
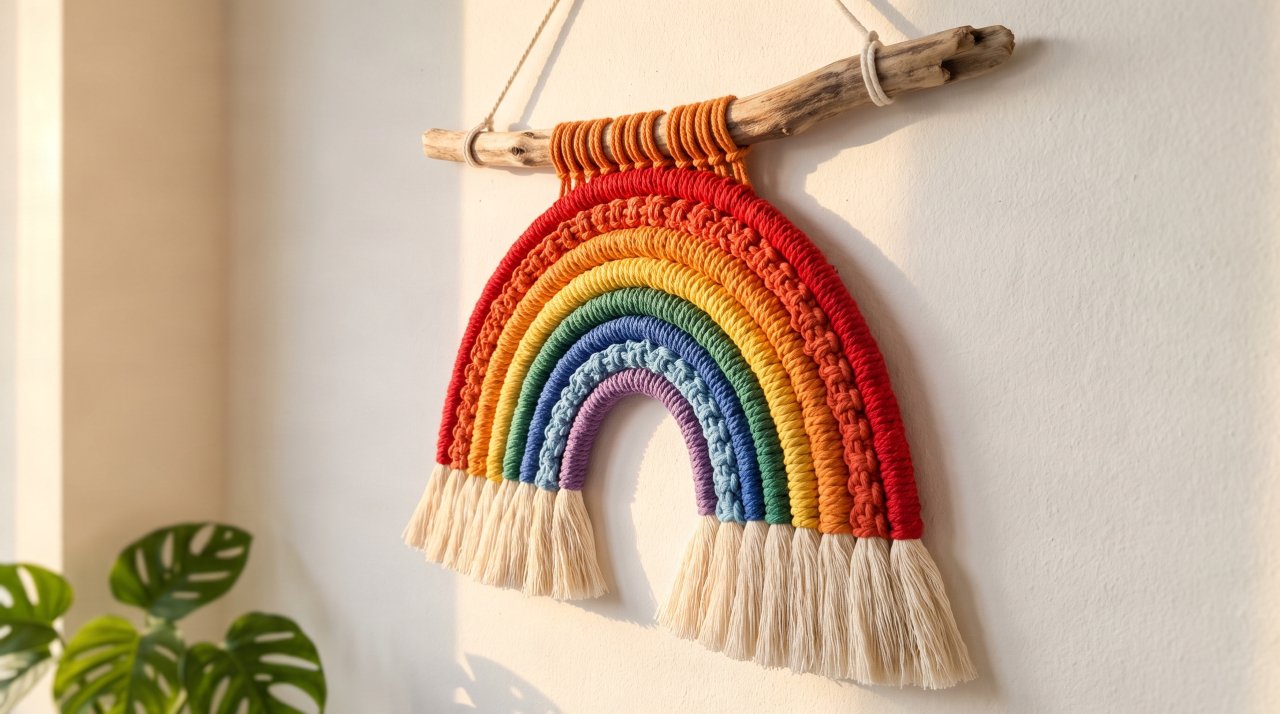
Most first-time macrame makers abandon their rainbow project mid-way through — not because it’s too hard, but because nobody told them exactly how much cord to cut before they started. You end up with colour strands that run out too soon, uneven arcs, and a tangled mess that feels like a failure. It doesn’t have to go that way.
This tutorial gives you a macrame rainbow wall hanging guide built specifically for beginners — with real measurements, colour-by-colour cord quantities, a symmetry method that actually works, and honest troubleshooting for the most common knot mistakes. By the end, you’ll know exactly what to buy, how to cut it, and how to build a rainbow arc you’ll be proud to hang on your wall.
What Makes This Project Perfect for Beginners
A macrame rainbow wall hanging is genuinely one of the most forgiving first macrame projects you can choose. The arc shape means small imperfections in knot tension are hidden by the curve. You work one colour row at a time, so you never have to manage multiple colours simultaneously. And the finished piece looks impressive without requiring advanced techniques.
According to the Craft Industry Alliance Maker Trends Report, macrame remains one of the top five trending fibre arts in the US, with wall hangings consistently leading project searches. Rainbow colourways specifically surged 34% in project saves on craft platforms in 2023–2024. That popularity means there’s a huge library of inspiration — but very few tutorials that actually explain the mechanics clearly for beginners.
The honest caveat: your first attempt will probably take 4–6 hours. That’s normal. Speed comes with the second and third project, not the first.
Your Complete Materials List (With Exact Quantities)
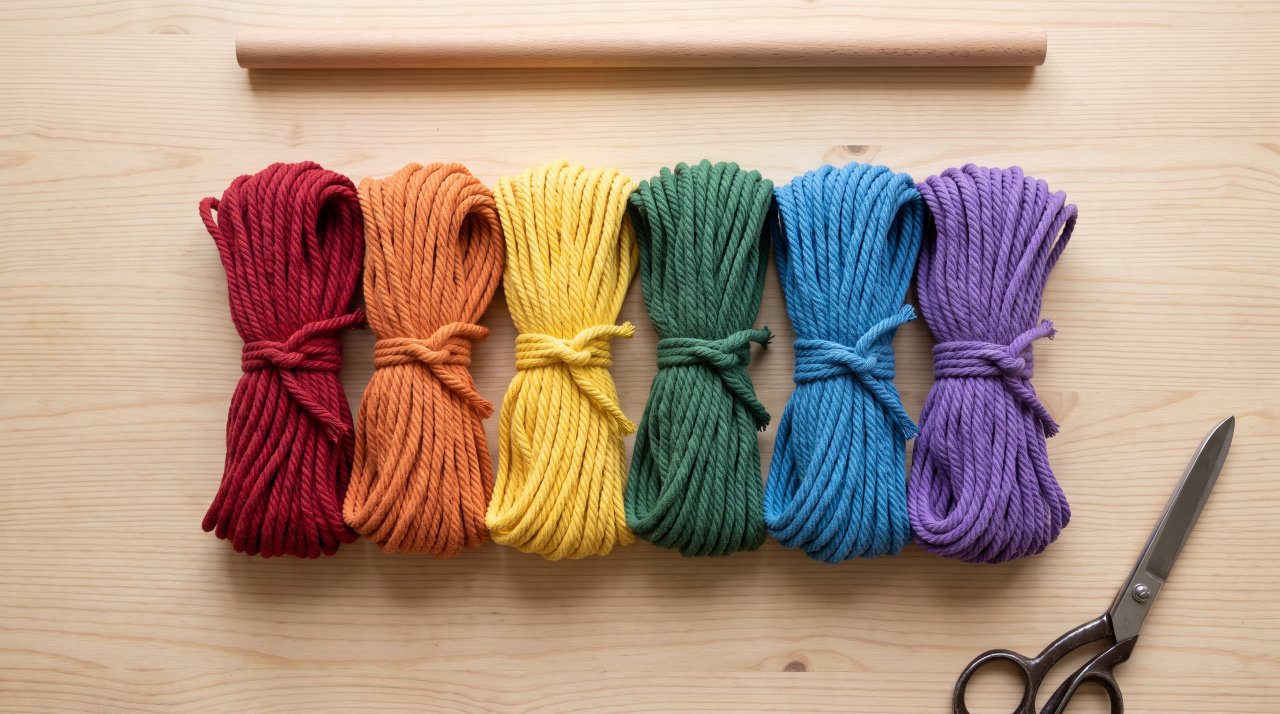
Getting your materials right before you start is the single biggest factor in whether your project succeeds. This is where most tutorials let you down.
Here’s exactly what you need for a finished rainbow approximately 12 inches wide and 8 inches tall:
| Item | Spec | Quantity Needed |
|---|---|---|
| Cotton macrame cord — Red | 3mm single-strand | 4 × 60-inch lengths |
| Cotton macrame cord — Orange | 3mm single-strand | 4 × 55-inch lengths |
| Cotton macrame cord — Yellow | 3mm single-strand | 4 × 50-inch lengths |
| Cotton macrame cord — Green | 3mm single-strand | 4 × 45-inch lengths |
| Cotton macrame cord — Blue | 3mm single-strand | 4 × 40-inch lengths |
| Cotton macrame cord — Purple | 3mm single-strand | 4 × 35-inch lengths |
| Wooden dowel or driftwood | 14–16 inches wide | 1 piece |
| Scissors | Sharp fabric scissors | 1 pair |
| Measuring tape | Standard | 1 |
| Tape or clips | For holding position | 4–6 pieces |
Why 3mm cord? It’s thick enough to show clean knot definition but thin enough to create a tidy arc without bulk. Choosing the right macrame cord for wall hangings matters more than most beginners realise — too thin and your knots disappear, too thick and your rainbow looks lumpy.
Why single-strand? Single-strand (also called 3-ply or twisted) cord fringes beautifully and holds square knots cleanly. Braided cord is harder to work with and doesn’t fringe well for rainbow ends.
The outer colour (red) uses the longest lengths because it forms the outermost, widest arc. Each inner colour is progressively shorter. This is the key measurement insight most tutorials skip entirely.
For a full breakdown of cord types and what works best for beginners, check the cotton vs jute vs nylon cord comparison on Gypsy Handmade — it’ll save you from buying the wrong thing.
The 2 Knots You Actually Need
You don’t need to know 20 macrame knots to make a beautiful rainbow wall hanging. You need two, and you need to know them well.
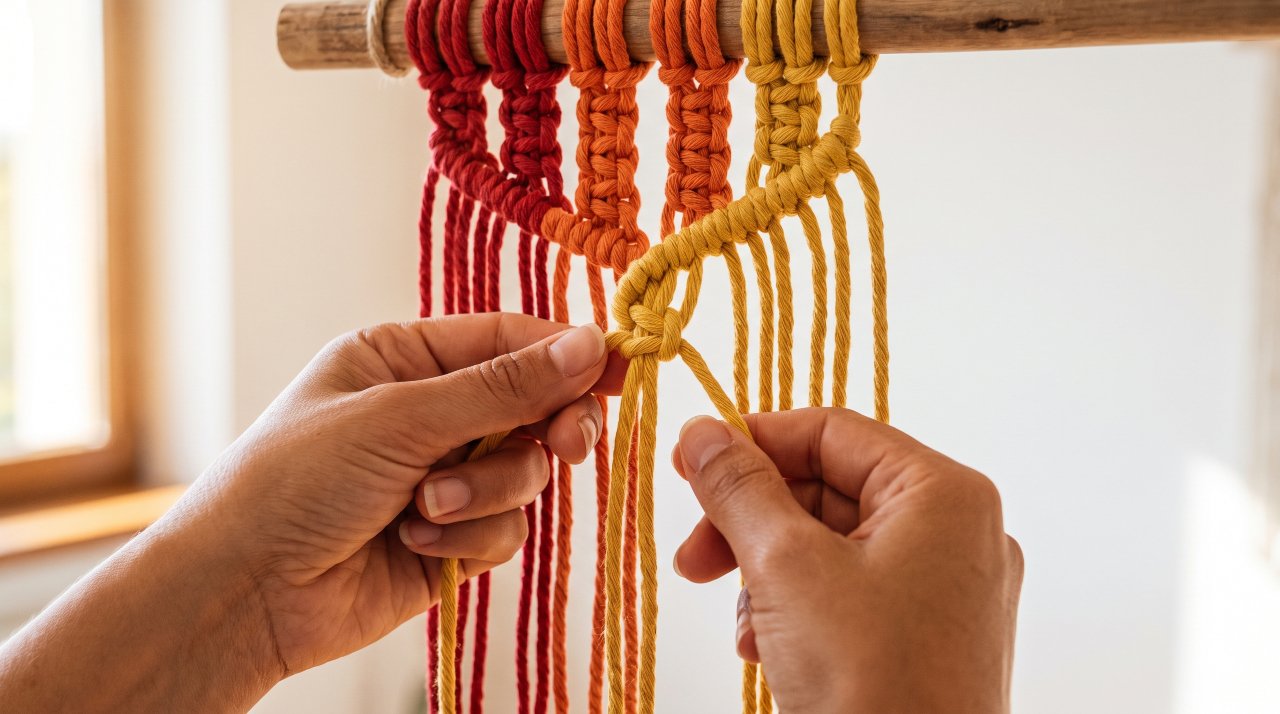
The Lark’s Head Knot — This attaches your cord to the dowel. Fold a length of cord in half, loop the folded end over the dowel, then pull the two loose ends up through the loop. Pull tight. That’s it.
The Square Knot — This is the main knot that forms each colour row. Take four strands (two working strands on the outside, two filler strands in the middle). Cross the left working strand over the fillers and under the right. Then pass the right strand under the fillers and up through the loop on the left. Pull both sides evenly and firmly. Repeat in mirror image to complete one full square knot.
If square knots are new to you, spend 10 minutes practising on scrap cord before you touch your rainbow materials. The easy beginner macrame knots guide walks through both knots with close-up detail — it’s worth a quick read before you start.
The most common beginner mistake with square knots is pulling one side harder than the other. Your knot will twist to one side instead of sitting flat. If that happens, don’t panic — loosen it gently and re-tension both sides equally.
The Symmetry Method That Prevents Uneven Arcs
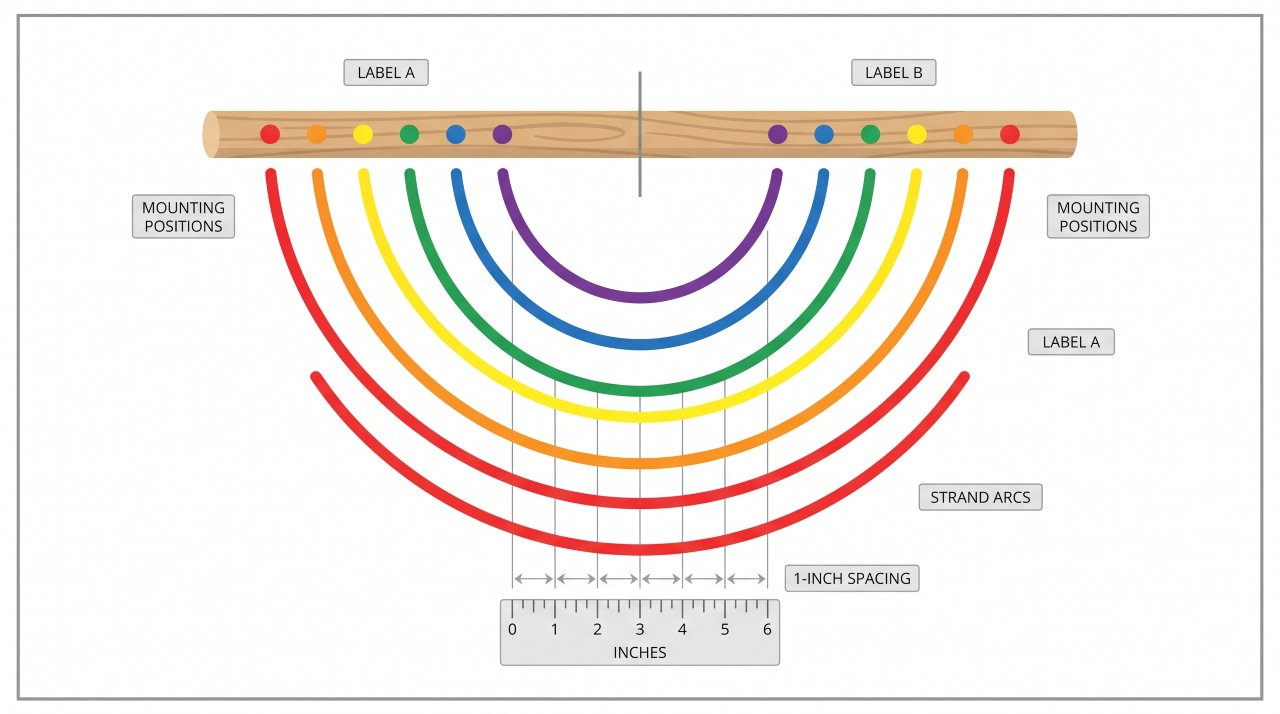
Here’s the step most tutorials skip: plan your arc shape before you tie a single knot. Symmetry problems don’t happen during knotting — they happen because the starting positions weren’t marked out first.
Take your wooden dowel and mark the centre point with a small pencil mark. Your rainbow will build outward from this centre point in both directions equally. For each colour, you’ll mount two sets of four strands — one set to the left of centre and one set to the right, placed as mirror images.
Use small pieces of tape to mark where each colour group starts on the dowel before you mount anything. For a 12-inch rainbow, space each colour group approximately 1 inch apart from the previous one. Red sits outermost, purple sits closest to the centre.
Work one colour at a time, and always knot both sides of each colour before moving to the next. Knot the left red group, then the right red group. Then left orange, then right orange. Never finish one full side before the other — that’s how you end up with asymmetric tension.
This mirror-and-match method is the difference between a rainbow that looks intentional and one that looks lopsided.
Step-by-Step: Building Your Rainbow
Step 1 — Prepare Your Workspace
Hang your dowel at eye level using two wall hooks or a door frame hook. Working at eye level (rather than flat on a table) lets you see the arc shape as it builds. Lay your cut cord lengths out by colour in order — red to purple — so you’re not hunting for strands mid-project.
Step 2 — Mount Your Outer Colour (Red)
Take your four red cord lengths. Fold each in half and attach them to the dowel using lark’s head knots, placing two groups: one about 5 inches left of centre, one about 5 inches right of centre. You’ll have 8 strands on each side (4 cords × 2 strands each).
Step 3 — Knot Your First Arc Row
Working with the 8 red strands on the left side, tie square knots across the group. Work left to right, using four strands per knot. Then repeat on the right side, working right to left. The goal is a neat row of square knots that will curve naturally when you gather the ends later.
Step 4 — Add Each Colour Inward
Mount orange cords approximately 1 inch inside the red mounting points. Repeat the knotting process — left side first, then right side, always matching. Continue this pattern through yellow, green, blue, and finally purple at the centre.
Step 5 — Create the Arc Shape
This is where your rainbow takes shape. Starting with red, gently pull the knotted strands downward into a curve. The outer strands (red) will hang lower than the inner ones (purple) because they’re longer. Use your fingers to guide the arc into a smooth curve and clip it temporarily to a flat surface to check symmetry from a distance before you finish.
Step 6 — Trim and Finish the Ends
Trim each colour group’s hanging ends to match a curved fringe line that echoes the arc above it. Red ends will be the longest, purple the shortest. Use sharp scissors and cut in small snips rather than one big cut — you can always trim more, you can’t add cord back.
Step 7 — Hang and Adjust
Tie a hanging cord to each end of the dowel and hang your finished rainbow. Step back and look at it from across the room. Small adjustments to fringe length are easy to make at this stage. Don’t over-trim — a slightly longer fringe always looks more intentional than one that’s too short.
Troubleshooting: When Things Go Wrong
Your knots look messy and uneven. This almost always comes from inconsistent tension. Try tightening each square knot by pulling both working strands simultaneously with equal pressure. If a section looks consistently worse than the rest, cut it off and re-knot — macrame is very forgiving about re-doing sections.
Your colour transitions look muddy. This happens when different colour strands overlap at the mounting point. Make sure each colour group mounts in a clean, distinct cluster on the dowel with no colour strands crossing over into the adjacent group.
Your arc isn’t symmetrical. Lay your piece flat and photograph it. A photo is often easier to assess than looking at it hanging. If one side is lower than the other, check whether your mounting points were equal distances from the centre — this is almost always the cause.
You’re running out of cord mid-colour. If a strand runs short, you can add length with a simple overhand join hidden inside the knot body. This is one of the genuinely useful things about macrame — joins hide easily inside dense knotwork.
Colour Choices Beyond the Traditional Rainbow
The traditional ROYGBV order (red, orange, yellow, green, blue, violet) is the most searched-for version, but it’s not your only option. Pastel rainbows — soft blush, peach, butter yellow, mint, sky blue, lavender — have been a consistent top search trend in US home décor since 2022 and work beautifully in nurseries and on bedroom walls.
Boho earth-tone rainbows use terracotta, rust, mustard, sage, and dusty blue for a more muted, grown-up feel. These also photograph exceptionally well for home interiors content, which is why you see them dominating Pinterest boards.
The colour quantity formula stays the same regardless of palette — outer colour gets the longest cords, inner colour gets the shortest. The only thing that changes is the hue.
For a complete list of tools and materials you’ll want before tackling this or any macrame project, the macrame supplies for beginners checklist covers everything from scissors to blocking boards.
FAQs
How much cord do I need for a macrame rainbow wall hanging?
For a 12-inch wide rainbow, you need approximately 4 cord lengths per colour, ranging from 35 inches (innermost) to 60 inches (outermost). Always buy 20% more than you think you need — cord gets used up faster in tight square knots than in looser patterns. One 100-yard skein of each colour is more than enough for a standard-sized piece.
What knots are used in macrame rainbow wall hangings?
Most macrame rainbow wall hangings use just two knots: the lark’s head knot to attach cords to the dowel, and the square knot to build each colour row. Some tutorials add a half-hitch knot for extra texture, but beginners don’t need it. Mastering the square knot cleanly is far more important than adding variety.
What cord thickness is best for a macrame rainbow?
3mm single-strand cotton cord is the best starting point for beginners. It’s thick enough to show clean knot definition but thin enough to create a neat arc without bulk. Go thicker (5mm) if you want a chunky, boho look on a larger piece. Avoid anything thinner than 2mm for your first project — fine cord amplifies tension inconsistencies and makes mistakes much more visible.
Can beginners make a macrame rainbow wall hanging?
Yes — it’s one of the best beginner macrame projects because you work one colour at a time and the arc shape hides minor imperfections in knot tension. Budget 4–6 hours for your first attempt. The skills you use (lark’s head and square knots) are the same foundation skills used in almost every other macrame wall hanging pattern.
How do you hang a macrame rainbow on the wall?
The easiest method is to tie a length of the same cord between the two ends of your dowel to create a hanging loop, then hook it over a simple wall nail or picture hook. For heavier pieces, use a proper macrame wall anchor rated for the weight. Most macrame rainbows weigh under 200 grams, so a standard picture hook is completely sufficient.
What colors should I use for a macrame rainbow wall hanging?
Traditional ROYGBV (red, orange, yellow, green, blue, violet) is the most searched option and the most visually striking. Pastel versions (blush, peach, yellow, mint, blue, lavender) work well for nurseries and soft-style interiors. Earth-tone rainbows (terracotta, rust, mustard, sage, dusty blue) suit boho and Scandinavian-influenced décor. Choose based on the room where you’ll hang the piece — hold your cord colours up against the wall before you buy.
You’re More Ready Than You Think
The biggest myth about macrame rainbow wall hangings is that the colour work is complicated. It’s not — you work one colour at a time, in a clear order, using just two knots. The only real complexity is in the planning stage: marking your symmetry points, cutting your cords to the right lengths for each colour, and mounting each group in a clean mirror pattern.
Get those three things right before you tie your first knot, and the rest of the project falls into place naturally. Your next step is simple: gather your materials this week, cut your cords to the lengths in the table above, and spend 10 minutes practising a square knot on scrap cord. You’ll be hanging your finished rainbow within a weekend.
