
Most macrame feathers end up looking more like a frayed rope disaster than an actual feather — and that’s usually down to one or two fixable mistakes that nobody talks about. If you’ve tried making macrame feathers before and felt let down by the result, you’re not alone. Getting that soft, realistic, layered look takes more than folding cord and attacking it with a brush.
This macrame feathers tutorial walks you through everything from choosing the right cord to shaping your finished feather like a pro. You’ll learn three distinct feather styles, the brushing technique that makes the real difference, and how to fix the most common problems that trip up intermediate crafters. By the end, you’ll have the skills to make feathers that look genuinely beautiful — not just recognisable.
What You Need Before You Start
Getting your materials right is non-negotiable. The wrong cord produces a flat, stringy feather that won’t fluff no matter how long you brush it.
Cord type is the single biggest factor in your result. Single-strand twisted cotton macrame cord brushes out into soft, fluffy fibres. 3-ply twisted cord (also called 3-strand) gives more volume. Braided cord doesn’t brush out well at all — avoid it for feathers.
Here’s a quick comparison of the most common cord choices:
| Cord Type | Texture After Brushing | Best Feather Size | Difficulty |
|---|---|---|---|
| 3mm single-strand cotton | Soft, fine, realistic | Small to medium | Easy |
| 5mm 3-ply twisted cotton | Full, fluffy, voluminous | Medium to large | Easy–Moderate |
| 3mm jute | Coarse, rustic look | Small | Moderate |
| 5mm single-strand recycled cotton | Very soft, slight sheen | Medium to large | Easy |
| Wool roving (unspun) | Ultra-soft, cloud-like | Any | Moderate |
For most intermediate crafters, 5mm 3-ply twisted cotton hits the best balance of workability and final texture.
Full materials list:
- Macrame cord (see table above)
- Scissors (sharp — dull scissors crush cord fibres)
- A stiff-bristle pet brush or wire slicker brush
- A piece of driftwood, dowel, or metal ring for mounting
- A comb for separating strands during fraying
- Optional: spray starch or a steam iron for shaping
You can find detailed cord specifications and weight recommendations at WEBS — America’s Yarn Store fiber weight guide — the weight categories translate directly to macrame cord sizing.
The Anatomy of a Great Macrame Feather
Before you cut a single piece of cord, know what you’re building. A well-made macrame feather has three distinct zones.
The quill is the central spine — the folded or knotted core that holds everything together. The barbs are the individual fibres that flare out from either side. The tip is the tapered point at the bottom that makes it read as a real feather shape.
Most tutorials skip this entirely, which is why so many homemade feathers look like a toilet brush. Knowing these three zones lets you make deliberate decisions about proportions. A feather where the quill is too short looks stubby; one where the barbs aren’t tapered at the tip looks like a paddle.
Aim for a quill that runs about 40% of the total feather length. The widest barb zone should sit at roughly 60–70% of the way up from the bottom tip, then taper toward the top.
Macrame Feathers Tutorial: Three Core Styles
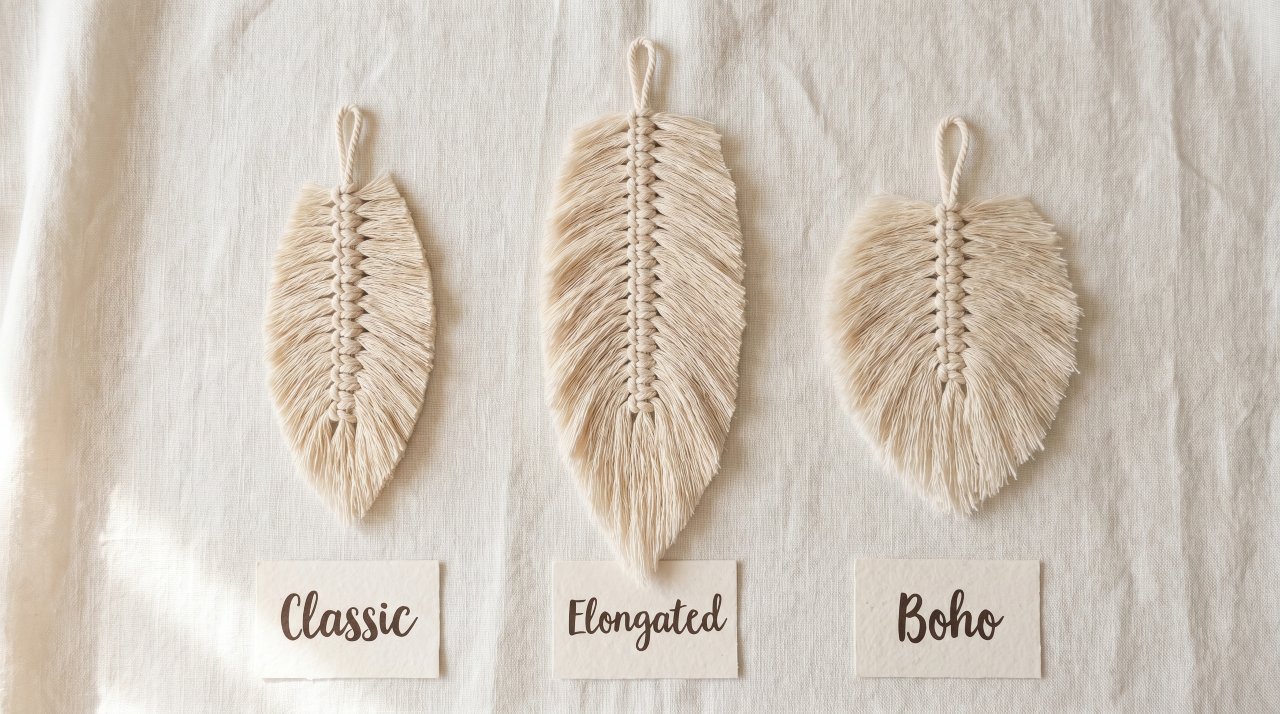
Style 1 — The Classic Fold-and-Knot Feather
This is the foundation method. Once you’ve done it well, everything else builds from here. You only need two knots to make a classic macrame feather — the overhand knot and the Lark’s Head knot — but if either of those feels unfamiliar, brush up on the knots used to make feathers before you cut your first piece of cord.
Cut your cord lengths. For a medium feather (roughly 10–12 inches finished), cut pieces 20–24 inches long. You’ll need 15–20 pieces depending on thickness.
Create the quill. Take one longer piece (about 30 inches) and fold it in half. This folded centre becomes your spine. Tie a simple overhand knot at the fold point — this is the top of your feather.
Attach the barb cords. Fold each shorter piece in half and attach it to the quill using a Lark’s Head knot. Work down both sides of the quill, alternating left and right, keeping the knots snug and evenly spaced.
Secure the bottom. Once all cords are attached, tie a firm overhand knot at the base of the quill — about 1–2 inches below your last Lark’s Head knot. This stops everything sliding.
Trim the basic shape. Before brushing, cut a very rough feather outline with scissors. Taper slightly toward the tip and gently curve the sides. Don’t worry about perfection yet — this is just a rough cut.
Brush, then trim, then brush again. This sequence matters more than most tutorials admit. Brush out the barbs with your slicker brush until the fibres separate fully. Then trim more precisely. Then give a final brushing. You’ll get a much cleaner line this way than trimming at the very end.
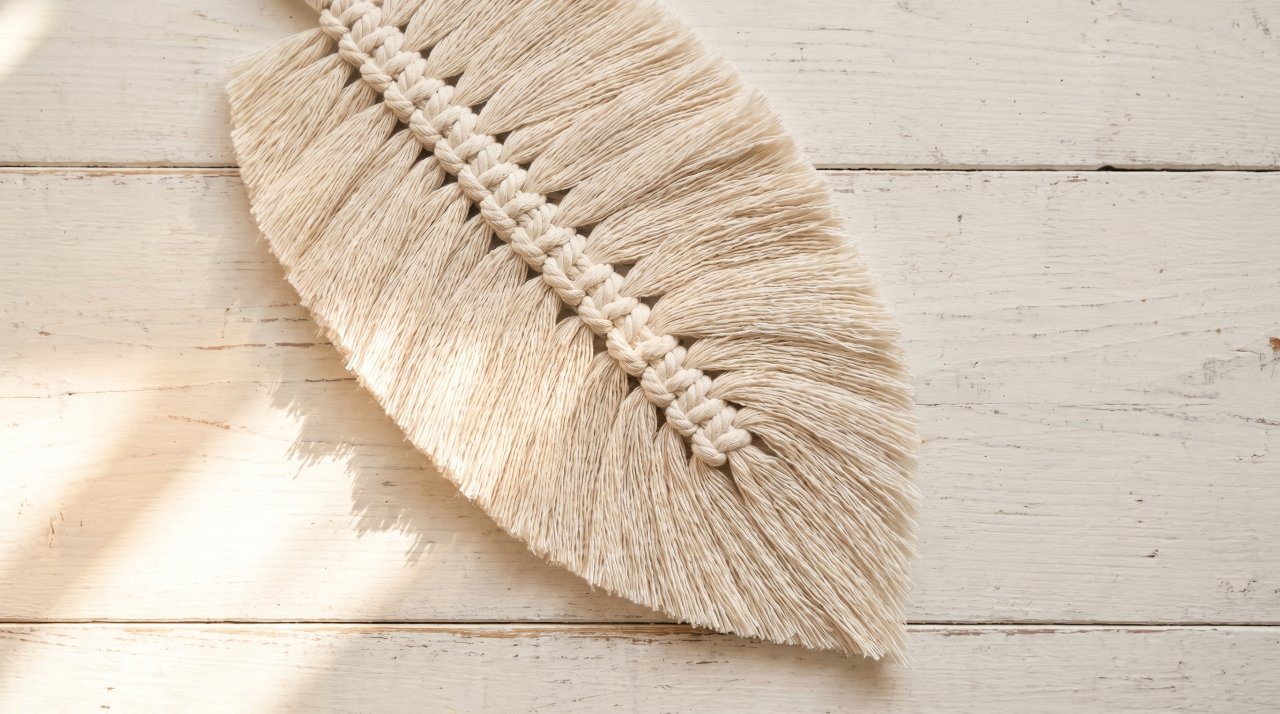
Style 2 — The Elongated Statement Feather
This style runs 18–24 inches long and creates a dramatic peacock-style feather shape perfect for wall hangings and boho home décor.
Use a longer quill cord — at least 40 inches. Your barb cords should be 28–32 inches each.
Attach fewer barbs at the tip section. For the bottom 6 inches of the quill, space your Lark’s Head knots farther apart (about ¾ inch gaps). As you move up, tighten the spacing to ½ inch, then ¼ inch near the widest point. This creates the natural tapering seen in real feathers.
Cut the tip angle sharply. After brushing, trim the lower section to a definite point rather than a soft curve. The contrast between the sharp tip and the wide mid-section is what makes this style look intentional.
Style 3 — The Rounded Boho Feather
Wider, shorter, and rounder than a classic feather — this style suits dream catchers, garlands, and earrings perfectly. You’ll use more barb cords and a shorter quill.
Keep the quill short — no more than 30% of the total feather length. Attach barb cords very densely, with knots almost touching each other.
Trim a wide oval shape after rough brushing. The overall width should be about half the total length — much wider than a classic feather.
This style benefits most from a light spray of starch after shaping. Hold the starch about 12 inches away, mist lightly, shape with your hands, and let it dry flat. According to fibre arts educators at Craft Yarn Council, starch spray is a standard finishing technique for maintaining soft fibre shapes without stiffening them — and it works beautifully on brushed macrame cord.
The Brushing Technique Most Tutorials Get Wrong
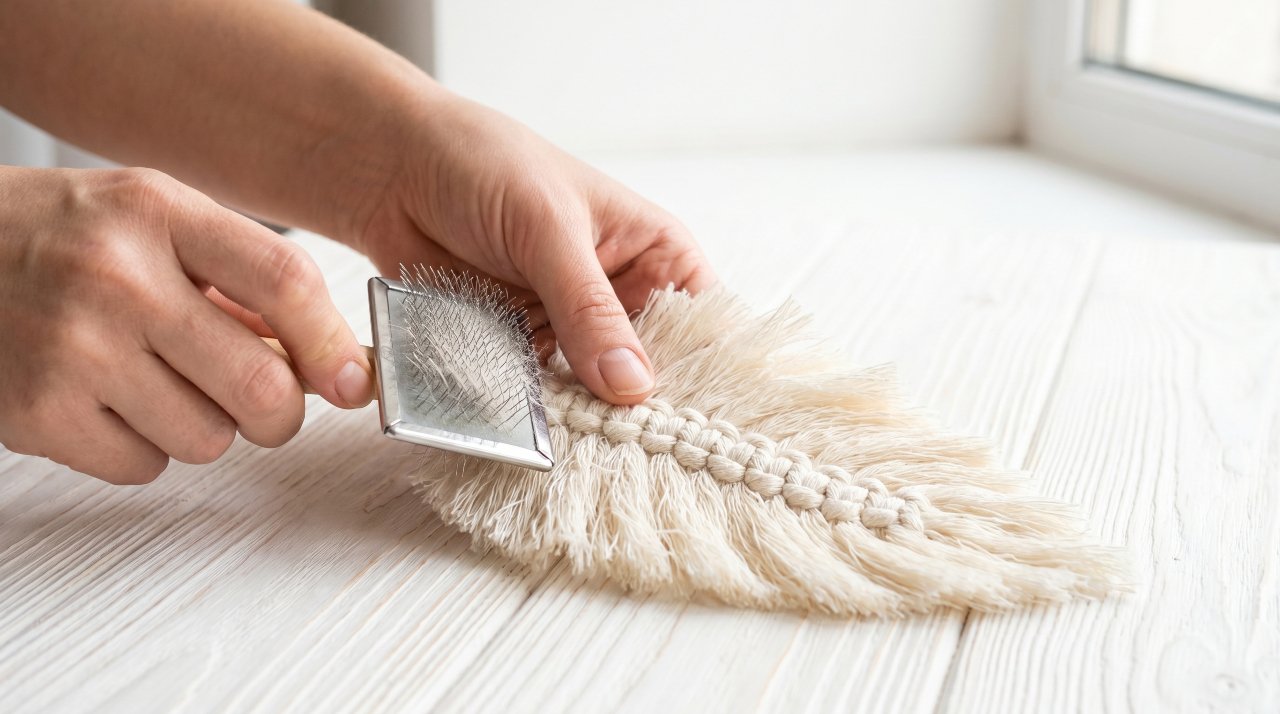
Brushing is where most macrame feathers succeed or fail, and it’s almost never taught properly.
Always brush from the tip upward — never from the quill outward. Brushing outward from the centre drags cord fibres away from the quill, creating uneven, messy barbs. Working from the tip toward the quill keeps fibres aligned and produces that smooth, natural separation.
Hold the quill firmly while you brush. If the feather flexes while you work, the barbs separate unevenly. Pin it to a foam board or hold it flat against a table.
Use short, firm strokes — not long sweeping ones. Three short strokes beat one long drag every time. Work in small sections, starting at the tip and moving methodically toward the widest point.
Separate ply before brushing for maximum fluff. Before you even start brushing, untwist each barb cord manually with your fingers. This pre-separation means your brush does less work and produces softer results faster.
If you want to learn more about the broader craft behind macrame knotting techniques — which directly affects feather quill structure — the Craft Industry Alliance’s resource library covers fibre art fundamentals in useful depth.
How to Shape Your Feather Like a Pro
A brushed-out feather is only half done. Shaping separates a craft project from something that looks handmade in the best possible way.
The steam method gives the most control. Hold your finished, trimmed feather over steam from a kettle or garment steamer for 10–15 seconds. The fibres relax and become temporarily malleable. Quickly shape the feather with your hands — curve it slightly, encourage the tip to taper, press the barbs flat. Hold the shape for 30 seconds while it cools. The feather will retain that form once dry.
Don’t over-steam. Too much moisture makes the cord fibres clump and mat. A brief pass is all you need.
For earrings or miniature feathers, skip steam entirely and use your fingers to shape while the feather is still slightly damp from a light misting. Tiny feathers lose their shape when overhandled.
Common Problems and How to Fix Them
Even experienced crafters hit these issues. Here’s what’s actually happening and how to correct it.
Problem: Feather looks thin and flat.
You didn’t use enough barb cords, or you used braided cord instead of twisted. Add more Lark’s Head knots to fill gaps, or start again with twisted cord. There’s no brushing technique that fixes an underfilled feather.
Problem: Barbs won’t fluff, just separate into thin strings.
Your cord is either too tightly twisted or too thin. Try pre-untwisting each piece manually before brushing. If the cord is very fine (1–2mm), layer two pieces per Lark’s Head knot.
Problem: Tip won’t hold its point.
You’re trimming too bluntly. Use sharp scissors and make a series of angled micro-cuts rather than one big cut. A light touch of fabric glue on the very tip prevents fraying from opening the point back up.
Problem: Quill slides when you brush.
Your base knot isn’t tight enough. Untie it, pull the quill taut, and re-tie with a double overhand knot. This is a common issue with thicker 5mm cord, which needs more deliberate securing.
You can also find answers to many technique-specific questions in the r/macrame community on Reddit, where thousands of crafters share troubleshooting photos and advice regularly.
If you want to put your finished feathers to work, check out our guide to [macrame wall hanging patterns for beginners] — feathers integrate beautifully into almost every design. And if you’re interested in making a complete project with your feathers, our tutorial on [macrame dream catcher tutorial with feathers] shows you exactly how to combine both elements.
Size Guide for Feather Applications
Knowing what size to make before you cut saves cord and time. Here’s a practical breakdown based on intended use:
- Earrings: 3–4 inches finished length. Use 1.5–2mm cord, 8–10 barb cords per feather.
- Dream catcher accents: 6–8 inches. Use 3mm cord, 12–16 barb cords.
- Wall hanging feature piece: 12–18 inches. Use 5mm cord, 20–30 barb cords.
- Statement single feather: 20–28 inches. Use 5mm or 6mm cord, 25–35 barb cords.
For layered feather wall art, make three feathers in graduating sizes — 8, 12, and 16 inches — and mount them overlapping slightly. This creates the most realistic visual depth and is one of the best-selling macrame feather formats on platforms like Etsy.
FAQ — Macrame Feathers Tutorial
What type of cord is best for macrame feathers?
Single-strand or 3-ply twisted cotton macrame cord works best. It brushes out into soft, realistic-looking fibres. Braided cord doesn’t fray well and produces a stringy, matted result instead of fluffy barbs.
How long should my cord pieces be for macrame feathers?
A good rule is to cut your barb cords at roughly double the intended finished feather length, plus a few extra inches. For a 10-inch feather, cut 22–24 inch pieces. Your quill cord should be about 3x the finished length.
How do you get macrame feathers fluffy?
Use twisted cord, pre-separate the plies with your fingers before brushing, then brush from the tip toward the quill using a stiff slicker brush. Short, firm strokes on small sections work better than long sweeping motions. More barb cords also increases volume significantly.
Can you make macrame feathers without a brush?
Yes — a fine-tooth metal comb or even a stiff hairbrush works. Some crafters use a Velcro hair roller in a pinch. The key is stiff bristles that can grip and separate individual fibres without snapping them.
How do you keep macrame feathers from fraying too much?
A light spray of spray starch helps set the shape and control excess fraying. On earrings or small pieces, a tiny dot of fabric glue or fray check on the very tip prevents the point from opening up with wear.
How many pieces of cord do you need for one macrame feather?
For a medium feather (10–12 inches), plan on 15–25 barb pieces plus one quill cord. Larger feathers need more — 30+ pieces for anything over 16 inches. More pieces always produces a better, fuller result than fewer.
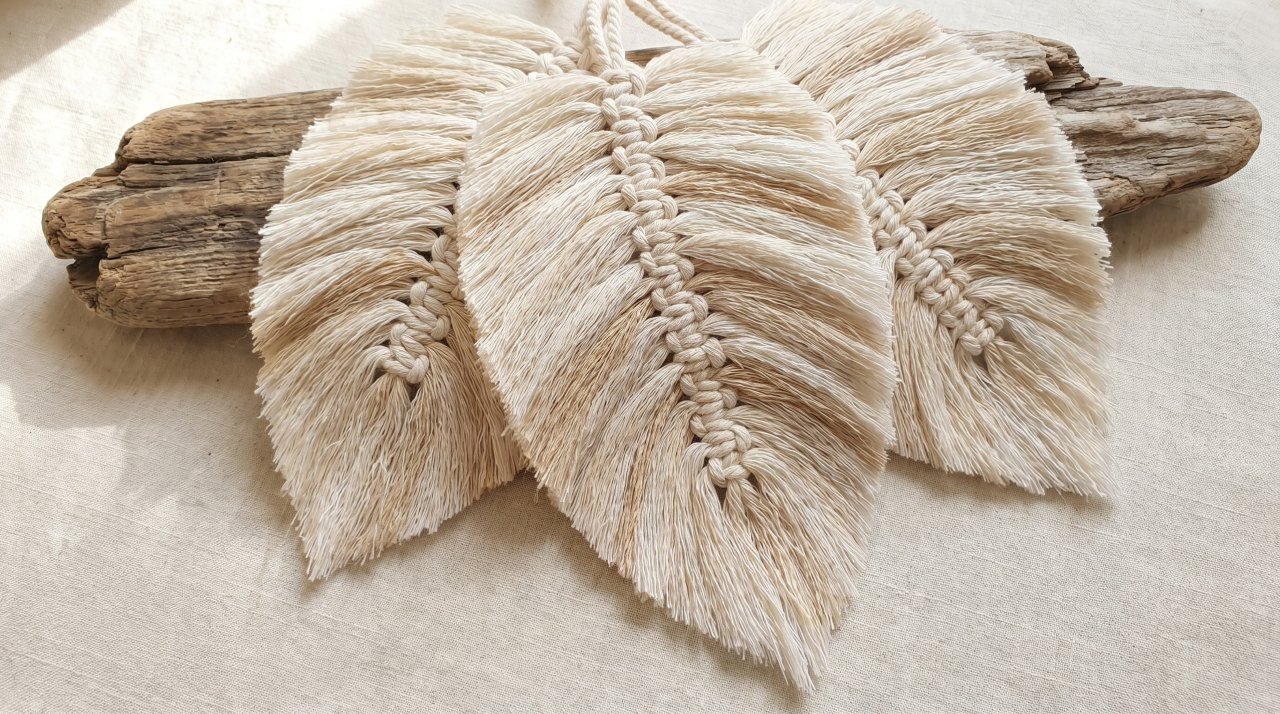
Finishing and Displaying Your Feathers
Once your feathers are shaped and dry, think about how you’ll display or use them. A single macrame feather mounted on a small piece of driftwood with a leather cord hanger makes a beautiful minimalist gift. If you want to take things further and build a full piece around your feathers, check out more wall art ideas — feathers integrate beautifully into almost every wall hanging design.
Wall hangings, wire wrap the quill to your dowel or driftwood using thin copper or brass wire instead of tying — it holds more securely and adds a metallic accent. For earrings, use a jump ring through the top knot and attach to a hook earring finding with flat-nose pliers. For garlands, string finished feathers onto a thin leather cord using a simple overhand knot around each quill.
Wrapping Up
The single most important takeaway from this macrame feathers tutorial is this: your results are almost entirely determined by your cord choice and your brushing direction. Get those two things right and the rest falls into place naturally.
Start with a medium feather using 5mm 3-ply twisted cotton cord. Practice the fold-and-knot method until your technique feels solid, then move to the elongated or rounded styles. Once you understand the anatomy — quill, barbs, tip — you’ll start to see where your feathers need adjusting rather than feeling like results are random.
Your next step is simple: gather your materials, cut your first set of cords, and make one feather today. Don’t wait until you feel ready — the only way to get that fluffy, full look is to work through it with your hands.