
Macrame as a craft has grown by over 300% in search interest since 2018, according to Google Trends data. That growth is mostly driven by people who want to make their own accessories instead of paying $60 to $120 for a handmade bag online. The good news is that learning how to make a macrame bag is more achievable than most tutorials make it look.
This article gives you a clear, honest breakdown of every step, from choosing the right cord to finishing the handles. You will know exactly what materials to buy, what knots to use, and how to avoid the mistakes that make first bags look sloppy. No fluff, no skipped steps.
Macrame bags do take a few hours and some patience. They are not a 20-minute project. But if you have never knotted anything in your life and you follow these steps, you can produce a bag you are genuinely proud of. That is what this guide is built to help you do.
This Guide Is Built for One Specific Person
This article is for someone who has seen macrame bags on social media or at a craft market and thought, “I could probably make that.” You are likely a beginner who has done little or no macrame before. Maybe you have tried a simple knot or two, but you have never finished a full project.
You are not a fiber artist. You are not looking for advanced pattern design & you want a clear, practical walkthrough that gets you to a finished, usable bag without wasting money on the wrong supplies or getting lost in confusing instructions. If that describes you, every section of this guide was written with your exact situation in mind.
What You Need to Know Before You Start Knotting
Macrame is the craft of creating fabric or texture entirely through knotting. No weaving, no sewing, no special machine. Just cord and your hands. If you are new to macrame, getting familiar with the knots used in bag making before you start will save you a lot of frustration. That simplicity is what makes it so popular, but it also means the quality of your work comes down almost entirely to cord choice and knot tension.
For a bag specifically, cord choice matters more than for other macrame projects like wall hangings. A bag has to hold weight, keep its shape, and withstand regular use. This means you need a cord that is strong but also flexible enough to knot comfortably — a deeper breakdown of natural vs. synthetic macrame cord can help you choose before you buy.
Avoid jute for your first bag. Jute is rough on your fingers and it frays quickly, which makes the knotting process frustrating. Nylon cord is stronger, but it is slippery and harder to control. Stick with natural cotton cord for your first project. You can find it at most craft stores or online for around $10 to $20 per roll, depending on length.
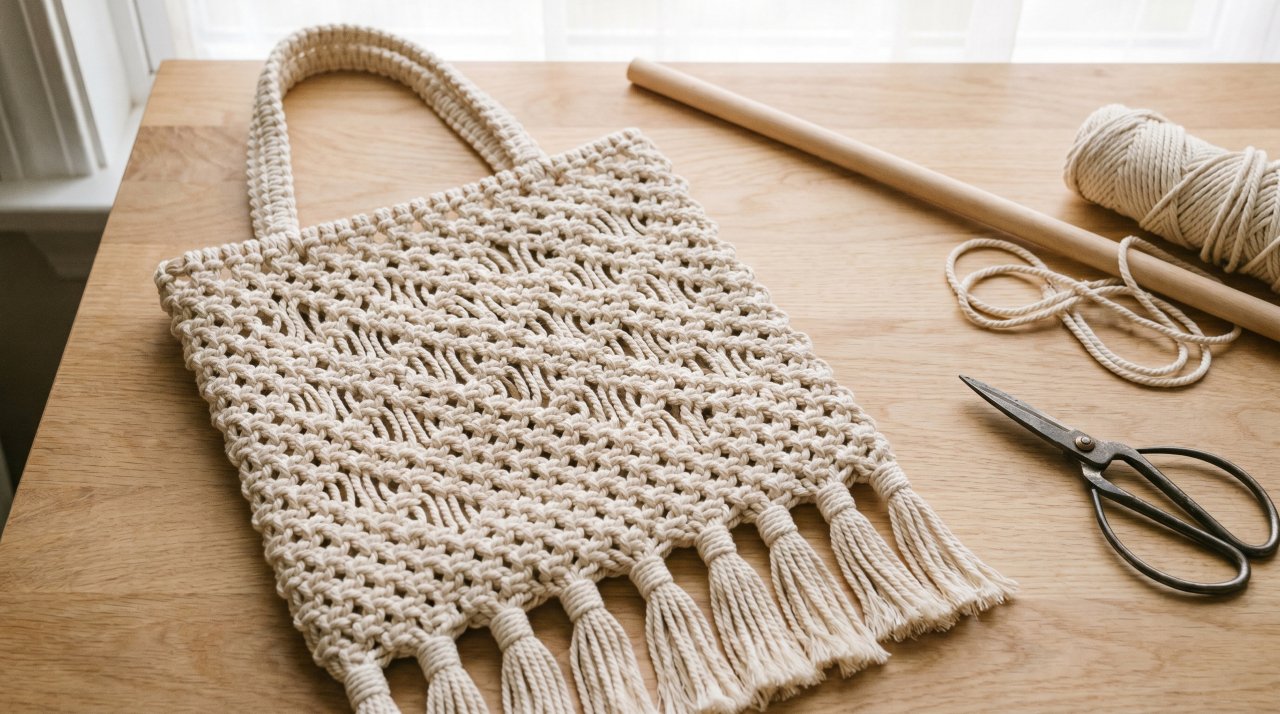
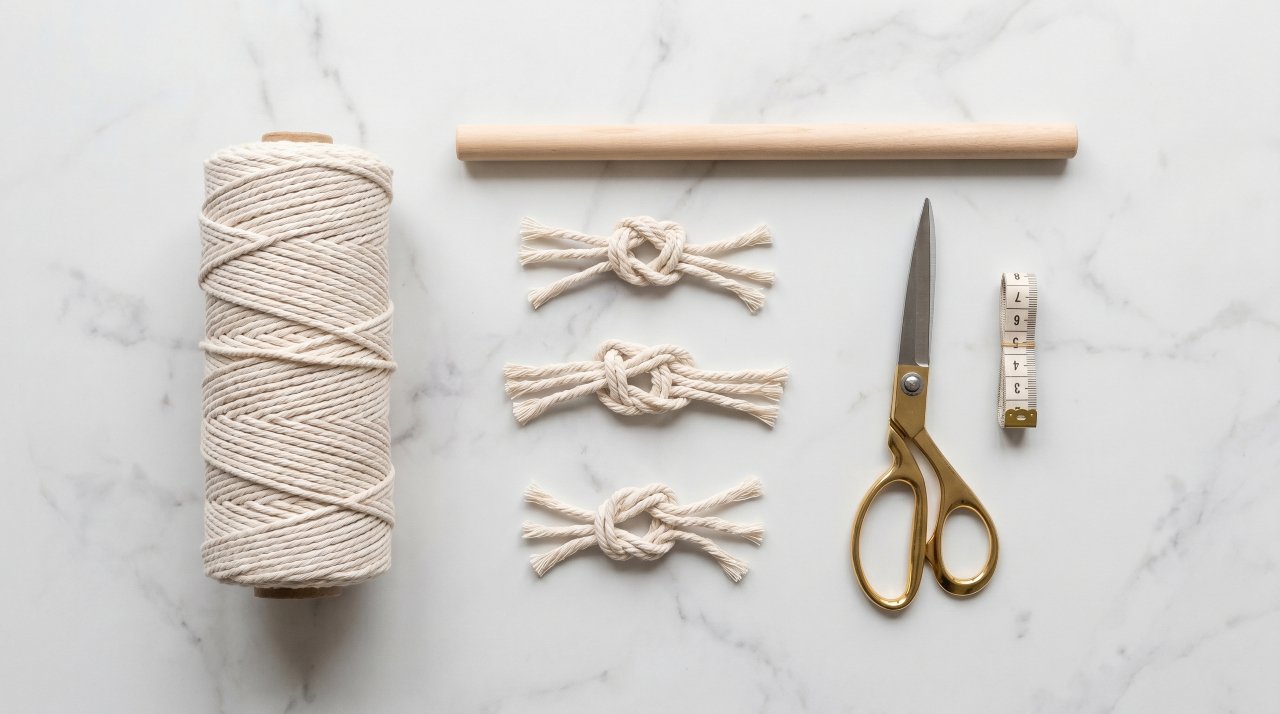
You will also need a few simple tools: a wooden dowel or metal ring to anchor your cords, scissors, a tape measure, and optionally a knotting board or foam board to pin cords in place while you work — see the full list of supplies needed for this project if you want everything laid out in one place before you shop. That is genuinely everything you need. Do not let supply lists with 15 items intimidate you.
How to Make a Macrame Bag, Step by Step
Step 1: Decide on Your Bag Size and Cut Your Cords
Before you cut a single piece of cord, figure out how big you want your finished bag. A small crossbody bag might be 8 inches wide and 10 inches tall. A tote-style bag could be 12 inches wide and 14 inches tall. Your finished dimensions matter because they determine how many cords you cut and how long each one needs to be.
A general rule for macrame: cut each cord to roughly 4 times the finished height of your project, then double it since you will fold each cord in half. So for a 10-inch tall bag, each cord should be about 80 inches long before folding. Width determines the number of cords. A basic bag body with a square knot pattern typically needs one cord every half-inch to one inch, depending on cord thickness.
Cut more cord than you think you need. Running short midway through a bag is one of the most frustrating beginner mistakes, and adding cord mid-project looks messy.
Step 2: Set Up Your Anchor Point
You need something to hold your cords in place while you knot. A wooden dowel, a metal ring, or even a thick branch works well. Clamp or hang the dowel at a comfortable working height, ideally at chest level so you can see what you are doing without hunching.
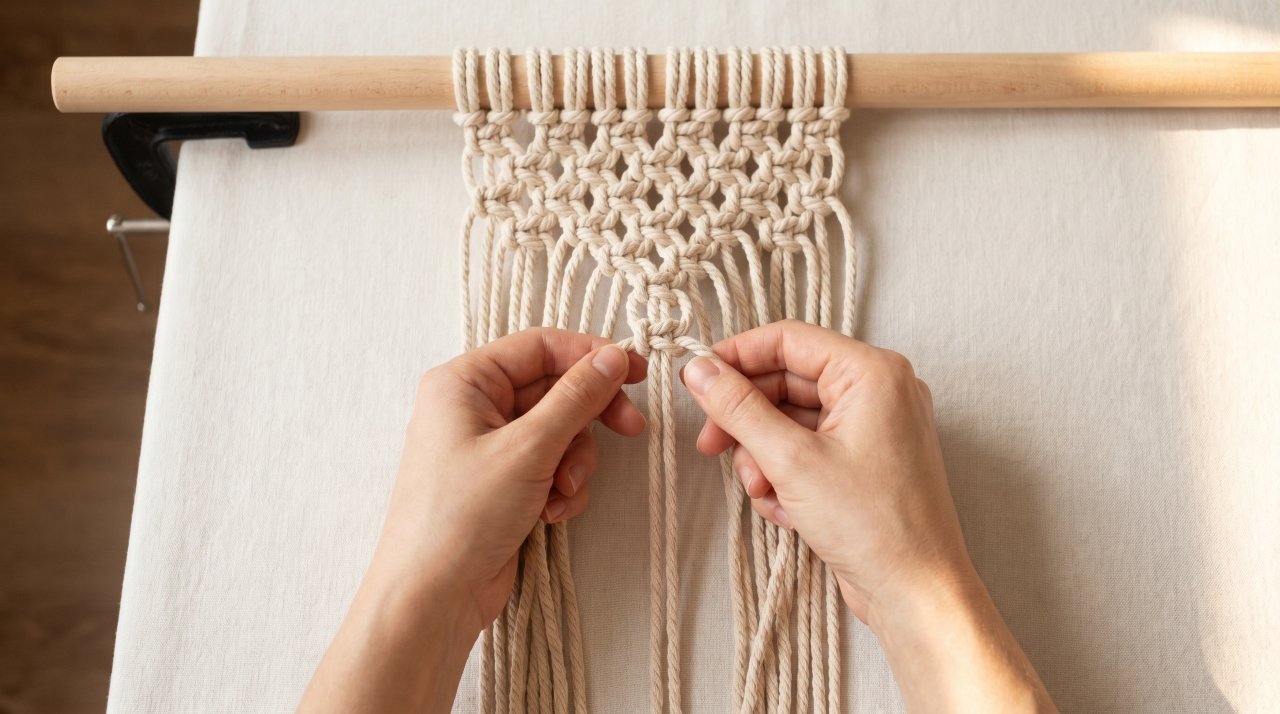
Fold each cord in half and attach it to the dowel using a lark’s head knot. This is the simplest knot in macrame. Fold your cord in half, lay the loop over the top of the dowel, pull both loose ends through the loop, and tighten. That is it. Repeat for all your cords, spacing them evenly across the dowel.
Step 3: Knot the Front Panel Using Square Knots
The square knot is the foundation of almost every macrame bag. If you learn one knot for this project, make it this one — here is how to tie a square knot correctly if you want a visual reference before you start.
Take the right outer cord, cross it over the two center cords, and tuck it under the left outer cord. Then take the left outer cord, pull it under the two center cords, and bring it up through the loop on the right side. Pull both working cords snug. That is the first half of the square knot. Repeat the same motion starting from the left side this time, and you complete the full knot.
Work row by row across your cords. After the first row, shift your groupings by two cords (this is called alternating square knots) and knot a second row. Alternating creates the classic macrame net pattern that most people recognize. Keep your tension consistent. Too loose and the bag looks floppy. Too tight and the fabric becomes stiff and hard to shape.
Step 4: Knot the Back Panel
Once your front panel reaches the desired length, you will repeat the same process for the back. Many beginners work the front and back separately on the same dowel by flipping the piece around. Others prefer to create both panels at once by working a tubular structure. For a first bag, working them separately is easier and gives you more control.
Match your row count and tension as closely as you can between the front and back panels. Mismatched tension is one of the most visible signs of a beginner-made bag, so take your time.
Step 5: Join the Sides and Bottom
Once both panels are knotted, you need to close the bag on three sides, leaving the top open. Hold the front and back panels together with the outside faces facing out. Use a lark’s head knot or a simple overhand knot to join the cord pairs along each side edge. Work your way down both side edges and then across the bottom.
Trim any excess cord at the bottom to an even length. Many people leave a few inches of fringe at the bottom as a design detail, which also saves you from having to hide every single cord end. If you prefer a clean finish, fold the cord ends inward and secure them with a dab of craft glue.
Step 6: Add the Handles
Handles need to be strong. Cut two sets of cords for each handle, each about 3 to 4 times longer than the handle length you want. A shoulder bag handle is usually 18 to 24 inches. A crossbody strap is longer, around 40 to 50 inches.
Knot the handle cords using a spiral knot (also called a half square knot) or a flat square knot pattern. Both are durable. Attach the finished handles to the inside top edge of the bag by threading the cord ends through the top row of knots and tying them off securely. Reinforce handle attachment points by adding extra knots or stitching with a needle and thread if you want extra durability.
Step 7: Finishing Touches
Trim all fringe to an even length using sharp scissors. You can brush out fringe ends with a stiff brush to create a soft, fluffy look. If you want a structured bag, you can stiffen it lightly with a fabric stiffener spray. If you want to add a lining, cut a piece of fabric to match the interior dimensions, fold the edges under, and hand-stitch it inside the bag. A lining is optional but it makes the bag much more functional.
What Most Macrame Bag Tutorials Get Wrong
Almost every beginner tutorial tells you to cut cords based on the finished length of the bag without accounting for knot density. The tighter and closer together your knots are, the more cord each one consumes. Two people following the same pattern with different tension can end up using wildly different amounts of cord.
Here is what most tutorials skip: before you start your actual bag, spend 15 minutes doing a small test swatch. Cut 8 cords at the recommended length and knot a 4-inch by 4-inch test square using the same tension you plan to use for the bag. Measure how much cord you used. Then scale that up to your full bag dimensions. This step feels unnecessary until the moment you run out of cord 6 inches from finishing your bag and have to start over. The test swatch takes 15 minutes. Re-knotting a half-finished bag takes hours.
Your Clear First Step Right Now
Do not buy supplies for the full bag yet. Start with one skein of 4mm cotton macrame cord and practice tying square knots on a short piece of dowel or even a chair back. Knot until your tension feels even and the knots form a clean, consistent pattern. This takes most beginners about 30 to 45 minutes to get comfortable.
Once your knots look even, cut your full cord set using the guidelines in Step 1, adjusting for your test swatch results. Buy your cord, dowel, and scissors before anything else. Skip the knotting board for now. Your hands and a simple clamp are enough for a first bag.
Once you have your materials, set up your anchor point and start with the lark’s head knots. Getting your cords mounted and your first row knotted will take you from “thinking about it” to “actually doing it” faster than anything else.
FAQs: How to Make a Macrame Bag
1: What is the best cord size for a beginner macrame bag?
For a first bag, 4mm single-strand or 3-ply cotton cord is the sweet spot. It is thick enough to knot comfortably without slipping through your fingers, and thin enough to create a bag that looks neat and finished rather than bulky. Thinner cord like 1mm to 2mm creates delicate, lacy results but requires far more cords and much more time. Thicker cord like 6mm or above works fast but produces a stiff, heavy bag that is hard to shape as a beginner. Start with 4mm, get comfortable with your knot tension, and adjust cord size on your next project once you know what results you prefer.
2: How much cord do I need to make a macrame bag?
This depends on the size of your bag and how tight you knot, but a general starting estimate for a small to medium bag (roughly 10 inches wide by 12 inches tall) is 150 to 200 feet of cord. That sounds like a lot, but most macrame cord is sold in rolls of 100 to 300 feet, so one roll often covers a small bag. Always buy slightly more than your estimate suggests. Running short mid-project is one of the most common beginner mistakes, and adding new cord mid-bag creates visible joins that are hard to hide. If you do the test swatch method described in the main guide, you can calculate your actual usage before cutting everything at once.
3: Do I need any special tools to make a macrame bag?
No special tools are required. The honest list is short: a wooden dowel or metal ring to anchor your cords, sharp scissors, and a tape measure. A knotting board (a foam board you can pin cords to) is helpful for keeping work tidy, but it is not essential for a bag. A clipboard or a clamp attached to a table edge works just as well for most beginners. Some people also use a comb or stiff brush to fluff out fringe at the bottom of the bag. That is genuinely the full list. Do not let anyone convince you that you need a $40 macrame kit to get started. Plain cotton cord and scissors get you most of the way there.
4: How long does it take to make a macrame bag?
For a complete beginner making a small to medium bag, expect 4 to 8 hours of total knotting time. That does not have to happen in one sitting. Most people break it into two or three sessions, knotting the front panel one day and the back panel the next. The part that takes longest is usually the main body panels, where you are working row after row of alternating square knots. Handles and finishing take less time than most people expect. Your second bag will likely take half as long because your hands will know the knots and your tension will be more consistent from the start. Speed comes with repetition, not rushing.
5: Can I wash a macrame bag once it is finished?
Yes, but with care. Cotton macrame cord is washable, but machine washing can cause cords to tangle, fray, or lose their shape — if you want to know exactly how cotton cord behaves when wet, this textile care resource explains the fiber science behind it.
The Payoff Is Worth the Time It Takes
Learning how to make a macrame bag is a skill that compounds. Your first bag will take 4 to 8 hours. Your second will take half that. By your third, you will be adjusting patterns, switching knot styles, and making bags that look like they came from a boutique.
The single most important thing to take from this guide is to do the test swatch before cutting all your cord. That one step separates finished bags from frustrated beginners with a pile of tangled rope.
Start with the square knot practice today. Once that feels natural, cut your cords and build your first panel. Your first macrame bag is closer than you think.