
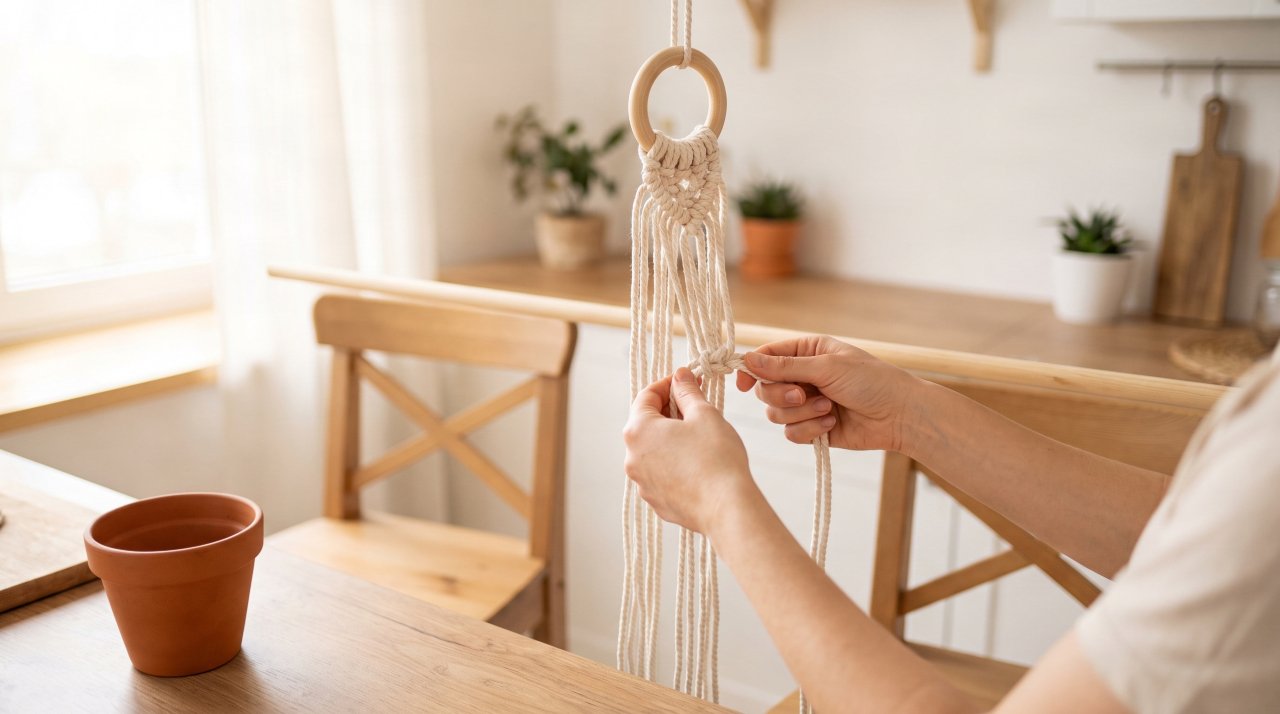
As an Amazon Associate I earn from qualifying purchases.
Nearly 60% of first-time macrame makers say they ran out of cord before finishing their first project. If you’ve ever stared at a pile of knotted rope wondering where it all went wrong, you’re not alone — and you’re in exactly the right place.
This tutorial shows you exactly how to make a macrame plant hanger from scratch. You’ll learn which knots to use, how much cord to buy, and — most importantly — how to size your hanger correctly for the specific pot you already own. By the end, you’ll feel confident enough to cut your cord, tie your first knot, and hang a plant that actually stays put.
What You Need Before You Start
Getting your materials right before you touch a single piece of cord saves you frustration later. Here’s what to gather.
Cord: Use 3mm single-strand or 3-ply twisted cotton macrame cord for your first hanger. Cotton grips itself well, holds knots tightly, and won’t stretch under the weight of a pot. You can read a full breakdown of cord types in this guide to best macrame cord for beginners — it covers cotton vs. jute vs. nylon so you buy the right one first time.
Ring: A 2-inch wooden or metal ring works for hanging. Metal rings hold heavier pots more reliably.
Scissors: Sharp fabric scissors, not kitchen scissors. Blunt cuts fray cotton cord and make fringe look messy.
Measuring tape: Non-negotiable. Eyeballing cord length is how people end up with pieces 6 inches too short.
Comb (optional): A wide-tooth comb lets you brush out the fringe at the bottom for that classic boho look.
You can find every item on this list in this roundup of essential macrame supplies for beginners — it includes budget picks and what to skip.
How Much Cord Do You Actually Need?
This is the question every beginner gets wrong, and it’s not your fault — most tutorials just say “buy extra.” That’s not helpful.
Here’s the rule that professional macrame makers use: each cord should be cut to 4 times the finished length of your hanger. For a standard 36-inch hanger, each working cord needs to be 144 inches (12 feet) long. You’ll fold each cord in half before attaching it to the ring, so your working length becomes 72 inches — which is enough for all your knots, plus fringe at the bottom.
For an 8–10 inch pot (a common 6-inch standard nursery pot), this formula works:
- Hanger length: 36 inches
- Each cord length (pre-fold): 144 inches = 12 feet
- Number of cords: 8
- Total cord needed: 96 feet (about 30 meters)
- Safe buy: 100 feet of 3mm cotton cord
Buy a 100-foot spool and you’ll have a little left over as a buffer — that buffer matters more than beginners realize.
How to Size Your Hanger for Your Specific Pot
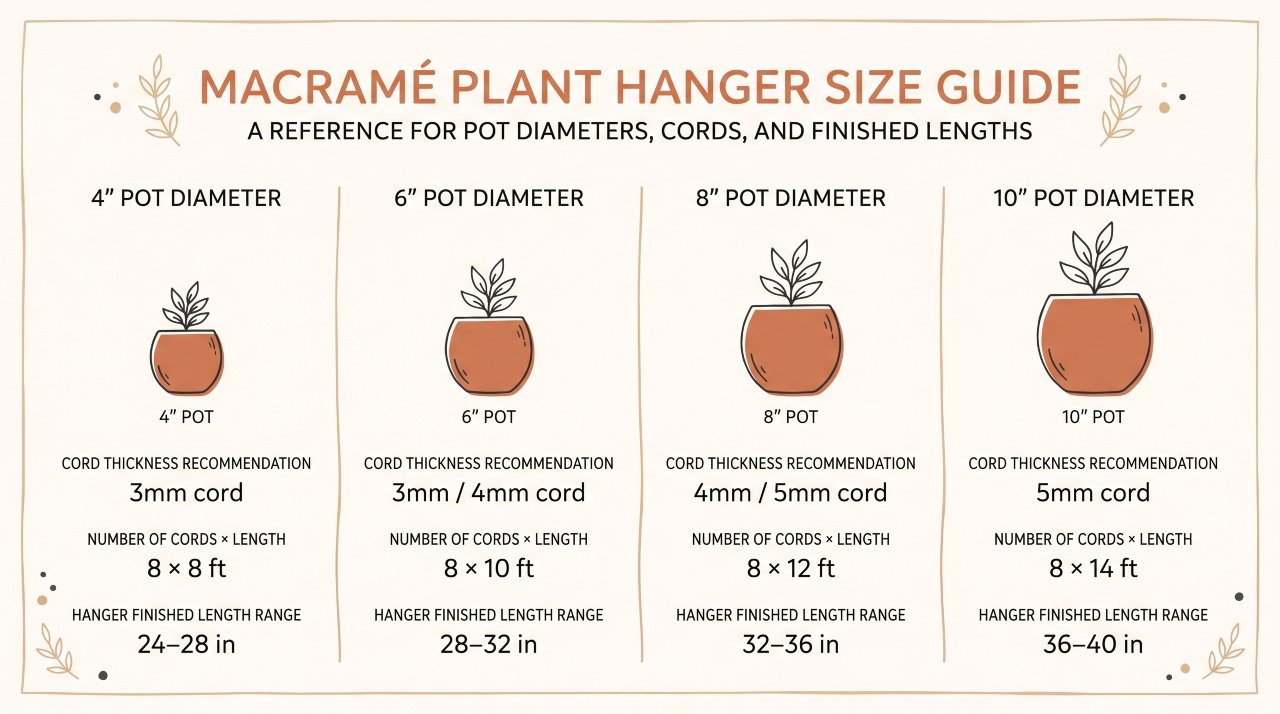
Here’s what no other tutorial tells you upfront: the pot comes first, the pattern comes second.
Measure your pot across the widest point (usually the rim or the belly, depending on the shape). That measurement determines how wide your basket section needs to be. The basket — the knotted net that holds the pot — must be slightly smaller than the widest point so the pot sits in it securely rather than sliding through.
Use this table to match your pot to your hanger dimensions:
| Pot Diameter | Basket Width Needed | Recommended Cord | Hanger Length |
|---|---|---|---|
| 4 inches (small succulent) | 3–3.5 inches | 3mm, 8 cords × 8 ft | 24–30 inches |
| 6 inches (standard nursery) | 5–5.5 inches | 3mm, 8 cords × 12 ft | 32–36 inches |
| 8 inches (medium planter) | 7–7.5 inches | 4mm, 8 cords × 14 ft | 36–40 inches |
| 10 inches (large planter) | 9–9.5 inches | 5mm, 8 cords × 16 ft | 42–48 inches |
Will it hold the weight? Yes — if you use 3mm or thicker cotton or nylon cord and tie your knots snugly. A properly knotted macrame hanger in 3mm cotton holds 6–8 pounds without stress. Most 6-inch houseplants weigh 1–3 pounds including the pot and wet soil. If your plant is larger or heavier, move up to 4mm or 5mm cord and always hang from a proper ceiling hook rated for at least 20 pounds.
The 4 Knots You Need to Know
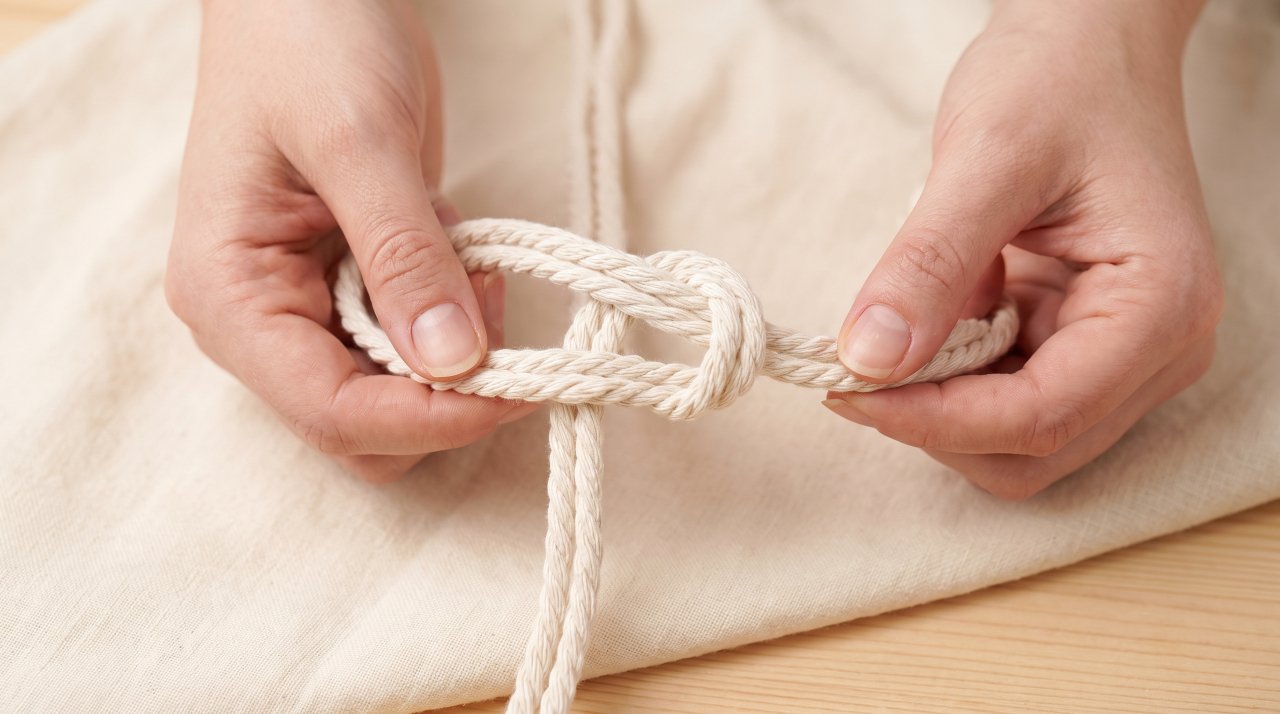
You don’t need to master 20 knots for your first hanger. You need four, and they’re all beginner-friendly.
The Lark’s Head Knot
This attaches your cords to the ring. Fold a cord in half, loop the folded end over the ring, pull the two tails through the loop, and tighten. That’s it — you’ve just tied a lark’s head knot. Repeat for all 8 cords so you have 16 working strands hanging from your ring.
The Square Knot
The square knot is the backbone of almost every macrame plant hanger. Take 4 strands. The two outer strands are your working cords; the two inner strands are your filler cords. Bring the left working cord over the fillers and under the right working cord. Then bring the right working cord under the fillers and up through the loop on the left. Pull both ends snugly. That’s half a square knot. Repeat the mirror image to complete the full square knot.
Pro tip: Always pull both working cords with equal tension. Pulling one harder than the other is the number one reason knots look uneven.
The Alternating Square Knot
Once you can tie a square knot, alternating square knots create the basket that holds your pot. Divide your 16 strands into 4 groups of 4. Tie a square knot in each group. Then re-group — take 2 strands from the first group and 2 from the second group, and tie another square knot. Repeat around all strands. This creates a diamond net pattern. The wider you space the knots apart, the more the basket opens up.
The Gathering Knot (Wrap Knot)
The gathering knot bundles all your strands together at the top (just below the ring) and at the bottom (just above the fringe). Take a separate piece of cord about 18 inches long. Hold it against your bundle of strands, leaving a 3-inch tail. Wrap it tightly around the bundle 6–8 times moving upward. Thread the working end through the loop formed by the tail, then pull the tail down to lock it. Trim both ends close to the wrap.
Step-by-Step: How to Make a Macrame Plant Hanger
This tutorial makes a hanger for a standard 6-inch pot. Adjust cord lengths using the sizing table above for different pots.
You’ll need: 100 feet of 3mm cotton cord, scissors, a 2-inch ring, and a measuring tape
Step 1: Cut Your Cords
Cut 8 cords, each 12 feet (144 inches) long. Lay them flat and double-check every piece before cutting the next — short cords can’t be fixed later.
Step 2: Attach Cords to the Ring
Fold each cord in half. Attach all 8 to the ring using lark’s head knots. You now have 16 strands hanging from the ring.
Step 3: Tie the First Gathering Knot
Using a separate 18-inch piece of cord, tie a gathering knot about 2 inches below the ring. This bundles your strands neatly and gives the hanger a clean top section.
Step 4: Divide and Knot
Divide the 16 strands into 4 groups of 4. Leave 6–8 inches of plain cord below the gathering knot — this is the straight hanging section. Then tie a square knot in each group.
Step 5: Create the Basket
Tie 3–4 rows of alternating square knots, spacing each row about 2 inches apart. The spacing determines how snugly your pot sits — less space means a tighter hold. Test your pot by sliding it gently into the basket after the second row to check the fit before you tie further rows.
Step 6: Close the Basket
About 3–4 inches below your last alternating knot row, gather all 16 strands together. Tie a final gathering knot to close the bottom of the basket. This is where your pot’s base will rest.
Step 7: Leave Fringe and Trim
Below the closing gathering knot, leave 4–6 inches of cord for fringe. Trim the ends level with sharp scissors. For a brushed fringe look, use a comb to separate the cotton fibers — work from the tip upward in short strokes.
Step 8: Hang and Test
Hang the ring on a ceiling hook. Slide your pot into the basket. Check that it sits level and the basket isn’t gaping open below the pot’s widest point. If the pot slips through, your basket is too wide — tighten your alternating knot spacing on your next hanger.
Step 9: Final Adjustments
Slide the knots upward or downward while the hanger is empty to adjust tension evenly. Once your pot is in place and sitting level, you’re done.
Common Beginner Mistakes (And How to Fix Them)
Even good tutorials skip this part. Here are the mistakes that trip up almost every first-timer.
Uneven knots: This almost always comes from unequal tension. Practice your square knot 5 times on spare cord before you start your actual hanger. Consistency beats speed.
Basket too loose: You spaced the alternating knot rows too far apart. On your next hanger, move the rows 0.5 inches closer together. You can also test-fit your pot earlier in the process to catch this before you’ve tied everything.
Cord too short mid-project: This happens when people estimate instead of measuring. Always cut every cord to the full measured length before starting. If it does happen, you can add a new cord with a well-hidden knot, but prevention is far easier.
Fringe looks uneven: Trim in small snips rather than one big cut, and hold all strands taut together before cutting. A rubber band around the bundle keeps strands aligned while you trim.
Hanger sits crooked: Your gathering knots aren’t centered, or your lark’s head knots aren’t evenly spaced on the ring. Slide the lark’s head knots so they’re evenly distributed around the ring before tying your first gathering knot.
Honest Limitations to Know Before You Start
Macrame plant hangers are one of the most beginner-friendly craft projects out there — but they’re not completely without friction.
Your first hanger will probably have a few uneven knots. That’s normal, and it doesn’t mean you failed — it means your hands are still learning the tension. By your second hanger, the consistency improves noticeably.
Also: macrame plant hangers work best with pots that have a rim wider than their base. Tapered pots with a narrower top than bottom can slip through even a well-made basket. Stick with straight-sided or rimmed nursery pots for your first attempt.
Cotton cord is the best beginner choice, but it isn’t weatherproof. Keep cotton macrame hangers indoors or in covered outdoor spaces. For fully outdoor use, nylon cord is more durable — the best macrame cord for beginners guide covers outdoor cord options in detail.
What to Make Next
Once you’ve finished your first plant hanger, you’ll find the knots start to feel automatic. The Craft Industry Alliance reports that macrame is consistently one of the top-growing fiber craft categories in the US, with online search interest holding strong year over year — meaning there’s a huge community to learn alongside. Craft Industry Alliance research on fiber crafts documents this trend if you want to explore the broader maker movement.
Your next logical step is to practice those same knots in a smaller, faster project. If you want to build your knotting confidence before trying another hanger, your first macrame project — a simple bracelet — uses the same square knot and takes under 30 minutes.
When you’re ready to try wall art, the macrame rainbow wall hanging tutorial uses techniques you’ve already practiced here.
For deeper knot education, the Macrame School YouTube channel offers free video walkthroughs of every knot mentioned in this tutorial — seeing the motions in video form alongside written instructions locks the technique in faster.
FAQ
How much cord do I need for a macrame plant hanger?
For a standard hanger that fits a 6-inch pot, buy 100 feet of 3mm cotton cord. Cut 8 cords at 12 feet each, and you’ll have a small buffer. For larger pots, scale up using the sizing table in this article — a 10-inch planter needs cords up to 16 feet each.
What kind of rope is used for macrame plant hangers?
3mm single-strand or 3-ply twisted cotton macrame cord is the best choice for beginners. Cotton grips knots tightly, holds weight reliably, and is easy to work with bare hands. Jute is cheaper but rough on your fingers and less consistent in thickness. Nylon is best for outdoor use.
How long should macrame cords be for a plant hanger?
Cut each cord to 4 times your desired finished hanger length. For a 36-inch hanger, cut each cord to 144 inches (12 feet). You fold each cord in half over the ring, giving you 72-inch working strands — enough for all your knots and 4–6 inches of fringe.
What size pot fits in a macrame plant hanger?
Most standard beginner patterns fit a 6-inch nursery pot. The basket section of the hanger needs to be slightly narrower than the pot’s widest point so it grips rather than lets the pot slide through. Use the sizing table in this article to match your cord setup to your specific pot diameter.
Is a macrame plant hanger hard to make?
It’s one of the most beginner-friendly macrame projects you can try. You only need four knots, and the most important one — the square knot — takes about 10 minutes of practice to get consistent. Most beginners finish their first hanger in 2–4 hours.
What knots do you use for a macrame plant hanger?
The four knots you need are: the lark’s head knot (to attach cords to the ring), the square knot (the main decorative knot), the alternating square knot (to form the basket), and the gathering knot (to bundle strands at the top and bottom). All four are covered step by step in this article.
You’re Ready — Now Cut That First Cord
The single most important thing to take from this tutorial: measure your pot first, cut your cords second. Every frustration beginners face — cords too short, baskets too loose, pots that don’t fit — traces back to skipping that first step.
Cut your 8 cords to 12 feet each, attach them to your ring with lark’s head knots, and tie your first gathering knot. That’s all you need to do today to get started. Your hands will figure out the tension as you go, and your second hanger will already look better than your first.
Pick up your supplies, measure your pot, and make something you’ll actually be proud to hang.
Recommended Cord
We recommend GOHOF 3mm Cotton Macramé Cord (328 Yards). Soft 4-strand cotton that holds square knots tight and combs into fluffy fringe.
