
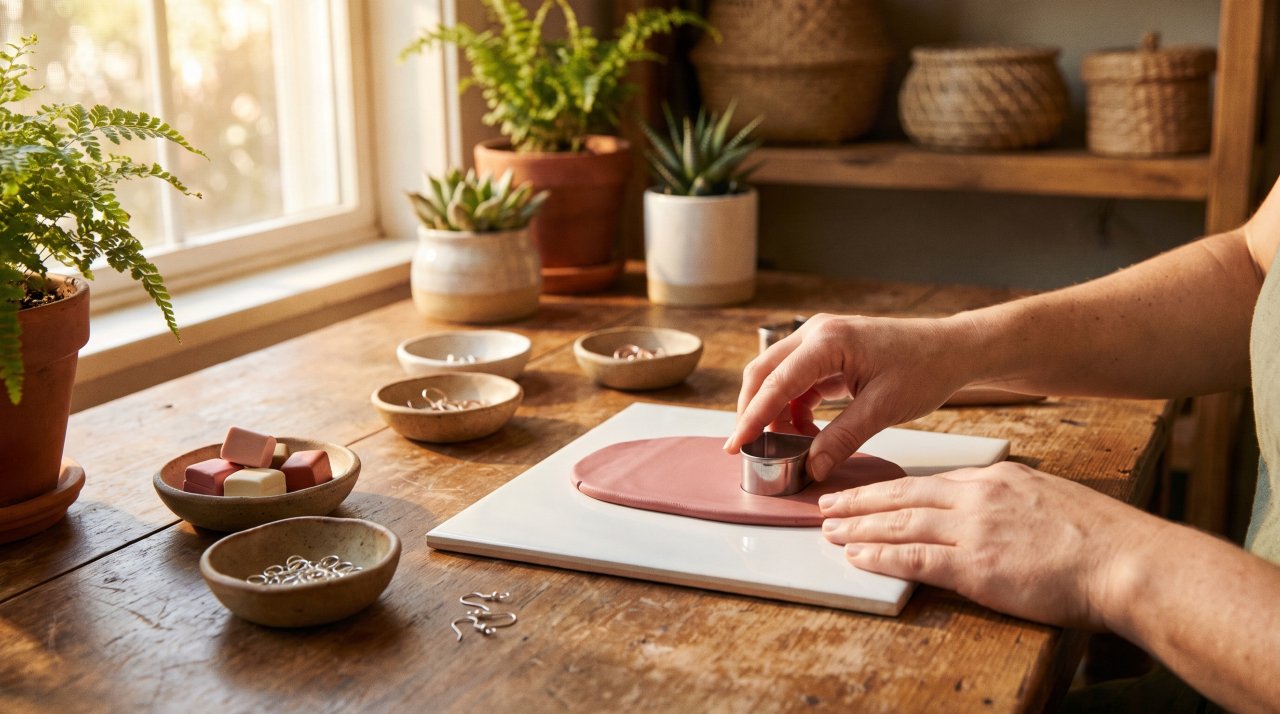
The first time I tried to make polymer clay earrings, I pulled a batch out of the oven to find cracked, slightly scorched little disasters. My oven ran 25°F hotter than the dial said, and I had no idea. If you’re starting out with polymer clay earrings, that one detail alone could save your first ten attempts.
Polymer clay earrings have become one of the biggest DIY jewelry trends right now, and for good reason. They’re lightweight enough to make statement-sized arches that feel like nothing in your ears. You don’t need expensive tools to start. Most of what you need costs under $30 for a full beginner kit. This guide walks you through exactly how to make polymer clay earrings at home, step by step, with honest notes on what goes wrong and how to fix it.
Expect your first pair to take about 60 to 90 minutes, not counting cooling time.
What You Need
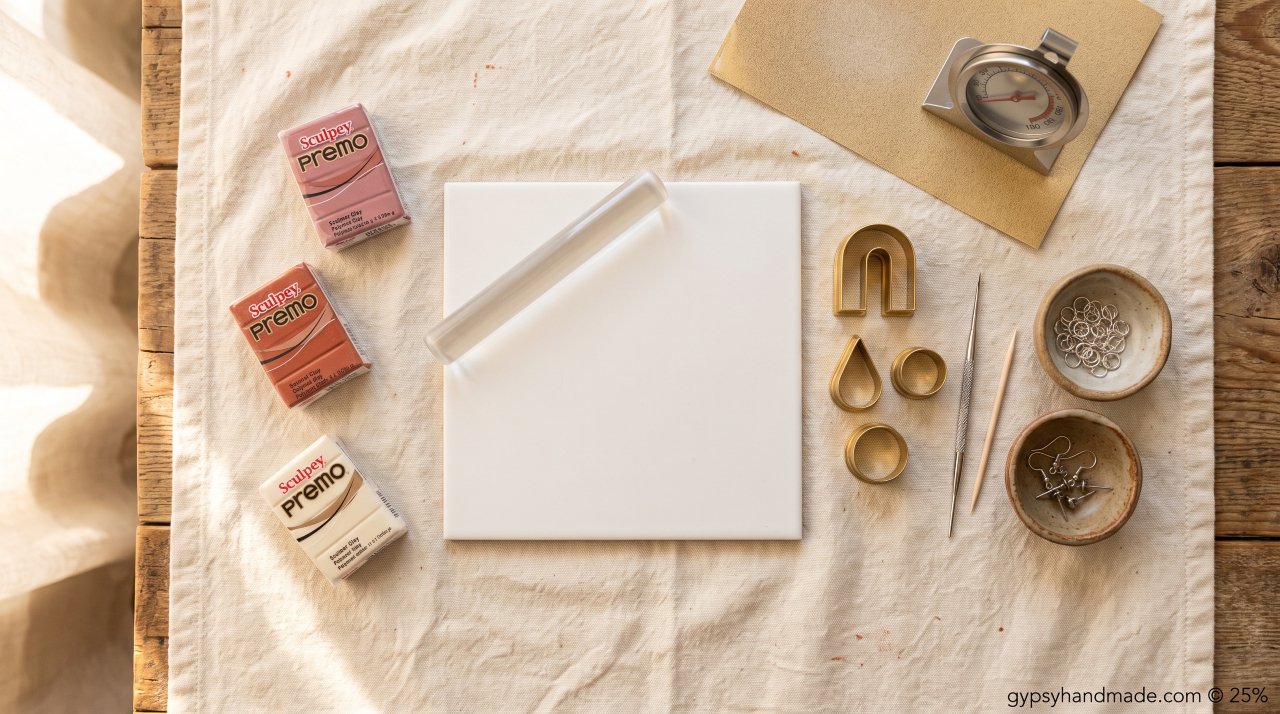
You don’t need to buy everything on this list before your first session. The essentials are marked below.
| Item | Specific Detail | Essential? |
|---|---|---|
| Polymer clay | Sculpey Premo or Sculpey Soufflé (2 oz block per color) | ✅ Yes |
| Work surface | Smooth white ceramic tile, 6″x6″ minimum | ✅ Yes |
| Acrylic roller | Smooth cylinder, at least 6 inches long | ✅ Yes |
| Thickness guides | 4 playing cards stacked on each side (gives ~2mm depth) | ✅ Yes |
| Clay cutters | Small arch, teardrop, or circle shapes (1–2 inches) | ✅ Yes |
| Needle tool or toothpick | For piercing holes before baking | ✅ Yes |
| Oven thermometer | Standalone dial or digital type | ✅ Yes |
| Earring findings | Silver or gold-tone posts or hooks, 1 pair per earring | ✅ Yes |
| Jump rings | 4–6mm, matching your findings metal | ✅ Yes |
| Round-nose jewelry pliers | 2 pairs (one to hold, one to open the ring) | ✅ Yes |
| 400-grit sandpaper | Wet/dry type for smoothing edges post-bake | Optional |
| E6000 adhesive or super glue | For gluing flat-back posts to studs | Optional |
| Baby wipes | For cleaning hands between colors | Nice to have |
Best beginner clay brand note: Sculpey Soufflé is softer and more lightweight, which makes it very forgiving on your first roll. Sculpey Premo is firmer and stronger once baked, and it holds texture details like pressed florals really well. Both work for beginners. If you run into hard, crumbly clay, grab a small amount of Translucent Liquid Sculpey and knead in a tiny drop — it revives older, stiff blocks.
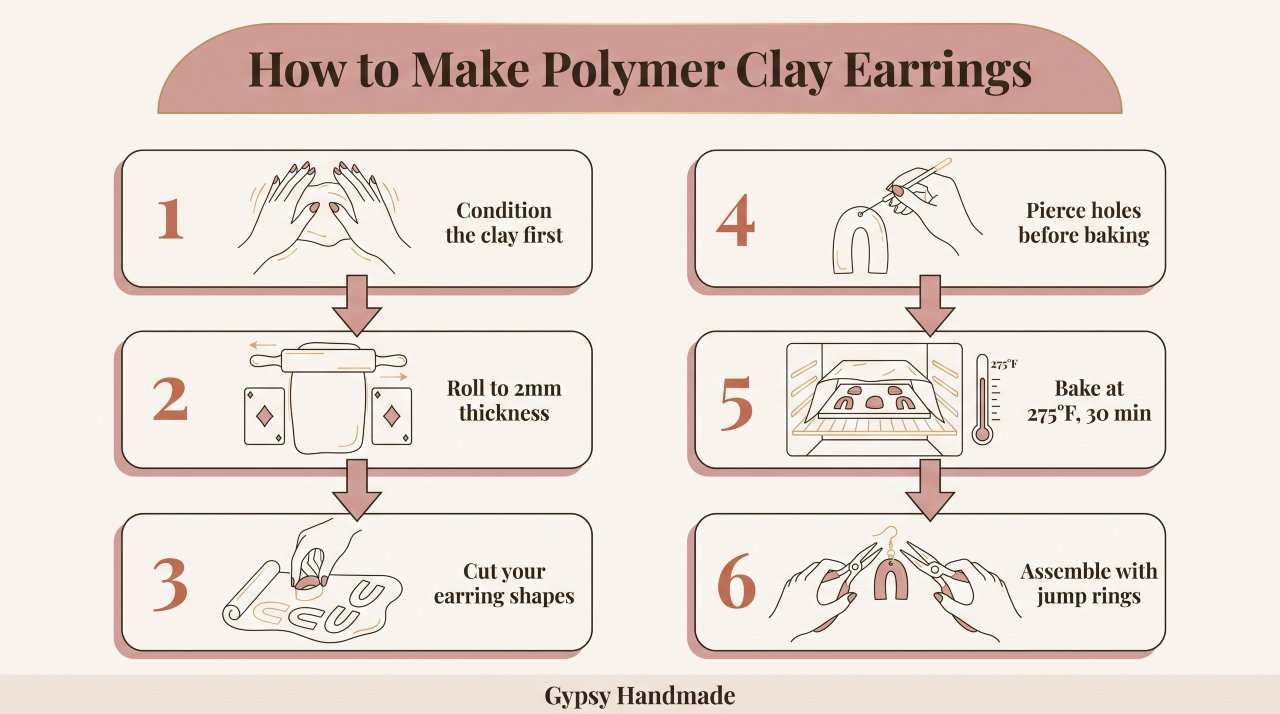
Step 1: Condition Your Clay
Why this matters: Polymer clay straight from the package often has tiny air pockets and is too stiff to cut cleanly. Conditioning breaks those pockets down and makes the clay pliable. Skipping this step is the main reason first-time earrings crack in the oven.
Take your clay block and break off a piece about the size of a large marble. Warm it between your palms for 30 seconds. Then press, fold, and roll it repeatedly. You’re looking for the clay to go from slightly crumbly and resistant to smooth, warm, and stretchy without tearing.
Common mistake here: Folding the clay end-to-end when rolling it through a pasta machine (or just by hand) traps a pocket of air right in the middle. Instead, fold it sideways, like closing a book from the spine. You’ll see a bubble if you fold it wrong — pierce it with your needle tool and smooth the clay over it immediately before baking.
Done correctly: The clay stretches slightly without cracking at the edges. It feels a little like warm chewing gum in terms of flexibility.
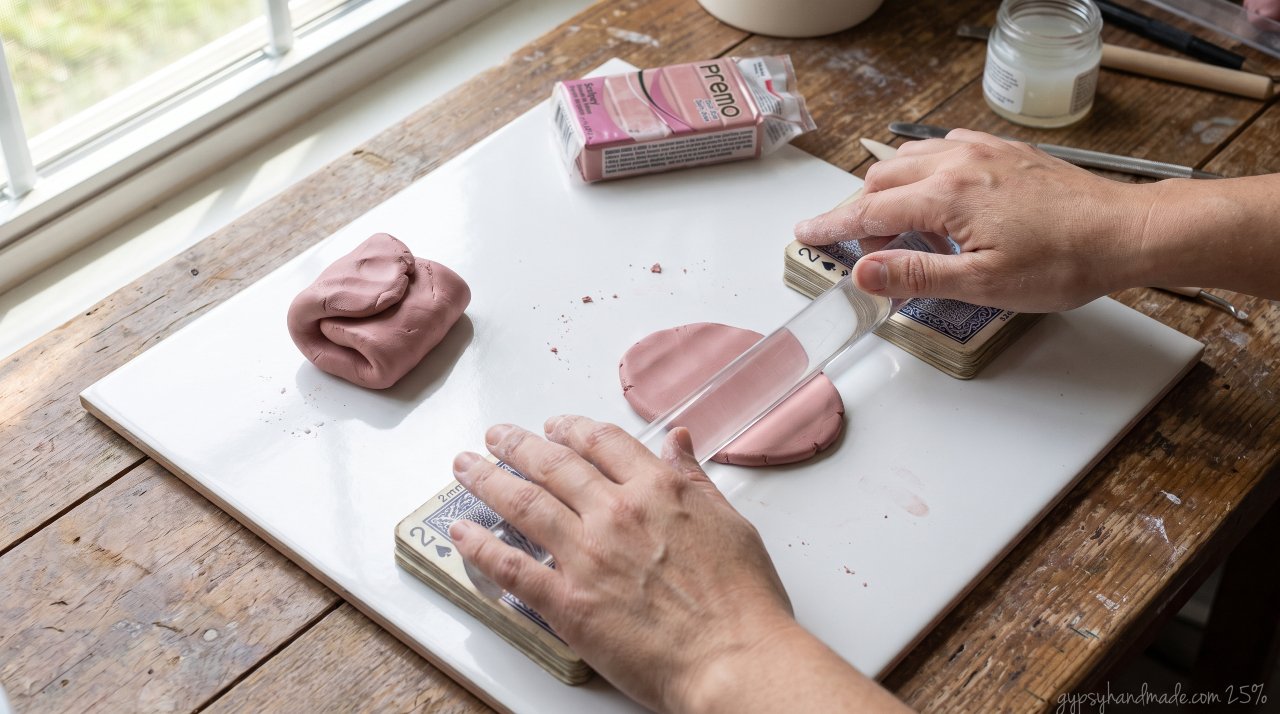
Step 2: Roll to Even Thickness
Why this matters: Uneven thickness means uneven baking. Thin spots will be brittle; thick spots may still be slightly soft when the thinner areas are done.
Place your conditioned clay on the ceramic tile. Stack two playing cards on each side of the clay as guides — this gives you a consistent depth of roughly 2mm. Roll your acrylic roller across the clay, resting the roller ends on the playing card stacks rather than pushing down hard.
Roll from the center outward in different directions. Rotate the clay 90 degrees and roll again. You want a flat slab with no visible lines or ridges.
Common mistake here: Pressing too hard in the center and going thin there while the edges stay thicker. Let the playing cards do the work of controlling depth — don’t force it.
Done correctly: Run your finger lightly over the slab. It should feel uniformly smooth, with no bumps or dips. Hold it up to the light at an angle — thin spots look slightly more translucent.
Step 3: Cut Your Shapes
Why this matters: Clean cuts now mean less sanding later. Dragging the cutter or twisting it slightly leaves ragged edges.
Press your cutter straight down into the slab with firm, even pressure. Don’t twist or wiggle. Lift the cutter straight back up. If the shape stays in the cutter, gently press from the back with a toothpick to push it out. If the shape sticks to the tile, use a thin craft knife or a flexible palette knife to slide underneath.
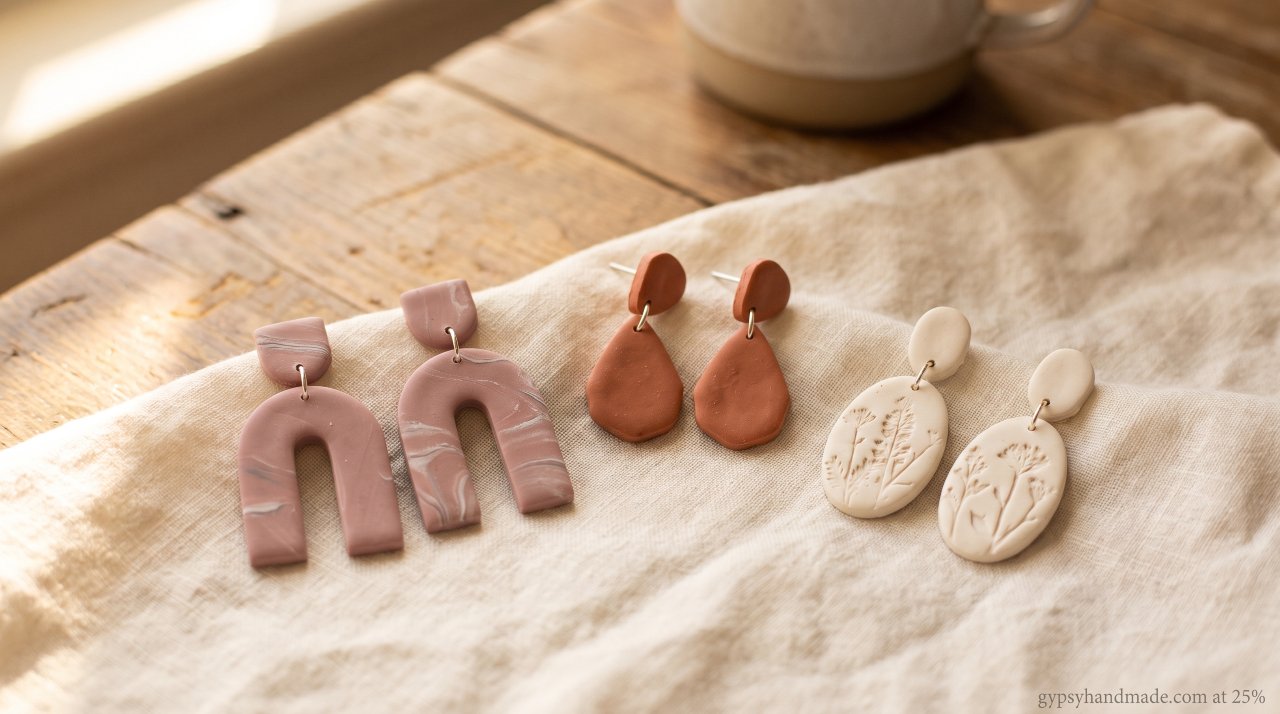
For beginners: Arch and teardrop shapes work better than very tiny intricate cutters for your first batch. Larger shapes (1.5 to 2 inches) are easier to handle and tend to bake more evenly than fussy small cuts.
Common mistake here: Cutting too close to the edge of your slab. Shapes cut from the very edge of rolled clay are often thinner because the roller tapers there. Work from the center of your slab for the most consistent pieces.
Done correctly: The shape lifts cleanly with flat, well-defined edges. Leave cut shapes on the tile for now — moving them too much before baking distorts them.
Step 4: Add Texture and Holes (Before Baking)
Why this matters: Texture must go on before baking. And your hole for the jump ring must also be made now, while the clay is soft. Post-bake drilling is possible but it’s a real risk of cracking for beginners.
For texture, try pressing a piece of lace fabric firmly into the clay surface and peeling it off slowly. Or press an old toothbrush in a stippling motion for a soft pebbled texture. For marbled swirl effects, twist two conditioned colors together and roll lightly — don’t overwork it or the colors will muddy.
For holes: use your needle tool to pierce a clean hole near the top edge of each earring shape, about 3mm from the edge. Wiggle the needle gently in a slow circle to widen the hole just slightly — jump rings are usually 4–5mm and need a clean opening to sit right. Make sure the hole goes all the way through.
Common mistake here: Making the hole too close to the edge. If it’s less than 2mm from the edge, the clay will crack at that spot when the jump ring pulls on it. Aim for 3–4mm from the edge minimum.
Done correctly: The hole is clean, slightly wider than the needle diameter, and positioned with at least 3mm of clay between it and the edge.
Step 5: Bake the Earrings
Why this matters: This is where most beginner batches go wrong. Home ovens are often 20–30°F off from what the dial shows. Your clay package says a specific temperature for a reason — going over it by even 25°F can scorch your pieces.
Before you bake:
- Put your standalone oven thermometer inside your oven on the same rack you’ll bake on.
- Set the oven to 275°F (130°C), which is standard for Sculpey Premo. Check your specific brand’s packaging.
- Wait 15 full minutes after the oven says it’s preheated. Most home ovens cycle and the actual temperature needs time to stabilize.
Baking process:
- Leave your clay pieces on the ceramic tile they’re already on (no need to transfer them).
- Place a sheet of parchment paper over the top loosely, like a tent, to protect them from direct overhead heat.
- Bake for 30 minutes for pieces that are 2mm thick.
- Check your thermometer when you put them in and again halfway through. If the oven is spiking above 285°F, crack the door briefly to let heat out.
After baking:
- Do not move the pieces immediately. Let them cool on the tile for at least 20 minutes. Polymer clay is soft and slightly pliable right out of the oven — it hardens fully as it cools.
- Properly baked clay will be firm and slightly flexible (not brittle). If yours snap like a cracker, they were underbaked. Do a second bake for another 10 minutes.
Common mistake here: Thinking polymer clay needs to come out hard immediately. It won’t. It firms up during cooling, not during baking. Pulling pieces off the hot tile too soon warps them.
Done correctly: Cooled pieces are firm, don’t crumble or flex dramatically, and have a slight matte finish. The tile will have kept the back flat and smooth.
Step 6: Sand, Seal, and Assemble
Why this matters: This is the step that separates “homemade” from “handmade.” A few minutes of finishing makes your earrings look deliberate and polished.
Sanding (optional but worthwhile): Fill a small bowl with water. Wet your 400-grit sandpaper and gently sand the edges of each earring piece in small circular motions. The water prevents dust and gives a smoother result. Work up to 800-grit if you want a semi-gloss finish on the clay itself.
Sealing (optional): A thin coat of Sculpey Gloss Glaze or a matte polymer clay varnish protects the surface and any texture detail. Apply with a soft brush in one direction. Let it cure for at least an hour before handling. Note: not all varnishes work with all clays — avoid anything with acetone or alcohol in the formula, as it can make the surface sticky.
Assembly:
- Open a jump ring by gripping it with two pairs of pliers and twisting one end toward you (not pulling it apart sideways, which distorts the round shape).
- Slip the jump ring through the hole in your clay piece.
- Add your earring hook or a small dangle if you want one.
- Twist the jump ring closed firmly.
For flat-back stud posts: apply a small dot of E6000 adhesive to the post pad, center it on the back of your clay piece, and press firmly for 60 seconds. Let it cure for 24 hours before wearing.
Done correctly: The jump ring sits flush in the hole without gaps. The whole earring hangs at a natural angle, not tilted.
Common Mistakes (and How to Fix Them)
1. Clay cracked in the oven. Almost always: under-conditioned clay, or an oven that spiked too hot. Condition longer next time. Always use that oven thermometer.
2. Earrings have bubbles on the surface. You folded the clay top-to-bottom instead of sideways when conditioning. Pierce bubbles with a needle tool before baking.
3. One earring came out darker/browner than the other. Uneven heat distribution from an oven hot spot. Rotate the tile halfway through baking next time, and use the parchment tent.
4. The clay is sticky and won’t hold a shape. The clay got too warm from your hands, or you’re in a warm room. Pop it in the fridge for 10 minutes to firm it up before cutting.
5. Jump ring hole cracked when I attached the findings. The hole was too close to the edge, or the clay was underbaked. Minimum 3mm from edge, and make sure pieces are fully cured before assembly.
6. The varnish made the surface tacky and won’t dry. You used a formula with alcohol or acetone. Scrape it off gently, re-bake the piece for 10 minutes, and use a clay-safe varnish next time.
Frequently Asked Questions
Are polymer clay earrings heavy to wear?
No. Polymer clay is naturally very lightweight, even in large statement shapes. A pair of 2-inch arch earrings made from Sculpey Soufflé weighs less than most metal earrings of the same size. That’s part of why big clay earrings have stayed popular — you can go bold without the earlobes paying for it by the end of the day.
Do polymer clay earrings break easily?
Properly baked clay is firm and has a slight flex — it won’t shatter if you drop it. Thin pieces (under 1.5mm) are more fragile and can snap under pressure. The breakage beginners usually see comes from underbaking, not from the clay itself. When in doubt, add five minutes to your baking time.
What is the best polymer clay brand for beginners?
Sculpey Soufflé is the top pick for beginners because it’s soft to condition, extremely lightweight, and very forgiving in the oven. Sculpey Premo is a close second and better if you want to sell your earrings, because its strength and color vibrancy hold up better over time. FIMO Soft is another solid option. Avoid “Super Sculpey” for earrings — it’s designed for sculpture and stays beige, not for colorful jewelry.
How do I clean polymer clay earrings?
Wipe them with a damp cloth and mild soap. Don’t submerge them or wear them in the shower. Keep them away from hairspray and perfume — the chemicals in those products can dull the surface finish over time. Store them flat or hanging (not stacked) to keep the shapes from pressing against each other.
Can I bake polymer clay in a toaster oven?
Yes, toaster ovens work and many polymer clay makers prefer them because they warm up quickly. The caution is that toaster ovens often run hotter and have more temperature spikes than full ovens. Use your oven thermometer no matter what — it matters even more with a toaster oven than a full-size one.
How do I attach earring backs so they don’t fall off?
For hook earrings, a properly closed jump ring is all you need. For flat-back stud posts, use E6000 adhesive — it bonds to both metal and cured polymer clay. Apply a thin layer, press firmly, and let it cure for a full 24 hours. Some makers embed the post pad partway into unbaked clay before baking for an even stronger hold, but E6000 on a clean dry surface works very well for most wearable pieces.
One More Thing Before You Start
Your first batch probably won’t be your favorite pair. That’s not a reason to stop. The first time you condition clay properly, cut a clean arch, and pull a pair out of the oven that actually looks intentional — that feeling is genuinely satisfying in a way that buying earrings never quite is.
If you want to go further, our beaded bracelets guide pairs really well with clay jewelry for a full handmade set. And if you’re thinking about selling what you make, how to price handmade crafts is worth reading before you set any numbers.
Save this guide to your craft board so it’s there when you’re ready to make your next pair. Drop your first attempt in the comments — cracks, victories, and everything in between.

