
As an Amazon Associate I earn from qualifying purchases.
Most beginner-made beaded bracelets end up on the floor within a week. The beads scatter, the cord snaps, and the whole project feels like a waste of time. But here’s the truth: the bracelet didn’t fail — the technique did.
Making beaded bracelets at home is genuinely easy once you know which cord to use, how to size your design correctly, and how to tie a knot that holds. According to the Craft & Hobby Association, jewelry making is one of the top five most popular crafts in the US — and beading specifically ranks as the number one entry point for new makers. Millions of people pick it up every year. The ones who stick with it learn a handful of fundamentals that make every bracelet better.
This guide covers everything you need — materials, bead selection, step-by-step instructions, finishing techniques, and the troubleshooting tips that most tutorials skip entirely. By the end, you’ll know exactly how to make beaded bracelets that look professional and stay together.
What You’ll Need Before You Start
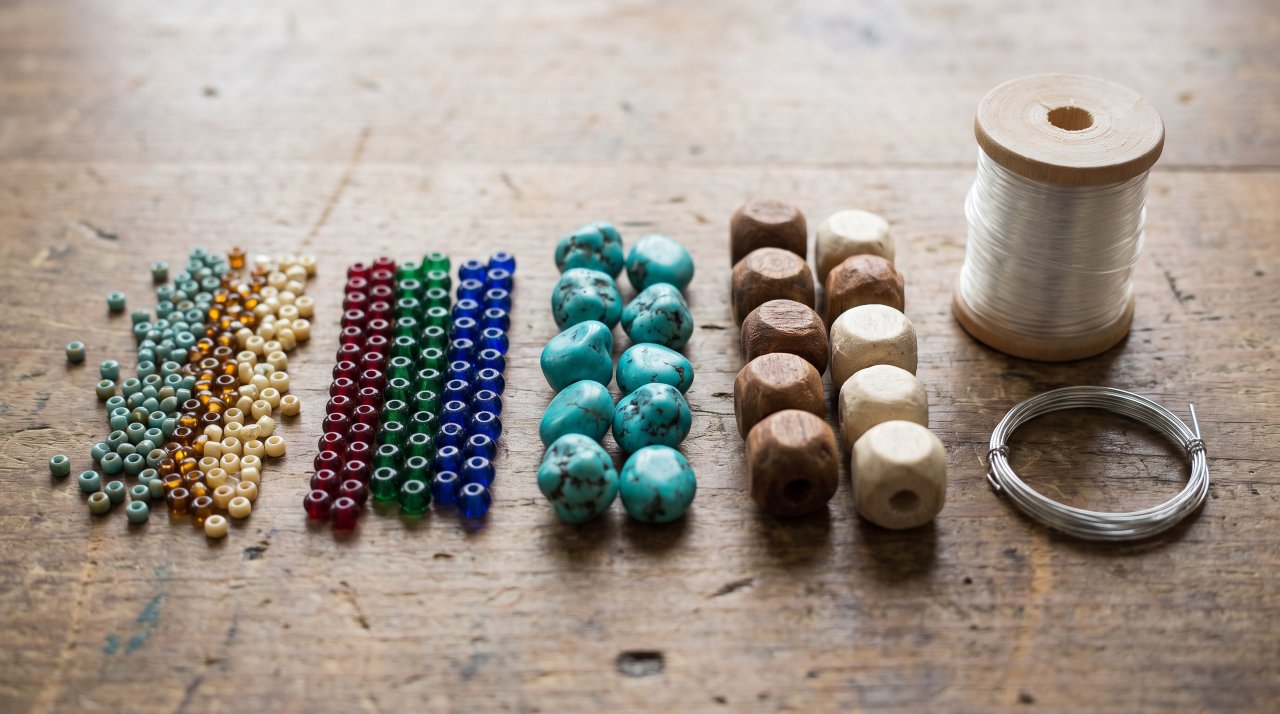
Getting your materials right is the single biggest factor in bracelet quality. Cheap cord and mismatched bead sizes cause most beginner problems before a single knot is tied.
Here’s everything you need to make beaded bracelets at home:
Cord or wire:
- Stretch elastic cord (0.5mm–1mm) — best for beginners, no clasp needed
- Nylon beading thread (size D or F) — stronger, good for smaller beads
- Beading wire (0.015″–0.019″) — rigid, suits heavier stone beads
Beads:
- Seed beads (sizes 6/0, 8/0, or 11/0) — tiny, versatile, great for patterns
- Glass beads (4mm–10mm) — easy to string, vivid colors
- Natural stone beads (6mm–10mm) — heavier, bohemian feel
- Wood or bone beads — lightweight, earthy aesthetic
Tools:
- Bead mat or towel (stops beads rolling away)
- Scissors or wire cutters
- Jewelry pliers (flat-nose or chain-nose)
- Beading needle (if using thread)
- Ruler or measuring tape
Finishing supplies:
- Crimp beads or tubes (for wire designs)
- Lobster clasp and jump rings (for non-stretch designs)
- Super glue or jewelry adhesive (for knot security)
- Bead stopper or paper clip (to hold beads while you work)
You can source quality beads and findings from Fire Mountain Gems, which carries a wide selection of materials used by professional jewelry makers and hobbyists alike.
Understanding Bead Sizes and Cord Matching
This is the section most tutorials skip — and it’s why so many bracelets fall apart or look uneven.
Every bead has a hole size, called the bore and your cord must pass through it cleanly without too much room to move. If the hole is too large for the cord, beads slide and bunch. If the cord is too thick, you can’t string the beads at all.
Here’s a quick reference for matching common bead sizes to cord:
| Bead Type | Bead Size | Recommended Cord |
|---|---|---|
| Seed beads | 11/0 (approx. 2mm) | 0.5mm elastic or size D thread |
| Small glass | 4mm–6mm | 0.5mm–0.7mm elastic |
| Medium glass/stone | 6mm–8mm | 0.7mm–1mm elastic |
| Large stone/wood | 10mm+ | 1mm elastic or beading wire |
| Crystal beads | 4mm–8mm | 0.5mm elastic or beading wire |
If you’re thinking about using real gold beads in your bracelet, it’s worth knowing how to spot the difference between solid gold, gold-filled, and gold-plated beads before you spend money — the price gap between them is significant.
When you’re working with a Gypsy or bohemian style — mixing turquoise chips, gold spacers, and seed beads, for example — you’ll often have multiple hole sizes in one design. Always string your cord through your largest beads first to confirm it fits before you commit to a full layout.
How to Measure Your Wrist Correctly
A bracelet that’s slightly too tight cuts circulation. One that’s too loose slides off constantly. Getting the fit right takes 30 seconds but saves enormous frustration.
Wrap a flexible tape measure around your wrist where you normally wear a bracelet. Note the measurement in inches. Then add the following:
- Snug fit (stackable style): add ½ inch
- Standard fit: add ¾ inch
- Loose, boho fit: add 1 inch
The average adult wrist in the US measures between 6 and 7 inches, according to industry sizing guides used by jewelers. Most pattern tutorials default to 7 inches — always check your own measurement before cutting your cord.
Cut your cord at least 6 inches longer than your target bracelet length. That extra length gives you enough to tie secure knots and trim the tails neatly.
Step-by-Step: How to Make a Basic Stretch Beaded Bracelet
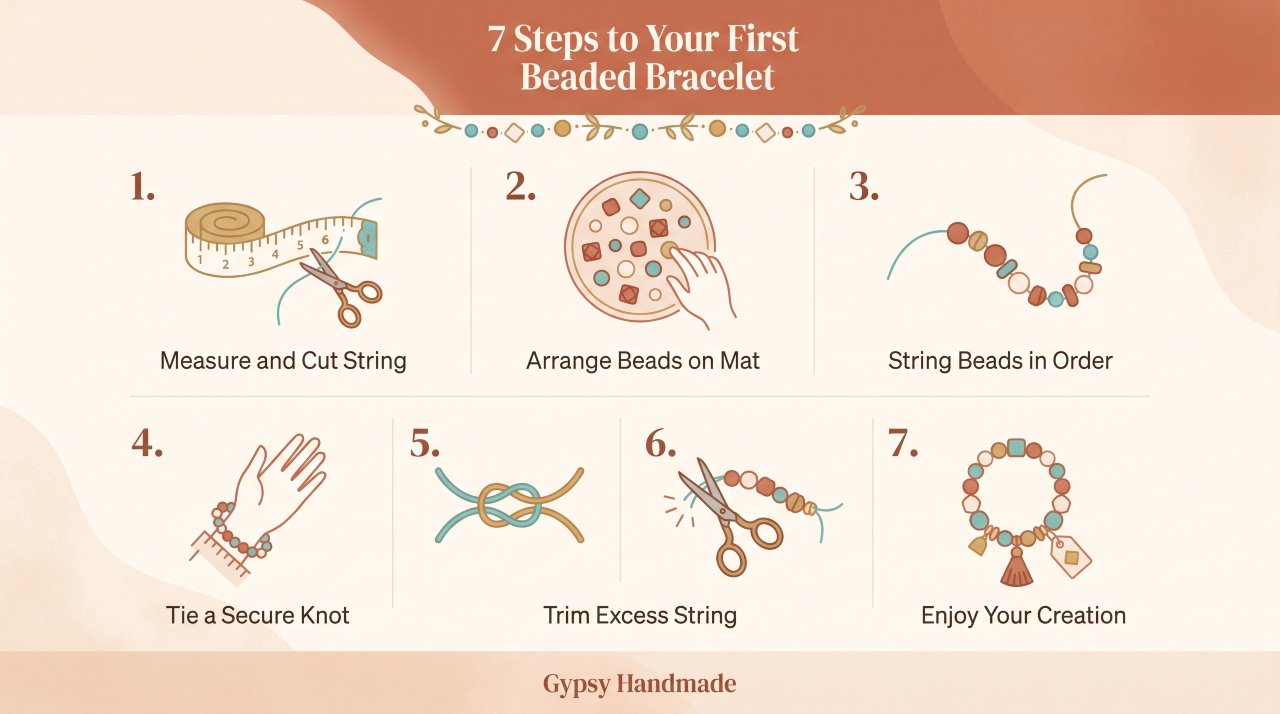
This is the best starting point if you’ve never made a beaded bracelet before. Stretch cord requires no clasps, no crimping tools, and no complex knotting. You get a clean result in under 30 minutes.
Step 1: Cut your cord
Cut a length of 0.7mm or 1mm elastic cord about 12 inches long. This gives you plenty of working length for a standard 7-inch bracelet.
Step 2: Secure one end
Clip a bead stopper or paper clip to one end of the cord. This stops your beads sliding off while you work.
Step 3: Lay out your design
Place your beads on the bead mat in the order you want to string them. For a Gypsy-style bracelet, try alternating 8mm turquoise stone beads with small gold-tone metal spacers. Lay out the full bracelet length before stringing anything — it’s much easier to adjust the design at this stage.
Step 4: String your beads
Thread the beads onto the cord one at a time, following your layout. Keep your tension even — don’t bunch the beads tightly while stringing.
Step 5: Check the fit
Remove the bead stopper and hold the bracelet around your wrist loosely. Make sure the length is right before you tie off. Add or remove beads as needed.
Step 6: Tie the knot
Bring both ends of the cord together. Tie a surgeon’s knot — pass the right end over the left twice, then pass the left end over the right twice. Pull both ends firmly to tighten. This knot resists loosening far better than a standard double knot.
Step 7: Secure and trim
Add a small drop of jewelry glue to the knot and let it dry for 60 seconds. Trim the cord tails to about 2–3mm. Gently slide the knot inside a bead hole so it’s hidden.
Your bracelet is finished and ready to wear.
How to Add a Clasp (Non-Stretch Designs)
Stretch bracelets are beginner-friendly, but if you want to work with heavier stone beads or beading wire, you’ll need a clasp. Don’t let that intimidate you — the process is straightforward once you’ve done it once.
What you need:
- Beading wire (0.015″ diameter works for most beads)
- 2 crimp beads or crimp tubes
- A lobster clasp
- 2 jump rings
- Flat-nose pliers and crimping pliers
The basic clasp method:
Thread a crimp bead onto the wire, then loop the wire through a jump ring, then back through the crimp bead. Pull the wire so the loop is snug but not rigid. Use crimping pliers to crush the crimp bead flat — this locks the loop in place. String your beads across the length of the bracelet. Finish the other end with another crimp bead, jump ring, and your lobster clasp, using the same technique.
Crimped wire connections are significantly stronger than knotted thread for heavier designs. According to Beadaholique’s technical guides, a properly set crimp bead on 0.015″ beading wire can hold up to 15 lbs of tension — more than enough for any bracelet.
Designing a Gypsy-Style Beaded Bracelet
Standard bead tutorials focus on single-color, single-material designs. Gypsy and bohemian jewelry takes a very different approach — and it’s what makes handmade pieces look genuinely unique.
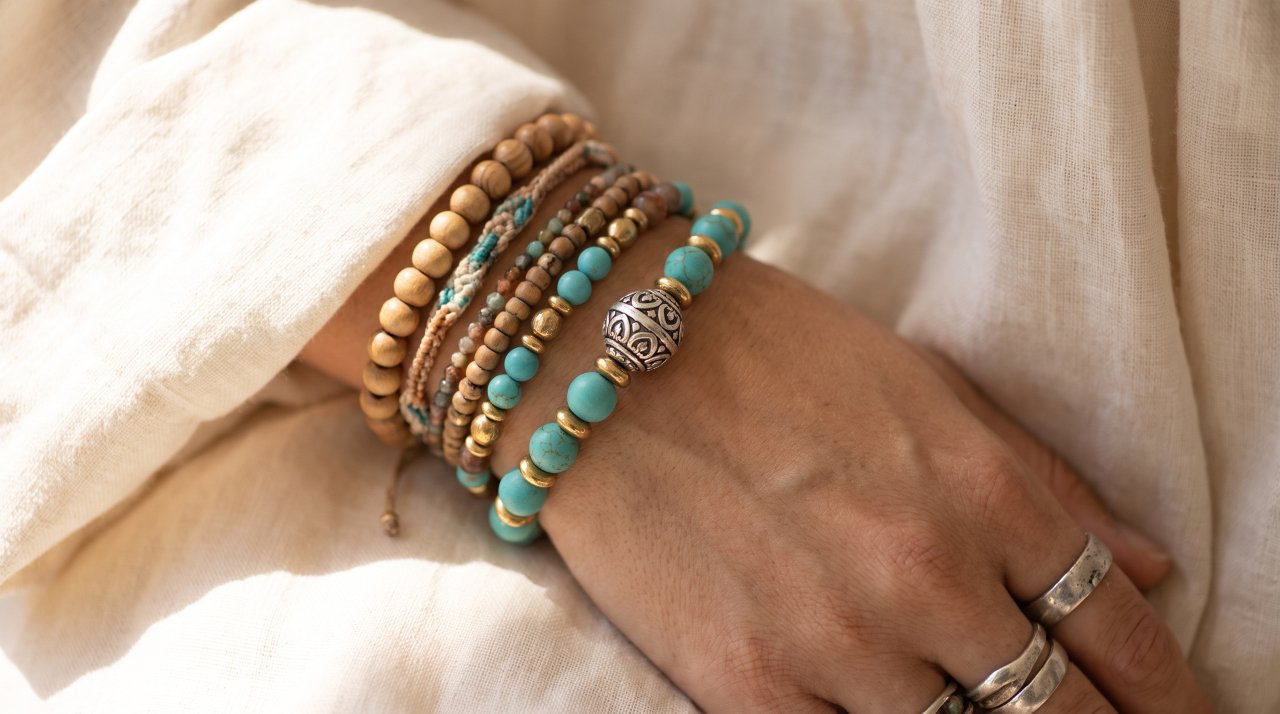
A Gypsy-style bracelet typically layers multiple textures, colors, and bead types in one design. Think rough turquoise chips alongside smooth gold metal beads, or faceted crystal rounds mixed with matte wood spacers. The “imperfect” quality is intentional and beautiful.
Here are three design principles that elevate your work immediately:
1. Work in odd numbers. Groups of three or five statement beads look more dynamic than pairs. Try three large stone beads separated by clusters of seed beads.
2. Use a focal bead. A single oversized bead — a large Tibetan silver piece, a carved bone bead, or a wrapped stone — anchors the whole design and draws the eye.
3. Vary your spacing. Instead of evenly spaced beads, cluster some together and space others apart. This creates rhythm in the design and gives it a hand-crafted, intentional feel.
If beading clicks for you right away, another easy bracelet to try is macramé — it uses knots instead of stringing, gives you a totally different texture, and pairs beautifully with beaded pieces when you stack them together.
Common Mistakes and How to Fix Them
Every maker runs into problems, especially at the start. Here are the most common issues you’ll encounter — and the honest solutions.
Beads bunching or gapping: Your cord is too thin for the bead holes, or you strung the beads too loosely. Start over with a thicker cord or add spacer beads to fill the gaps.
Knot slipping loose: You used a single or double overhand knot, which isn’t enough for elastic. Always use a surgeon’s knot plus a drop of adhesive. No exceptions.
Bracelet too short after knotting: You forgot to account for the knot taking up cord length. Always add at least 6 extra inches to your working cord length — even if it feels like too much.
Cord snapping quickly: You’re using low-quality elastic or you tied the knot too tightly, which stressed the cord. Use a reputable brand like Stretch Magic or Beadalon elastic, and don’t pull the knot so hard that the cord distorts.
Design looks uneven: You didn’t lay out your beads before stringing. Always arrange your full design on a bead mat first.
Honest note: your first bracelet probably won’t be perfect. That’s completely normal. Most experienced makers describe their first few attempts as “learning pieces.” The technique becomes natural by your third or fourth project.
How to Make Beaded Bracelets Last Longer
Making a beautiful bracelet is one thing — keeping it beautiful is another. A few simple habits extend the life of your handmade jewelry significantly.
Remove your bracelet before showering, washing dishes, or swimming. Water weakens elastic cord over time, and soaps and chlorine degrade both cord and certain beads (especially matte-finish stones and dyed wood).
Store bracelets flat or hanging — not piled in a drawer where they stretch under their own weight. A small jewelry tray or hanging organizer works well.
Check the knot every few months. Give the bracelet a gentle tug. If you feel any give near the knot, it’s time to re-tie before the cord breaks mid-wear.
For beading wire designs with clasps, check the crimp connections periodically. A crimped connection that’s starting to fail will show slight movement at the wire loop — re-crimp immediately if you notice this.
Frequently Asked Questions
What string is best for beaded bracelets?
Stretch elastic cord (0.7mm–1mm) is the best choice for beginners because it requires no clasp and is easy to knot. For heavier stone beads, beading wire (0.015″–0.019″ diameter) is stronger and more durable. Nylon thread works well for seed bead designs and detailed patterns.
How do you keep beads from falling off a bracelet?
The most effective method is tying a surgeon’s knot and sealing it with a drop of jewelry glue before trimming the tails. Sliding the knot inside a bead hole hides it and adds extra protection. Always use the correct cord thickness for your bead hole size — oversized holes let beads move and stress the cord.
How long does it take to make a beaded bracelet?
A simple stretch bracelet with medium-sized beads takes 20–30 minutes for a beginner. More complex designs with clasps, patterns, or mixed bead types take 45 minutes to an hour. Speed increases dramatically after a few practice sessions — most makers can complete a standard bracelet in under 15 minutes once they’re comfortable with the process.
How do you finish a beaded bracelet neatly?
For stretch cord, tie a surgeon’s knot, apply a small drop of jewelry adhesive, let it set, trim the tails short, and tuck the knot inside the nearest bead hole. For beading wire, use a crimp bead to secure each end loop before attaching your clasp. Neat finishing is what separates professional-looking work from craft-fair quality.
How many beads do you need for a bracelet?
The number depends entirely on bead size. A 7-inch bracelet using 8mm beads needs approximately 22 beads. The same length with 6mm beads needs around 30 beads, and with 4mm beads, roughly 44 beads. Always lay your beads out along a ruler before stringing to get an accurate count for your specific design.
Can you make beaded bracelets without special tools?
Yes. A stretch cord bracelet needs only scissors and the beads themselves — no pliers, needles, or crimping tools required. A bead mat is helpful but a folded towel works just as well. You only need pliers and crimping tools if you’re working with beading wire and clasps.
Your Next Step as a Maker
The single most important thing this guide leaves you with is this: your materials determine your results more than your skill level does. Start with the right cord for your bead size, measure your wrist accurately, and use a surgeon’s knot with adhesive — and your first bracelet will look far better than most beginners expect.
Your next step is a simple one. Choose one bracelet style from this guide, gather your materials, and make just one bracelet before the weekend is over. Don’t aim for perfect — aim for finished. Once you have a completed bracelet in hand, everything covered here will make much more sense.
Recommended Supplies for This Project
- Stretch Magic 0.7mm Elastic Cord — the go-to for beginner stretch bracelets. Holds a surgeon’s knot reliably.
- Acejoz Crimp Beads & Lobster Clasp Set — everything you need to finish beading wire designs with a professional clasp.
- Beadsmith Double-Sided Bead Mat — stops beads rolling off the table and lets you lay out your full design before stringing.
- Natural Turquoise Chip Beads — rough-cut stone chips that give any gypsy-style bracelet an earthy, textured look.

