
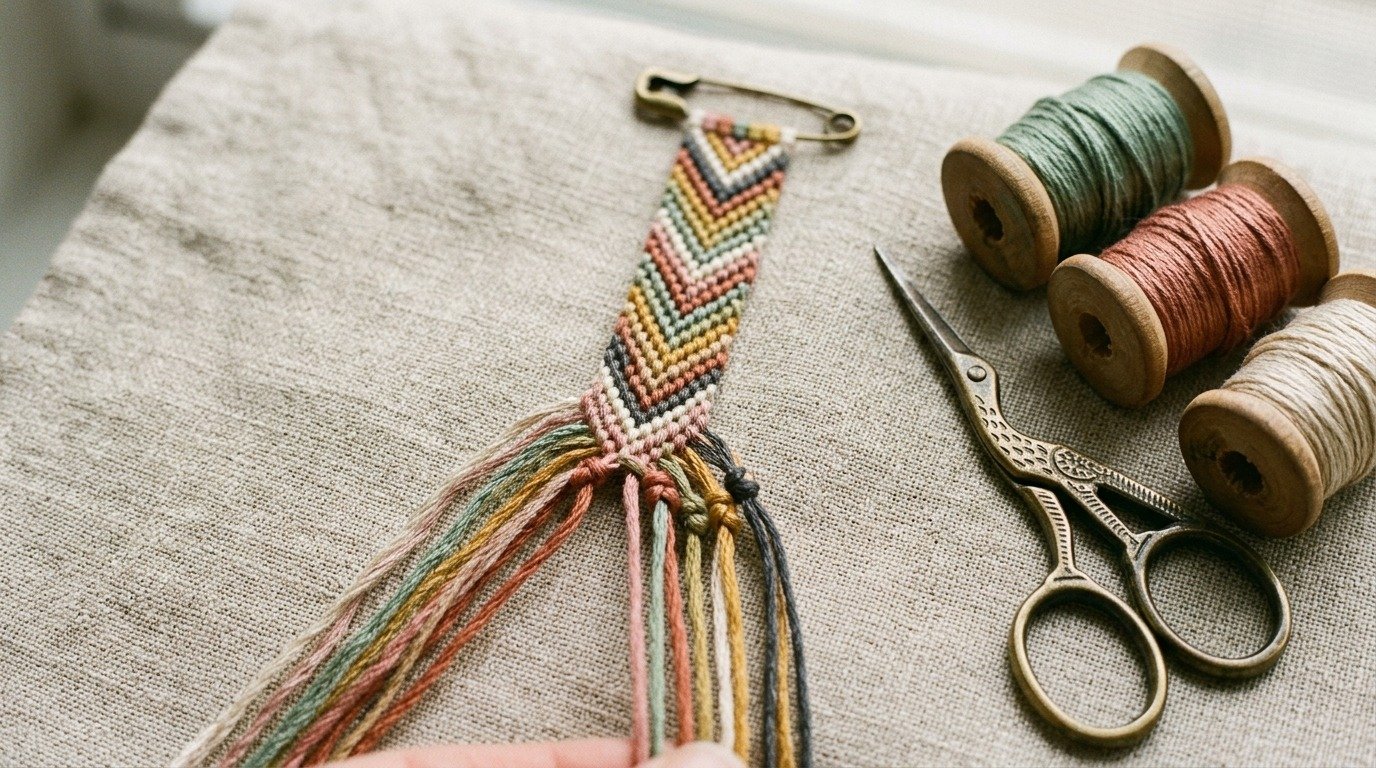
Few handmade crafts carry the enduring charm of the classic chevron friendship bracelet pattern. Whether you first knotted one at summer camp or you are exploring fiber arts for the first time, this symmetrical V-shaped design remains the gold standard of DIY friendship bracelets.
The beauty of the chevron pattern lies in its clean geometry and simplicity. Once you understand how the two basic macrame knots work together in symmetry, you can create intricate, high-end accessories using little more than everyday cotton embroidery floss and a flat working surface.
If you have previously tried making a chevron bracelet only to end up with curled edges, twisted rows, or uneven center points, do not worry. In this tutorial, we will walk through the exact string measurements, color setups, and tension techniques that guarantee flat, professional results every single time.
Quick Answer: How to Make a Chevron Friendship Bracelet
The chevron friendship bracelet pattern creates a distinct symmetrical V-shaped arrow design using basic forward and backward knots tied in mirrored rows. To start, cut 6 to 8 strands of cotton embroidery floss to 36 inches (90 cm) each, fold them in half or knot them together, and arrange the colors in a mirrored sequence from outside to inside (for example, A-B-C on the left and C-B-A on the right). Knot the outermost left strand across to the center using forward double knots. Next, knot the outermost right strand across to the center using backward double knots. Connect the two meeting center strands with one final forward knot to lock the V-point. Repeat this symmetrical sequence row by row until your bracelet reaches desired wrist length, usually 5.5 to 7 inches.
1. What Is the Chevron Friendship Bracelet Pattern?
At its core, a chevron pattern is a diagonal stripe pattern split down the middle and reflected across a vertical axis. While a simple candy stripe bracelet works by knotting strings continuously in one direction from left to right, a chevron bracelet uses two opposing diagonal movements that meet precisely in the center.
Decorative knotting of this style has deep roots across global folk cultures. According to historical textile research curated by the Smithsonian Institution Textile Collections, manual knotting techniques like macrame and decorative friendship bands evolved across maritime and indigenous traditions as durable utilitarian craftwork before becoming popular tokens of friendship.
When you master the chevron, you open up endless possibilities for advanced bracelet designs. The symmetrical knot placement practiced here forms the exact mechanical foundation needed for more complex projects like our Diamond Friendship Bracelet Pattern, where chevrons invert to create hollow diamond windows.
2. Essential Supplies and Embroidery Floss You Need
One of the greatest joys of friendship bracelet making is that the entry barrier is incredibly low. You do not need expensive specialized equipment to produce clean, boutique-worthy jewelry right at your kitchen table.
Here is the exact supply checklist you will want on hand before you cut your first thread:
- Six-Strand Cotton Embroidery Floss: High-quality mercerized cotton (such as DMC or Anchor) gives the best knot definition without fraying. Avoid cheap polyester floss, which tends to slip and stretch unevenly.
- Sharp Craft Scissors: A clean snip prevents the string tips from shredding while you measure and knot.
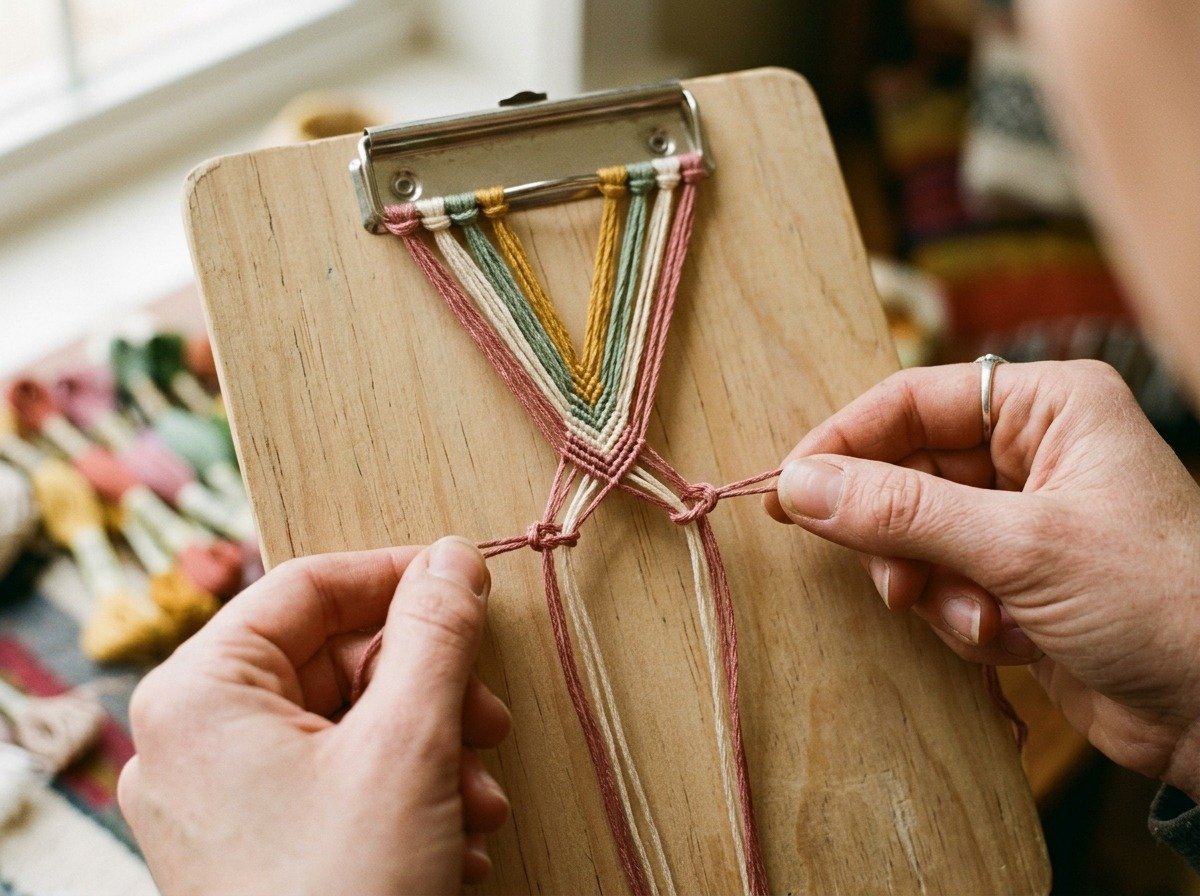
- Securing Tool: A sturdy wooden clipboard, safety pin attached to your jeans, or painter’s tape taped securely to a table will keep your tension steady.
- Measuring Tape or Ruler: Accurate measurements ensure your ties do not run out of thread before the design is complete.
- Optional Tapestry Needle: Helpful if you ever need to pick open an accidental knot without fraying your cotton fibers.
For color selection, 4 distinct colors (giving 8 total strands) is the sweet spot for beginners. Choosing tones with contrasting values, such as terracotta, dusty blush, sage green, and warm cream, highlights the crisp angle of each chevron row.
3. How to Measure and Cut Your Bracelet Strings
Running out of thread two inches before finishing a bracelet is one of the most frustrating maker experiences. Because chevron bracelets pack hundreds of micro-knots into a dense braid, the cotton cord consumes length rapidly.
A reliable rule of thumb for an adult bracelet is 36 inches (approx. 90 cm) per strand. If you prefer to start with a top fold loop, you can cut 4 strands at 72 inches (180 cm), fold them evenly in half, and instantly have 8 working strands ready to knot.
Always allow 4 to 5 inches of unknotted tail on both ends for your braided closures. It is far better to trim off a small excess at the end than to struggle tying a microscopic knot around your wrist.
4. Setting Up the Color Order: The Symmetrical Mirror Technique
The secret behind the chevron pattern is the mirrored setup of your strings. Unlike asymmetrical patterns, your working strands must mirror each other across an invisible center dividing line.
Suppose you are using four colors: Cream (A), Rose (B), Sage (C), and Terracotta (D). Tie an overhand knot about 3 inches from the top and secure your bundle to your clipboard.
Spread your 8 strands across your surface in this exact mirrored order from left to right: A, B, C, D | D, C, B, A. Color A occupies both outside edges, while Color D sits together right in the center. This mirror placement ensures that when your knots travel toward the middle, identical colors meet seamlessly.
5. Step-by-Step Chevron Knotting: Forward and Backward Knots
Every stitch in a friendship bracelet is a double half-hitch knot. That means whenever you knot string 1 over string 2, you must tie the knot twice to form a complete, secure stitch.
Follow these five straightforward steps to complete your very first chevron row:
Step 1 (The Left Side Forward Knots): Pick up the leftmost strand (Strand 1). Make a “4” shape over Strand 2, loop the end under, and pull up snugly toward the top. Repeat that exact motion a second time to complete one forward double knot. Strand 1 has now swapped places with Strand 2.
Step 2 (Continue to Center): Take that same Strand 1 and tie a forward double knot over Strand 3. Next, tie a forward double knot over Strand 4. Your working strand has now traveled from the far left edge all the way to the center of the bracelet. Let it rest there.
Step 3 (The Right Side Backward Knots): Now pick up the outermost right strand (Strand 8, which matches the color of Strand 1). Make a reverse “D” shape over Strand 7, wrap under, and pull upward. Repeat once more to finish the backward double knot.
Step 4 (Right Travel to Center): Continue moving that same strand inward by tying backward double knots over Strand 6, and then over Strand 5. Both of your original outside strands are now sitting side by side in the center.
Step 5 (Joining the Center V-Point): To connect both sides into a unified V, tie one double knot between the two center strands. You can use either a forward knot or a backward knot, but staying consistent across every row creates a sharp, uniform spine down the middle.
Congratulations, you have just completed your first chevron row. Notice that the next color in line is now positioned on the far left and right edges. Simply repeat Steps 1 through 5 with your new outer strands to build your second row.
6. The Secret to Crisp Center Points and Even V-Stripes
A common issue beginners face is a muddy or rounded center point. Instead of a crisp, sharp arrow tip, the middle stitches can bunch up or leave small holes.
To keep your chevron points razor-sharp, hold the passive base thread straight down with firm, gentle tension while pulling your working knot upward and slightly outward. Never pull down toward your body when tightening a knot, as that forces the row out of alignment.
If you enjoy experimenting with different texture combinations, consider pairing your woven cotton pieces with beadwork. Many crafters love stacking chevrons alongside Preppy Clay Bead Bracelet Ideas or accenting them with delicate pieces from our guide on Beaded Friendship Bracelets.
7. How to Fix Curling, Twisting, and Uneven Edges
If your bracelet looks like a curled spiral staircase instead of a flat ribbon, do not panic. Curling happens almost entirely because of unequal knot tension or tying only one half of the required double hitch.
When you tie the first half of a forward knot, it creates the foundation. The second knot locks it in place against the core strand. If you tighten one stitch aggressively and the next one loosely, the fabric will curl naturally toward the tighter side.
Educators at Utah State University Extension Textile Arts emphasize that developing muscle memory for consistent, uniform tension is the single most valuable foundational skill in all hand-knotting and weaving disciplines.
8. How to Start and Finish: Clean Loops and Braided Ties
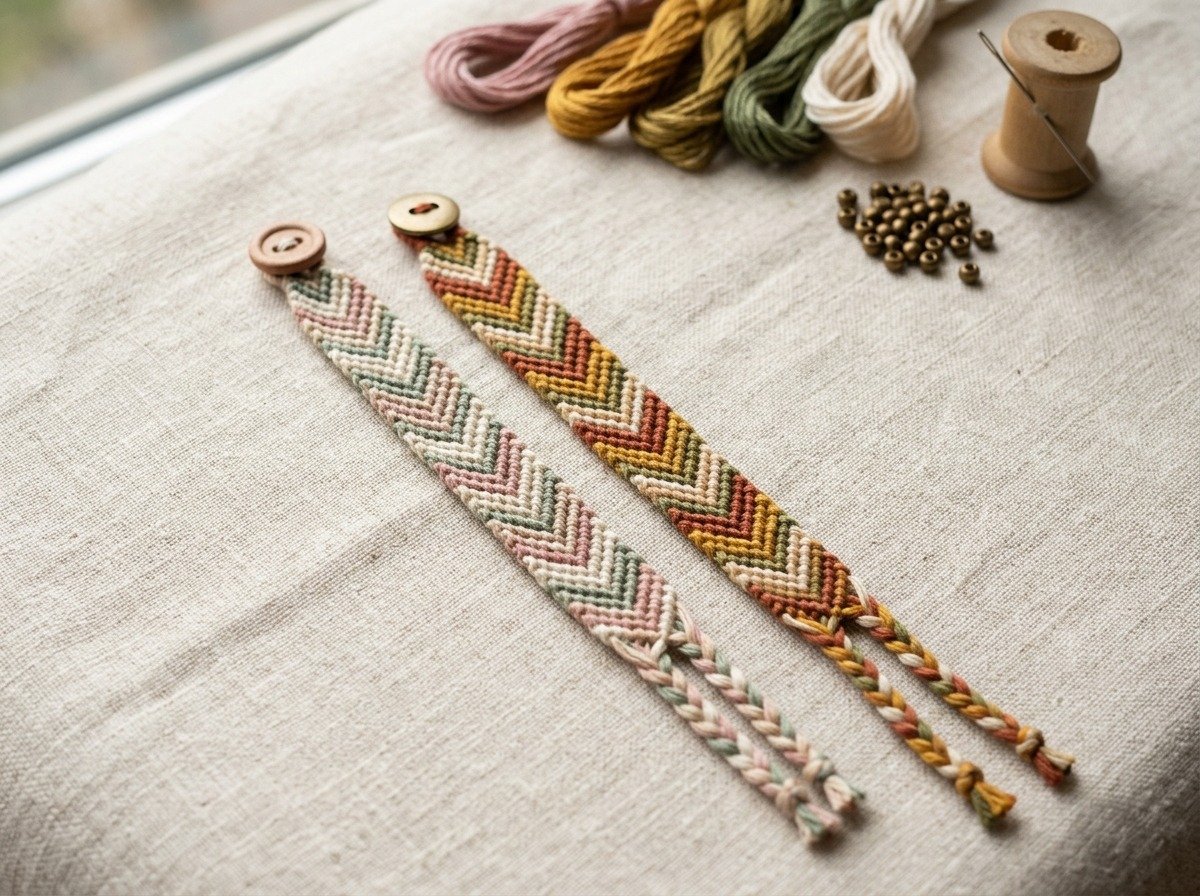
A great friendship bracelet deserves a clean closure that makes taking it on and off effortless. While simple overhand knots work, upgrading to a buckle loop and twin braids transforms your piece from casual camp craft to artisan jewelry.
To create a buckle loop at the start, fold your long cut strands in half. Tie small lark’s head or Chinese staircase knots around the center bend for approximately one-half inch, then fold the knotted section in half to form an eyelet loop before securing it to your board.
When your patterned section reaches approximately 5 to 6 inches, divide your remaining tail strings into two equal groups. Braid each group for 3 inches, finish each with a neat overhand knot, and trim the fringe. To wear, simply thread one or both braids through the top loop and tie a comfortable square knot.
9. Chevron String Length Reference Table by Wrist Size
Use this handy reference guide to calculate exact strand lengths and knotting requirements before cutting your embroidery floss:
10. Creative Pattern Variations: 6, 8, and 10-Strand Designs
Once you feel confident working the standard 8-strand chevron, you can easily adapt the formula to create fresh new aesthetics. Increasing or decreasing strand counts changes the final width and thickness of the wristband.
A 6-strand chevron produces a dainty, narrow band that is fast to knot and perfect for everyday minimalist wear. On the other hand, a 10 or 12-strand wide chevron creates a bold statement cuff that showcases gradient color transitions beautifully.
You can also experiment with bordered chevrons by keeping a dedicated border color on the outside edges, or introduce beaded accents inspired by our step-by-step tutorial on How to Make a Beaded Flower Bracelet. Those wanting to expand their foundational knotting knowledge can also explore our beginner guide on What Is Macrame Crafting.
Frequently Asked Questions
Why is my chevron friendship bracelet curling?
Curling is caused by uneven knot tension or forgetting to tie both halves of each double hitch knot. Always pull knots upward toward the clipboard with consistent, gentle pressure, and ensure every stitch contains two complete knots over the base strand.
How much embroidery floss do I need for a chevron bracelet?
For a standard adult bracelet, cut each strand to approximately 36 inches (90 cm). If you are using the fold-in-half loop method, cut 4 strands at 72 inches (180 cm) to yield 8 working strands with ample tail length for braided closures.
What is the difference between a candy stripe and a chevron bracelet?
A candy stripe bracelet uses only forward knots tied in one continuous diagonal direction across all strands. A chevron bracelet divides strings into mirrored halves, knotting toward the center from both sides to form symmetrical V-shaped points.
Can I make a chevron bracelet with an odd number of strings?
Traditional symmetrical chevrons require an even number of strings (such as 6, 8, 10, or 12) so each side has an equal number of matching colors meeting in the middle. Odd strand counts result in an off-center point unless a single stationary core cord is used.
How do you wash and care for a handmade friendship bracelet?
Hand wash your bracelet in lukewarm water with a drop of gentle dish soap or mild wool wash. Rinse thoroughly and press between two clean towels to remove moisture, then lay flat to air dry. This prevents shrinkage and restores flat geometry.
11. Final Maker Tips for Perfect Friendship Bracelets
Creating friendship bracelets is more than just an enjoyable weekend pastime; it is a mindful, tactile practice that connects makers to centuries of shared textile traditions. Archival folk culture records maintained by the Library of Congress American Folklife Center illustrate how decorative cord craft continues to thrive across communities as a personal, heartfelt expression of friendship.
Do not worry if your first few rows look slightly uneven. As your hands grow accustomed to the knotting cadence and your tension stabilizes, your chevron points will naturally fall into a crisp, rhythmic symmetry.
Keep your board flat, take short breaks to relax your fingers, and enjoy watching your vibrant V-stripes take shape one knot at a time. Happy knotting!

