
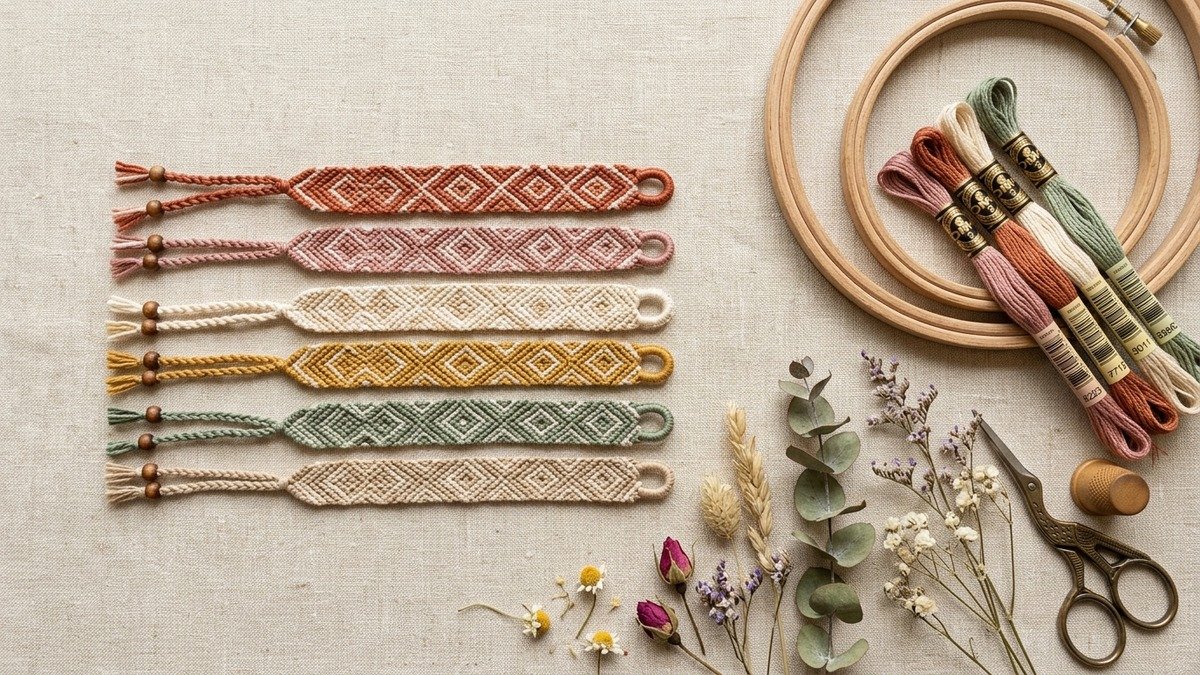
Among traditional knotted jewelry designs, the diamond friendship bracelet pattern stands out as a timeless favorite for makers of every skill level. While classic candy stripe or diagonal chevron patterns repeat single diagonal passes across your work, diamond motifs introduce symmetrical geometry that transforms simple cotton embroidery floss into intricate woven textile art. The repeating diamond shapes look remarkably sophisticated, yet the entire construction relies on fundamental double half-hitch knots tied in balanced left-to-right and right-to-left sequences.
If you have already created simple braided bands or tried our beginner beaded friendship bracelets, stepping up to geometric diamond patterns is the natural next milestone. Symmetrical knotting teaches you precise tension control, muscle memory, and thread management. Once you master how the outer borders open and close around contrasting core threads, you can personalize the pattern with endless custom color palettes, metallic accents, or delicate bead insertions.
In this detailed maker guide, you will learn everything required to knot crisp, flat diamond patterns from start to finish. We walk through strand measurement, symmetrical thread ordering, clean starter loops, row-by-row knot execution, and durable braided closures. Grab your favorite embroidery floss skeins, clip your strands to a clipboard, and let us weave your first diamond pattern together.
Quick Answer: How to Knot a Diamond Friendship Bracelet Pattern
To knot a classic diamond friendship bracelet pattern, cut four lengths of six-strand embroidery floss (each measuring 160 cm / 63 inches), fold them in half, and tie a teardrop buckle loop to yield eight working strands. Arrange the strands in symmetrical pairs from the outside inward (A-B-C-D-D-C-B-A). The diamond forms in two distinct stages: first, open the diamond by tying forward knots from the left and backward knots from the right toward the center, forming an outward V-shape. Next, knot the contrasting center core threads together. Finally, close the diamond by reversing direction: tie backward knots on the left and forward knots on the right toward the center until the outer border threads meet and join with a center knot. Repeat this opening and closing sequence for five to seven diamond repeats until reaching your desired wrist circumference.
Key Project Takeaways
- ✓ Skill Level: Advanced beginner. Requires mastery of forward knots (FK) and backward knots (BK).
- ✓ Total Time: 90 to 120 minutes for a complete adult bracelet.
- ✓ Thread Count: 8 working strands (4 colors doubled over) is the standard starter layout.
- ✓ Recommended Thread: 100% mercerized cotton embroidery floss (DMC or Anchor) for smooth knots and vibrant colorfastness.
1. Understanding the Anatomy of the Diamond Pattern
At its structural heart, the diamond friendship bracelet pattern belongs to the ancient family of micro-macramé textiles. As documented in historical collections at the Library of Congress folk arts archive, knotted friendship bands originated from sailors and artisans who transformed functional hitching knots into decorative personal keepsakes. Unlike machine-woven ribbons, every millimeter of a handmade friendship bracelet consists solely of interconnected double half-hitches.
A standard diamond motif is constructed from eight working strands organized symmetrically across a central dividing line. Four strands work downward from the left side, while four identical color matches work inward from the right side. The design operates like an accordion bellows: it expands outward to reveal the widest part of the diamond, then contracts inward to seal the bottom apex.
To visualize how the pattern functions, imagine the diamond divided into three distinct zones: the outer frame, the inner framing layer, and the solid center gem. Because each knot requires two consecutive half-hitches over a passive core strand, the working thread completely encases the foundation thread. Maintaining uniform tension ensures that the background threads remain hidden while the active color pops cleanly on the surface.
2. Essential Materials, Thread Selection, and Cord Sizing
Selecting suitable fiber is critical when knotting intricate geometric motifs. Low-grade craft threads frequently fray, shed lint, or vary in thickness, causing the finished diamonds to distort or cup along the margins. For clean, uniform knot definitions, always choose 100% long-staple mercerized cotton embroidery floss such as DMC Mouliné Spécial or Anchor stranded cotton.
Mercerization is a chemical treatment that smooths cotton fibers, strengthens tensile capacity, and imparts a subtle, lustrous sheen. Detailed research from the Utah State University Extension textile guides notes that high-quality mercerized cotton exhibits superior knot retention and colorfastness when subjected to daily wear and moisture. This quality ensures your handmade bracelet withstands hand washing, summer swims, and long outdoor adventures without fading or fraying.
Here is the complete supply checklist you need before casting on your project:
- Cotton Embroidery Floss: 4 skeins in complementary colors (Color A for outer frame, Color B for middle frame, Color C for inner border, Color D for center core).
- Work Surface: A stiff wooden clipboard with a firm metal clamp, or a macramé cork board with T-pins.
- Measuring Tape: Flexible tailor tape for calculating precise strand lengths.
- Embroidery Scissors: Sharp precision snips for trimming clean, unfrayed thread tails.
- Optional Accents: 4mm wooden beads or tiny brass seed beads if you wish to blend this with our DIY beaded flower bracelet tutorial techniques.
3. Aesthetic Color Palettes and Symmetrical String Setup
The visual impact of any geometric friendship bracelet relies heavily on deliberate color placement. Because the diamond pattern expands from the edges inward, high contrast between adjacent colors makes each nested diamond sharp and distinct. If your chosen colors are too similar in tone, the geometric borders blur into an indistinct gradient.
To maintain an elevated bohemian aesthetic, avoid jarring neon combinations in favor of organic, nature-inspired palettes. Consider these four curated combinations that harmonize beautifully with handmade linen attire and modern jewelry stacks:
- Earthy Desert Sunset: Raw Terracotta (A), Warm Ochre (B), Dusty Rose (C), and Unbleached Cream (D).
- Coastal Meadow: Sage Green (A), Seafoam Mist (B), Antique Ivory (C), and Pale Olive (D).
- Vintage Heirloom: Deep French Navy (A), Muted Sky Blue (B), Toasted Oatmeal (C), and Soft Ecru (D).
- Neutral Bohemian: Espresso Brown (A), Warm Taupe (B), Natural Flax (C), and Chalk White (D).
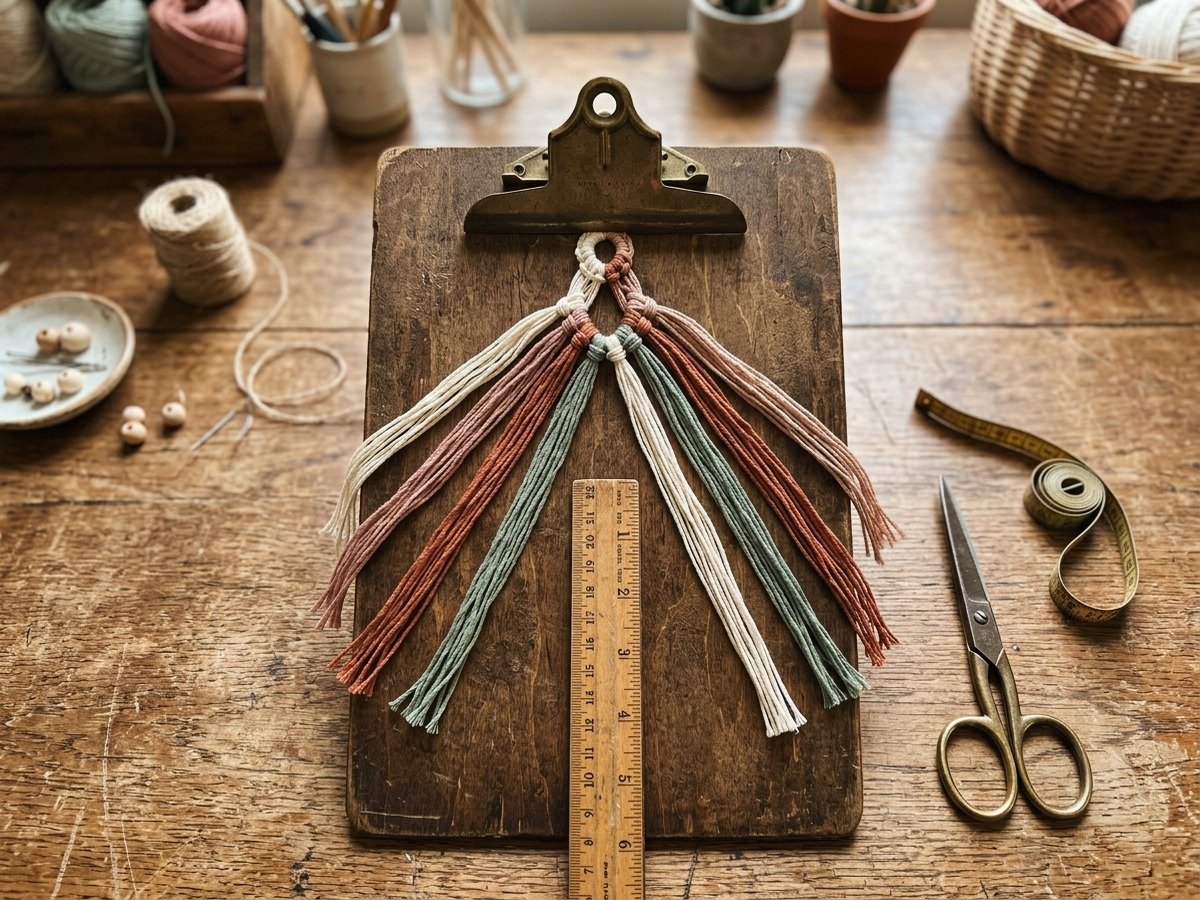
Once your colors are selected, cut one 160 cm strand of each color. Fold all four strands in half together at their center point. This creates eight working strands measuring 80 cm each with a neat fold at the top. Secure the fold under your clipboard clamp and arrange the eight strands in mirrored symmetrical order: A – B – C – D – D – C – B – A. With Strand 1 through Strand 8 laid out flat, you are prepared to tie your opening knots.
4. Step-by-Step Row-by-Row Knotting Guide
Before beginning the row sequences, remember that every knot in friendship bracelet making consists of two identical half-hitches. A Forward Knot (FK) crosses the working strand over the passive strand in the shape of a numeral 4, loops underneath, and pulls tight upward, repeated twice. A Backward Knot (BK) reverses this orientation across the passive strand in the shape of a backwards 4 (or letter P), loops underneath, and pulls tight upward, repeated twice.
Follow these detailed sequential steps to complete your initial diamond repeat:
Step 1: Starting with a Professional Teardrop Loop
Rather than beginning with a bulky overhand knot that leaves messy fringe, create a sleek teardrop buckle loop. Find the center fold of your four long strands. Take one strand and knot Chinese staircase knots or alternating half-hitches around the remaining strands for approximately 2 cm. Fold this knotted section in half to form a smooth reinforced loop, and clamp the base firmly to your board. This provides a neat anchor that pairs with braided end ties later.
Step 2: Opening the Diamond Outer Frame (Rows 1 to 3)
With your strands ordered A-B-C-D-D-C-B-A, pick up the outermost left strand (Strand 1, Color A). Tie a Forward Knot onto Strand 2 (Color B), Strand 3 (Color C), and Strand 4 (Color D). Strand A now sits in the fourth position. Next, pick up the outermost right strand (Strand 8, Color A). Tie a Backward Knot onto Strand 7 (Color B), Strand 6 (Color C), and Strand 5 (Color D). Strand A from the right now sits in the fifth position.
To complete the outer V-shape, join the two Color A strands in the center. Tie either a Forward Knot or Backward Knot using the left Color A strand over the right Color A strand. You have just formed the upper frame point of your diamond. Repeat this identical process with the new outer strands (Color B), knotting inward until they meet in the center. Finally, repeat with Color C, creating three nested V-stripes.
Step 3: Knotting the Diamond Center Core
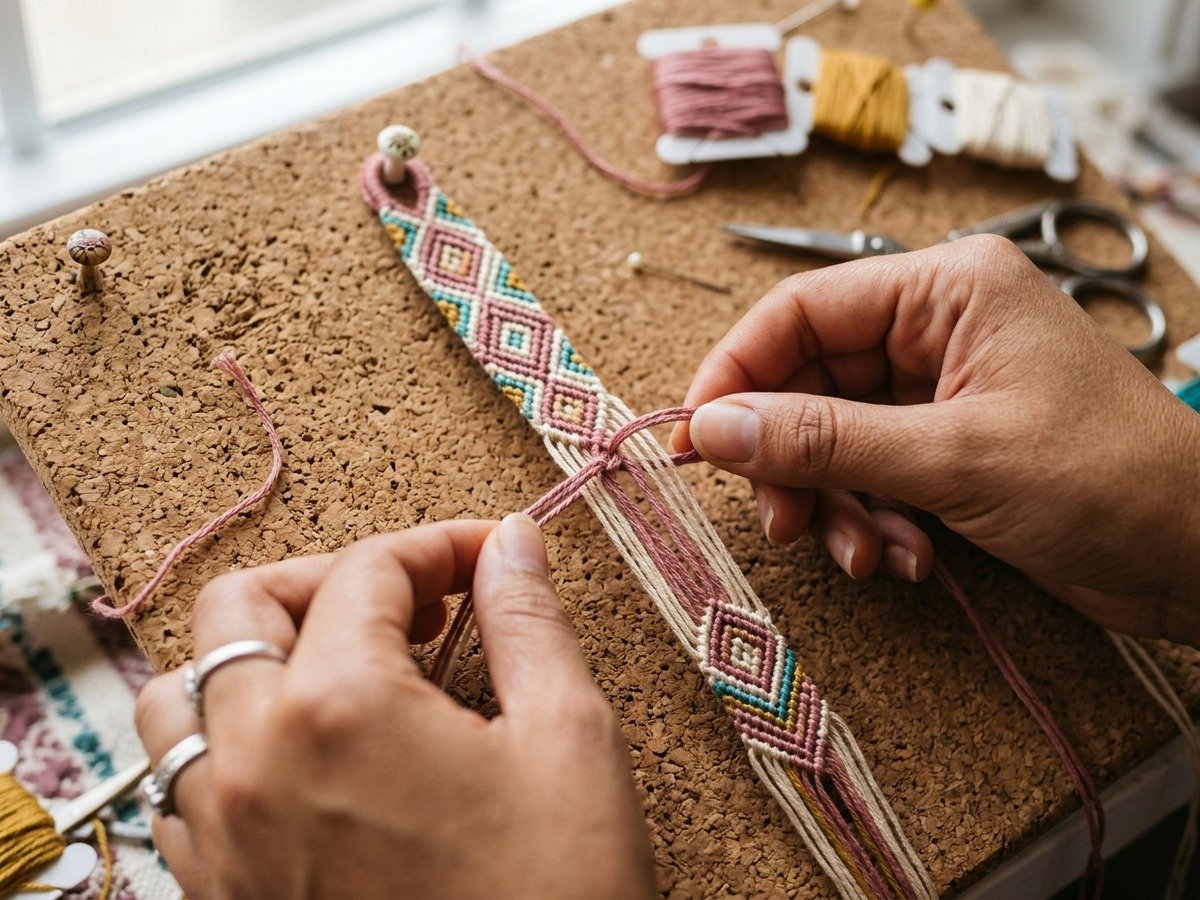
At this stage, your two innermost strands are Color D. Tie them together with a single Forward Knot in the middle. This small knot represents the very center core of the diamond jewel. If you prefer a solid center gem rather than a nested hollow outline, you can cycle several inner knots back and forth across the four interior strands before closing the walls.
Step 4: Closing the Diamond Inward (Rows 4 to 6)
Now you reverse the knotting direction to draw the borders back toward the center line. Working with the innermost border strands (Color C), tie a Backward Knot toward the outside left, and a Forward Knot toward the outside right. Next, take the next framing strands (Color B) and knot them inward toward the center to seal the middle layer.
Finally, take your outermost border strands (Color A) that define the side corners of the diamond. Work the left strand inward using three consecutive Forward Knots toward the middle. Work the right strand inward using three consecutive Backward Knots toward the middle. When both Color A strands meet at the bottom center, tie them firmly together with a Forward Knot. Your first complete geometric diamond is now locked in place.
Look closely at your strand arrangement beneath the finished motif: all eight strands have naturally reset into their original symmetrical sequence (A-B-C-D-D-C-B-A). Simply repeat Steps 2 through 4 to begin your second diamond. If you enjoy structured geometric patterns like this, you will also love exploring our free bead weaving loom patterns, which share similar symmetry principles.
5. Thread Sizing and Strand Length Reference Guide
Running short on working threads mid-pattern is one of the most frustrating crafting hiccups. Outer border strands (Color A) absorb significantly more thread than inner core strands (Color D) because they travel diagonally across multiple foundation cords. As emphasized in educational textiles guides from Penn State University Extension craft education resources, accounting for knot density and wrist circumference prevents thread shortages and ensures balanced tension.
Use the reference table below to calculate starting lengths and expected diamond repeats based on wrist sizing:
6. Pro Tips for Crisp Lines and Preventing Curled Edges
The most common grievance among crafters attempting diamond patterns is curling or cupping along the side margins. A finished bracelet should rest completely flat against your wrist without twisting into a corkscrew spiral. Achieving this crisp, tailored look requires attention to thread tension and knot alignment.
Keep these seasoned maker tips in mind as you knot each row:
- Anchor the Passive Core Strand Tightly: When tying a double half-hitch, pull the passive foundation strand straight down with steady, firm tension. Never let the passive strand buckle or curl around the active knotting strand. The active thread must slide freely around the stiff core.
- Equal Pressure on Both Halves of the Knot: Each knot consists of two hitches. If your first hitch is loose and your second hitch is tight, the knot tilts askew, creating rippling surface ridges. Snug both hitches with identical, moderate pressure.
- Move Your Working Clamp Downwards: As your bracelet grows longer, do not let your working section dangle 15 cm below the clipboard clamp. Repin or reclamp your work every two completed diamonds so your knotting line remains directly beneath the anchor point.
- Block Your Finished Band with Light Steam: When your bracelet is complete, lightly spritz it with cool water or hold a warm garment steamer 10 cm above the cotton fiber. Smooth it flat on a dry towel and let it dry overnight. This releases micro-tension in the cotton and leaves the woven band silky and pliable.
7. Beautiful Finishing Techniques: Braided Ties and Clasps
How you finish your friendship bracelet determines both its everyday durability and ease of wear. While a simple knotted knot works in a pinch, professional finishing styles refine your handmade project into wearable artisan jewelry.
Three reliable closure options suit the diamond pattern:
- Dual Three-Strand Braids with Button Knot: Divide your eight remaining tails into two equal groups of four strands. Plait each side into a tight three-strand braid (with two paired strands) measuring 10 cm. Tie an overhand knot at each tip and trim the tassel. To put the bracelet on, simply thread one braid through your starter teardrop loop and tie a comfortable bow.
- Sliding Macramé Square Knot Closure: Overlap both braided tail ends in opposite directions. Take a scrap 20 cm piece of floss and tie three square knots around both braided strands. This creates an adjustable sliding clasp that expands over the hand and tightens securely on the wrist.
- Ribbon Crimp Clasps with Lobster Claws: For a polished retail look, apply craft glue along the last row of knots, trim the excess tails flush once dry, and clamp an 8mm metal ribbon crimp over the edge. Attach a jump ring and lobster clasp for a secure, instant-on closure that pairs well with our preppy clay bead bracelet ideas in layered stacks.
Frequently Asked Questions
Why is my diamond friendship bracelet curling while I knot?
Curling almost always happens when you pull the active knotting thread sideways or tie your second half-hitch significantly tighter than your first. Keep your passive foundation strand pulled firmly downwards, snug your knots upwards with gentle even tension, and avoid over-tightening. Light steam blocking on a towel after finishing will also flatten the band.
How many strands do I need for a diamond friendship bracelet?
The classic beginner diamond pattern uses eight working strands (four colors cut to 160 cm and folded in half to create eight 80 cm strands). You can scale the pattern up to twelve or sixteen strands for wider, multi-layered diamond cuffs once you feel confident with the eight-strand layout.
What do I do if one string runs out before finishing the bracelet?
If an outer border thread runs short, cut a fresh 40 cm piece of matching floss. Lay the new strand alongside the short working tail, tie your next double half-hitch holding both strands together as one, and pull the tails to the backside of the bracelet. Continue knotting with the new strand, and weave the rear tails into the back of your work with an embroidery needle.
Can I wear my diamond friendship bracelet in the shower or swimming?
Yes. High-quality 100% mercerized cotton embroidery floss (like DMC) is colorfast and holds up well to fresh water. While water will not harm the cotton, chlorine and saltwater can gradually dull the dye sheen over several months. To extend the life and crispness of your bracelet, rinse it with fresh tap water after swimming and let it air-dry flat.

