
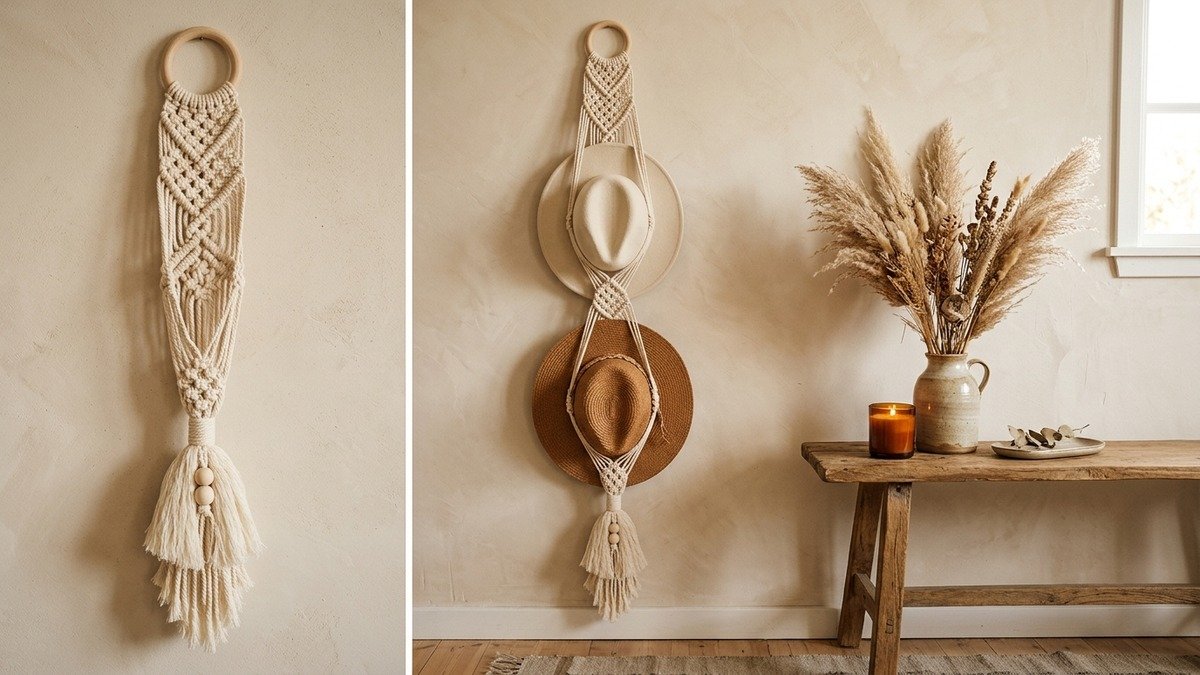
If you own wide-brim felt fedoras, summer straw boaters, or structured sun hats, you know the eternal struggle of storing them properly. Tucking them away in cramped closets crushes their delicate crowns, while flat shelves quickly run out of room. Learning how to craft a stylish macrame hat holder solves this storage dilemma while transforming your favorite headwear into an eye-catching bohemian wall display.
This vertical fiber hanger combines natural unfinished wooden rings, supple unbleached cotton cord, and sculptural knotwork to create an adjustable cradle that grips hat brims securely without leaving dents or pressure marks. Whether hung in an entryway, above a bedroom vanity, or beside a walk-in wardrobe, it brings warmth, rich organic texture, and clever vertical organization to unused wall space.
Best of all, this project is remarkably accessible for beginners. You only need to master two foundational techniques: the Lark’s Head knot and the versatile Square Knot. In under forty-five minutes, you can knot a durable, heirloom-quality hanger that holds one, two, or even three hats with graceful stability. Let us examine our materials, measure our cords, and knot your new favorite storage accent.
Quick Answer: How to Make a Macrame Hat Holder
To craft an easy macrame hat holder, mount six lengths of 4mm single-twist or 3-ply cotton cord (each cut to 4.5 meters / 15 feet) onto a 2.5-inch natural wooden ring using Lark’s Head knots, producing twelve working strands. Knot a decorative header band of alternating Square Knots measuring 8 to 10 cm in length. Separate the cords into two outer guide arms (three strands each) and a center stabilizing core (six strands), then form an open diamond cradle by joining the cords with a floating Square Knot approximately 20 to 25 cm below the header. This open loop cradles the hat crown while supporting the brim flat against the wall. Repeat the cradle sequence downward for a double or triple hat display, and finish the base with a tight Gathering Knot and a fluffy 15 cm combed tassel.
Key Project Takeaways
- ✓ Skill Level: Beginner friendly. Requires only Lark’s Head knots, Square Knots, and a Gathering Knot.
- ✓ Total Time: 35 to 50 minutes for a double-hat hanger.
- ✓ Ideal Cord Type: 4mm or 5mm cotton cord (single strand or 3-ply) provides superior grip and prevents brim slippage.
- ✓ Hat Compatibility: Fits wide-brim felt fedoras, straw sun hats, panamas, and cowboy hats ranging from 30 cm to 42 cm brim diameter.
- ✓ Estimated Cost: Under $6.00 in materials using standard cotton cord and a craft wooden ring.
1. Essential Supplies and Cord Selection Guide
Selecting the proper fiber weight is vital when making functional home organizers. While delicate 2mm string works beautifully for small accessories, a hat holder needs strong structural integrity to support heavy felt fedoras without stretching out of proportion over time.
We strongly recommend 4mm or 5mm natural cotton cord. Three-ply twisted rope offers maximum tensile strength and durability, while single-twist cord provides an ultra-soft look with a plush, brushable bottom tassel. If you want to compare how different rope constructions perform under load, explore our comprehensive guide on the best macrame cord for beginners before buying supplies.
Equally important is your mounting ring. A 2.0-inch to 2.75-inch (50mm to 70mm) natural beechwood or maple ring gives your hanger a solid anchor point that slips easily over picture nails, brass wall hooks, or adhesive command strips.
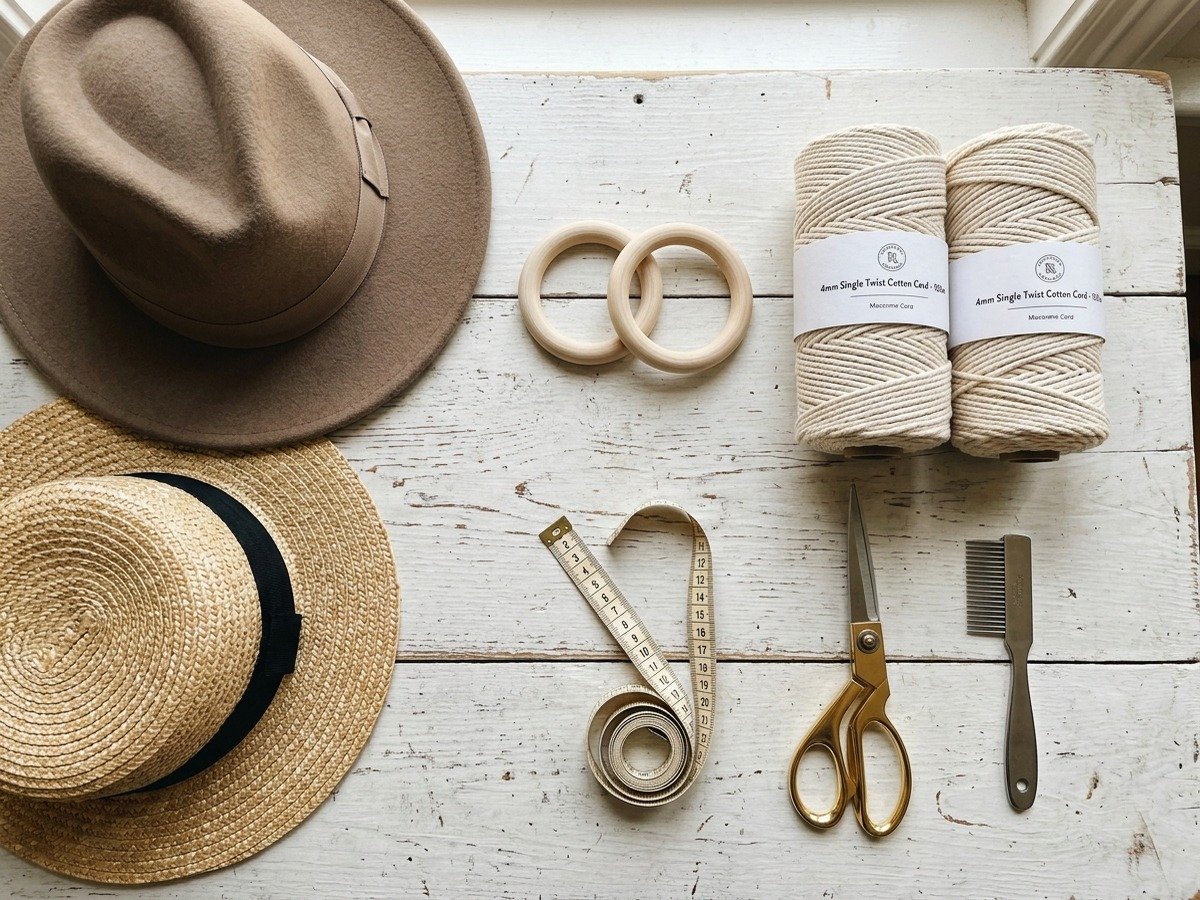
Here is the complete workbench checklist:
- Cotton Cord: 27 meters (approx. 90 feet) of 4mm single-twist or 3-ply natural unbleached cotton cord for a double-hat holder.
- Top Ring: One 2.5-inch (65mm) unfinished natural hardwood craft ring (beech or birch).
- Middle / Accent Rings (Optional): One or two 2-inch rings if you choose to separate hat tiers with wood hardware.
- Workstation Mount: An S-hook hung from a garment rack, doorknob, or wall hook to knot under comfortable vertical tension.
- Measuring Tape: Flexible sewing tape to ensure balanced cradle spacing.
- Fabric Scissors: Heavy-duty shears capable of slicing cleanly through multiple 4mm cord strands.
- Fringe Comb: Fine-tooth metal comb to fluff the bottom tassel.
- Wooden Accent Beads (Optional): Two 20mm large-hole wooden beads to decorate the bottom fringe.
2. Cord Cut Lengths and Sizing Reference Table
Cord cut lengths depend on how many hats you intend to display. Because square knotting uses a lot of rope, under-measuring cords will leave your bottom tassel skimpy or leave you short on your final cradle loop.
Use this tested cutting chart to prepare your strands for single, double, or triple vertical configurations:
3. The Two Core Knots for Hat Support
You do not need complicated knotting maneuvers to construct this piece. In fact, clean, uniform geometric knots provide the most friction against felt and straw materials.
If you want to review finger placement, take a quick look at our visual tutorial on macrame knots for beginners to ensure your tension remains rock steady. Here is how our two primary knots function in this hanger:
Lark’s Head Knot (Mounting)
Fold each cord in half, loop the center bight through the wooden ring, and pull the two tail ends through the loop. Snug the knot firmly against the wood. Six Lark’s Head knots anchor twelve balanced working cords to the base ring.
Square Knot (Sling Structuring)
Tied using four adjacent cords (two outer working cords and two center filler cords). By tying sequential square knots in alternating brick formations, you build a rigid top header and secure junction bridges that hold hat cradles open at the perfect width.
Documented maritime knot records curated by the Smithsonian Institution demonstrate that square knotting provides exceptional lateral stability under gravity loads, making it the ideal structural pattern for hanging accessories.
4. Step-by-Step Macrame Hat Holder Tutorial
Follow these step-by-step instructions to knot a double-hat holder. Suspend your wooden ring from a sturdy S-hook at eye level so your arms can work comfortably with natural vertical posture.
Step 1: Mount the Cords to the Ring
Cut six lengths of 4mm cotton cord to 4.5 meters (15 feet) each. Fold each cord exactly in half to find its center. Mount all six cords onto your 2.5-inch wooden ring using clean Lark’s Head knots. Pull each knot snug so the loops sit flat in a neat horizontal row along the bottom edge of the ring. You now have twelve downward-hanging working cords.
Step 2: Knot the Top Decorative Header Bar
Divide your twelve cords into three groups of four. Tie three Square Knots side by side across Row 1 directly underneath the ring. On Row 2, skip the outer two cords on each side and tie two alternating Square Knots across the center eight cords. On Row 3, tie one central Square Knot across the middle four cords. This creates a handsome inverted triangle header that directs downward tension cleanly into the cradle arms.
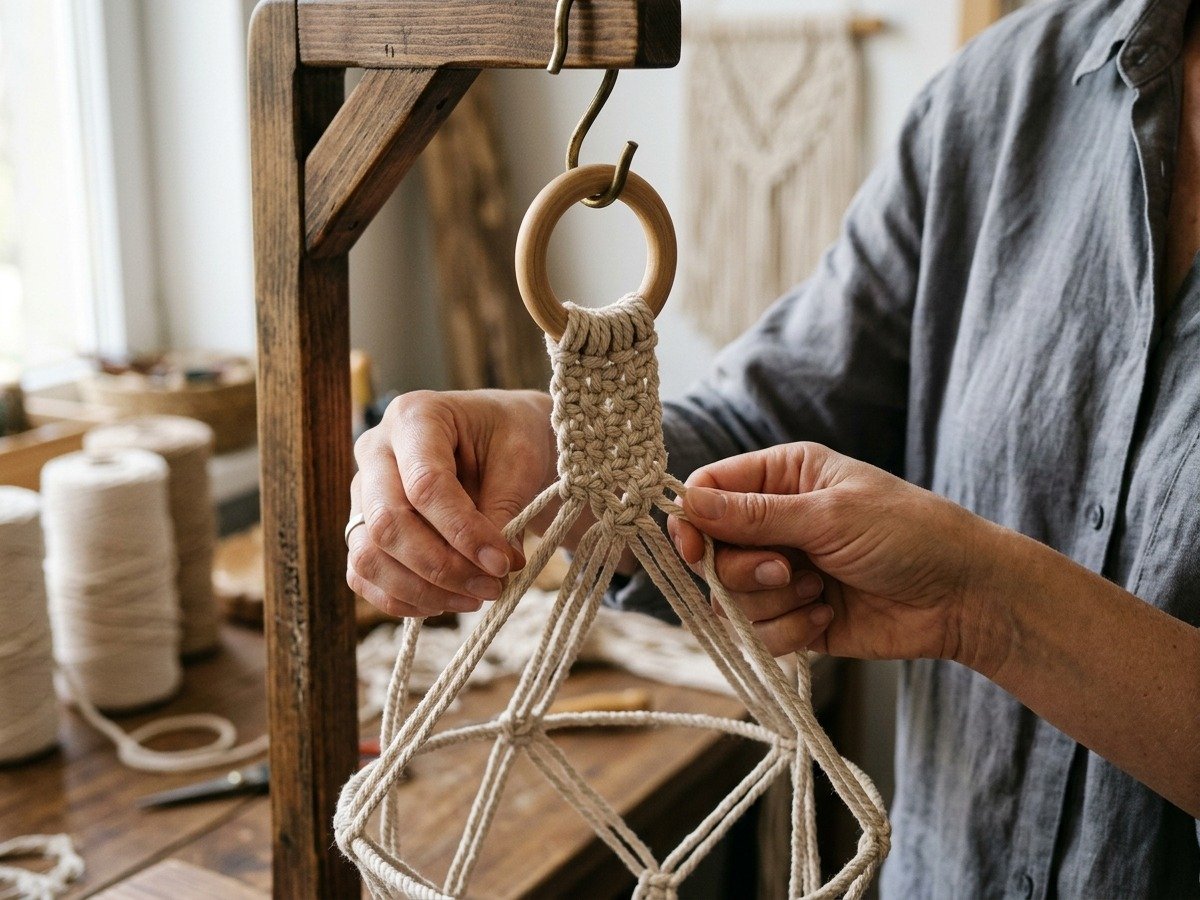
Step 3: Construct the First Hat Cradle Sling
Now we will form the opening that cradles your first hat. Take the three outermost cords on the left and three outermost cords on the right. Leave the center six cords hanging straight down as the back spine that rests flush against the wall.
On the left three cords, knot a continuous column of six half-knots to form an attractive 8 cm spiral sennit. Repeat this spiral knotting on the right three cords. Measure down 22 cm (8.5 inches) from the bottom of your header bar. Bring all twelve cords back together and tie three firm Square Knots straight across. This establishes your first cradle pocket, sized generously to hold standard hat crowns while gripping the brim securely from below.
Step 4: Knot the Intermediate Bridge Section
Directly beneath the first cradle junction, knot two rows of alternating Square Knots to form a sturdy 6 cm intermediate bridge. This decorative spacer keeps the first and second hats from overlapping clumsily, ensuring both headpieces remain visible and fully displayed.
Step 5: Form the Second Hat Cradle
Repeat the cradle process: separate the outer three cords on each side, leaving the center six cords as the rear wall spine. Knot spiral sennits or straight square knot bars along the outer arms for 22 cm, then reunite all twelve cords with two rows of tight Square Knots to close the second hat pocket.
Step 6: Finish with a Gathering Knot and Combed Tassel
Gather all twelve tail strands into a neat bundle directly below the final knot row. Take a separate 60 cm scrap cord and tie a classic 4 cm Gathering Knot around the bundle, pulling the hidden loop firmly inside before trimming the tag ends flush. Slide two 20mm raw wooden beads onto center cords if desired, then trim the fringe to 15 cm. Brush the cotton fibers out with your wire fringe comb to create a full, bohemian tassel hem.
5. Wall Display Styling and Hat Preservation Tips
One of the greatest benefits of this macrame design is hat preservation. Traditional metal hat hooks exert concentrated pressure on a single point of the crown, causing permanent dimples and distorting wool felt over time. By contrast, our macrame cradle distributes weight across the entire lower brim circumference.
To display your hats without brim curling, always insert hats crown-first through the open front loop so the back of the brim rests flat against the wall. The front cords support the lower dip of the brim, holding the hat upright through gentle friction. Research on agricultural fiber resilience from Penn State Extension demonstrates that natural cotton rope maintains consistent frictional grip without abrading delicate straw weaves or dyed wool fibers.
For an elevated bedroom or entryway aesthetic, mount your hat holder alongside complementary textured wall pieces like our macrame mirror diy or a rustic timber shelf from our macrame floating shelf with a board tutorial. The combination of natural fibers, warm wood tones, and sculptural headwear creates an intentional boutique vignette.
6. Three Design Variations for Every Decor Style
Customize your hat holder to match your home aesthetic with these three designer variations:
Variation A: Multi-Ring Hardware Link
Instead of knotting a continuous rope bridge between hat tiers, insert a second 2-inch wooden ring between the upper and lower cradles. Tie off the top cradle onto the ring with Lark’s Head knots, then mount fresh cords below. The exposed timber rings add striking Scandinavian geometric rhythm.
Variation B: Two-Tone Terracotta & Ivory
Combine four strands of unbleached natural ivory with two strands of warm terracotta or sage green cord. Mount the colored strands on the outer edges so the spiral sennits frame your hats with earthy contrasting borders. If you love wall art patterns, review our guide on how to make a macrame wall hanging for beginners to experiment with color blocking.
Variation C: Triple Hat Vertical Tower
For serious hat collectors, cut six 6.0-meter strands and knot three consecutive 22 cm cradles down a single column. The finished 175 cm (69 inch) hanger makes a dramatic vertical statement in high-ceiling hallways or beside tall wardrobe armoires. Material research published by the Textile Society of America confirms that multi-ply twisted cotton cords distribute vertical load evenly across knotted junctions, easily supporting three full-sized headpieces indefinitely.
Frequently Asked Questions
Will a macrame hat holder bend or damage my hat brims?
No. Unlike sharp wall hooks that create localized pressure dents in hat crowns, a macrame cradle supports hats along the wide curve of the lower brim, distributing weight evenly and preserving original crown shaping.
What size wooden ring should I use for the top hanger?
A natural hardwood ring with an outer diameter of 2.0 to 2.75 inches (50mm to 70mm) is ideal. It provides ample interior room for six Lark’s Head knots while slipping easily over standard wall hooks and picture nails.
What thickness of macrame cord works best for hat holders?
A 4mm or 5mm cotton cord is strongly recommended. This diameter provides the necessary tactile friction and structural strength to grip straw and felt brims securely without sagging under weight.
How long does it take to make a DIY macrame hat holder?
A single-hat holder takes approximately 25 to 30 minutes to complete, while a double-hat display takes roughly 40 to 50 minutes from cord cutting to final fringe trimming.
Can this holder accommodate baseball caps or beanies?
While this pattern is designed for wide-brim hats (fedoras, sun hats, panamas), you can adapt it for baseball caps by reducing cradle spacing from 22 cm to 14 cm and using wooden pegs or brass clips along the cord arms.
Making your own macrame hat holder is one of the most practical and satisfying weekend crafts you can tackle. In less than an hour, a spool of cotton rope and a wooden ring turn into a functional statement piece that protects your hats while adding genuine handmade warmth to your home. Hang your ring from an S-hook, keep your square knots even, and enjoy showcasing your favorite hats on the wall.

