
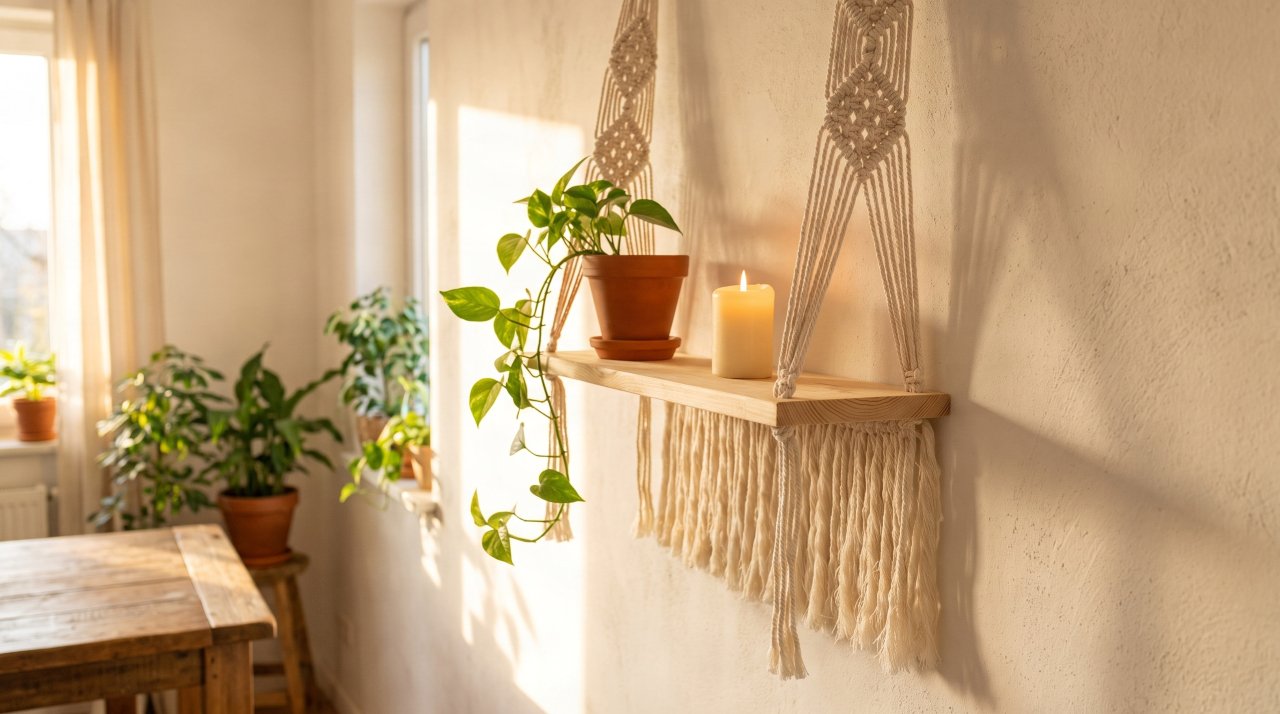
Most macramé floating shelf tutorials skip the one detail that actually matters: how to keep the wooden board level once it’s threaded onto the cords. You follow every step, hang it on the wall, and within a day the board has tilted, the cords have shifted, and anything sitting on it slides to one end. That’s not a skill problem. It’s a measurement problem that the tutorial never addressed.
This macramé floating shelf guide fixes that. You’ll get the exact cord lengths for a standard 60cm board, the right knot placement to lock the board in position, and the single hanging test that tells you if the shelf is level before you commit to the wall. It takes two to three hours for a first attempt, so give yourself a full afternoon rather than an evening. The macramé feathers tutorial on the blog is a good warm-up project if you haven’t worked with macramé cord before.
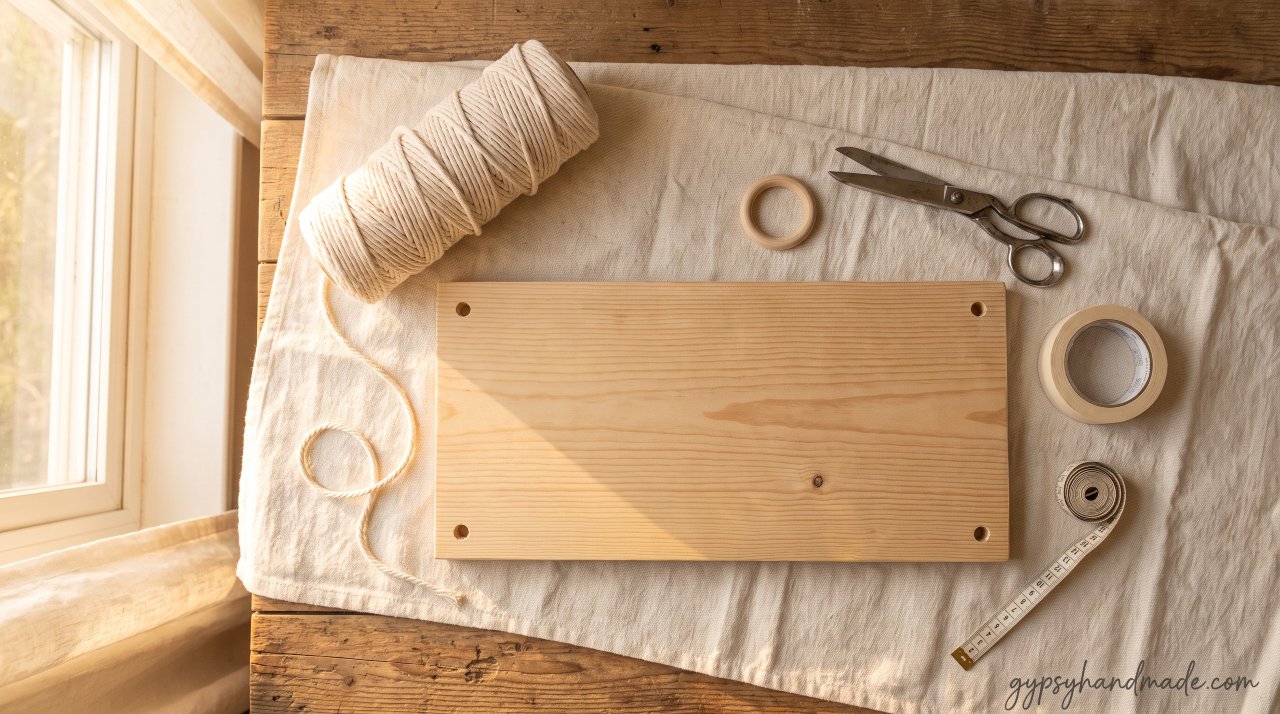
What You Need
Board:
- 1 wooden board, 60cm x 15cm x 1.8cm (pine or poplar, pre-sanded) or a natural-edge live edge board cut to size
- 4 drilled corner holes, 8-10mm diameter, positioned 2.5cm in from each corner
- Most hardware stores will cut and pre-drill the board to your exact measurements for a small fee. Bunnings has a full timber cutting and drilling service if you need it done before you start.
Cord:
- 4mm single-strand natural cotton macramé cord (not braided – single-strand holds knots tighter)
- Total cord needed: approximately 32 meters for a standard one-shelf hanger at 80cm drop height
Hardware:
- 1 wooden ring, 8cm diameter, or a 30cm wooden dowel (both work)
- 2 sturdy wall hooks rated for at least 5kg each
Tools:
- Measuring tape
- Sharp scissors or rotary cutter
- Masking tape (wrap around cord ends before threading through holes)
- A spirit level
- A clothes rail or curtain rod to hang the project while working
Optional:
- 220-grit sandpaper to smooth drilled hole edges before threading
- Beeswax block to run the cord through before threading for easier sliding
1: Cut and Prepare Your Cords
Why this step matters: Cutting cords too short is the single most common reason a macramé shelf project fails mid-way. You cannot add length once a cord is cut, and running out of cord 10cm above the board means starting over.
For a shelf hanging at 80cm from ring to fringe, cut the following:
- 8 cords at 4 meters each (these become the 4 hanging pairs, one pair per corner hole)
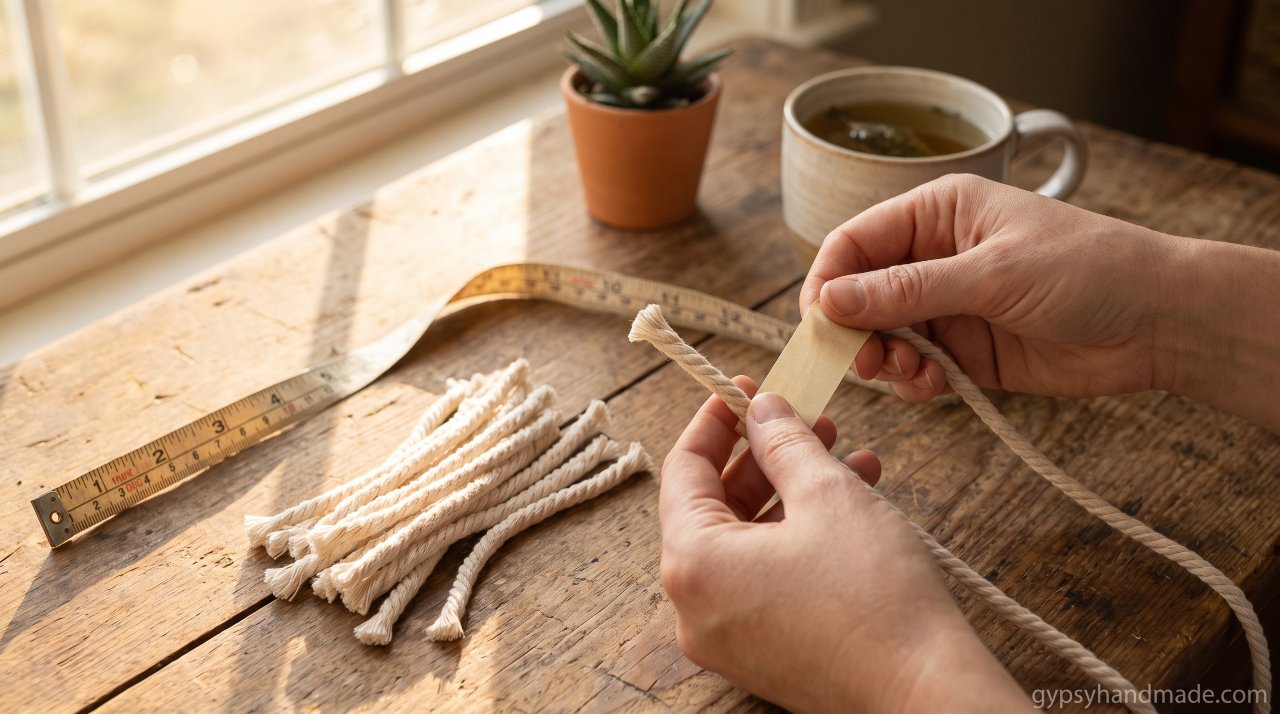
Fold each cord in half. The fold becomes the lark’s head knot point. Each working cord will be 2 meters long after folding, which gives you enough length for the decorative knotting plus the board threading plus 20-30cm of fringe at the bottom.
Wrap a 3cm strip of masking tape tightly around each cord end. This stiffens the tip and lets it pass through the 8-10mm drilled holes without fraying or bunching.
What it looks like when done correctly: 8 cords cut cleanly to exactly 4 meters, ends taped, folded in half and grouped into 4 pairs. Each pair will go through one corner hole.
2: Attach Cords to the Ring With Lark’s Head Knots
Why this step matters: The ring is your anchor point. How evenly you space the cords here determines how balanced the shelf hangs before you’ve tied a single knot below.
Hold the ring in front of you. Take one folded cord pair, place the folded midpoint over the top of the ring, pull both loose ends down through the loop, and tighten. That’s one lark’s head knot. Repeat with all four cord pairs, spacing them evenly around the bottom arc of the ring – not around the full circumference. All four pairs should sit within the bottom 120 degrees of the ring so the cords hang straight down rather than fanning outward.
Most common mistake here: Spreading the cords too far around the ring, which causes the outer cords to angle away from the wall instead of hanging straight. Keep all four pairs within the lower third of the ring.
3: Work the Decorative Knots
Why this step matters: The decorative section above the board is what makes this a macramé piece rather than a plain cord hanger. But it also sets the shelf height, so you work top-down and stop at the right point.
Hang your ring from a clothes rail now. Working with cords hanging freely is far easier than working flat on a table because you can see how the cords are behaving under their own weight.
Separate your eight cords into two groups of four (left side and right side). Within each group of four, work alternating square knots for 15-20cm. This creates the decorative ladder pattern visible above most macramé shelves. If you need a step-by-step visual for the alternating square knot before you start, Macramé School’s free knot library is the most reliable reference available online. You can also use the macramé curtains guide on this blog for the same knot shown in context.
Stop your knotting at the point where you want the top surface of the shelf to sit. For an 80cm total drop, stop at around 45-50cm below the ring. This leaves enough cord below for the board threading and fringe.
What it looks like when done correctly: Two symmetrical columns of alternating square knots, equal in length on both sides, with cords hanging freely and evenly below.
4: Thread the Board Onto the Cords
Why this step matters: Threading is where most beginners lose board position. If you thread before tying your position knots, the board slides freely and will never stay level.
Do not thread the board yet. First, tie a temporary overhand knot in each of the 8 cords at exactly the same distance from the ring – use a measuring tape and mark with a small piece of masking tape on each cord at the 50cm point. These marks show you where the board’s top surface will sit.
Now thread: push the two cords of each pair through one corner hole (both cords from the same pair go through the same hole). The masking tape on the cord ends helps slide them through cleanly. Pull the cords through until the marked point sits flush at the top of the hole.
Remove the temporary knots and masking tape marks once all four corners are threaded.
5: Tie the Locking Knots Under the Board
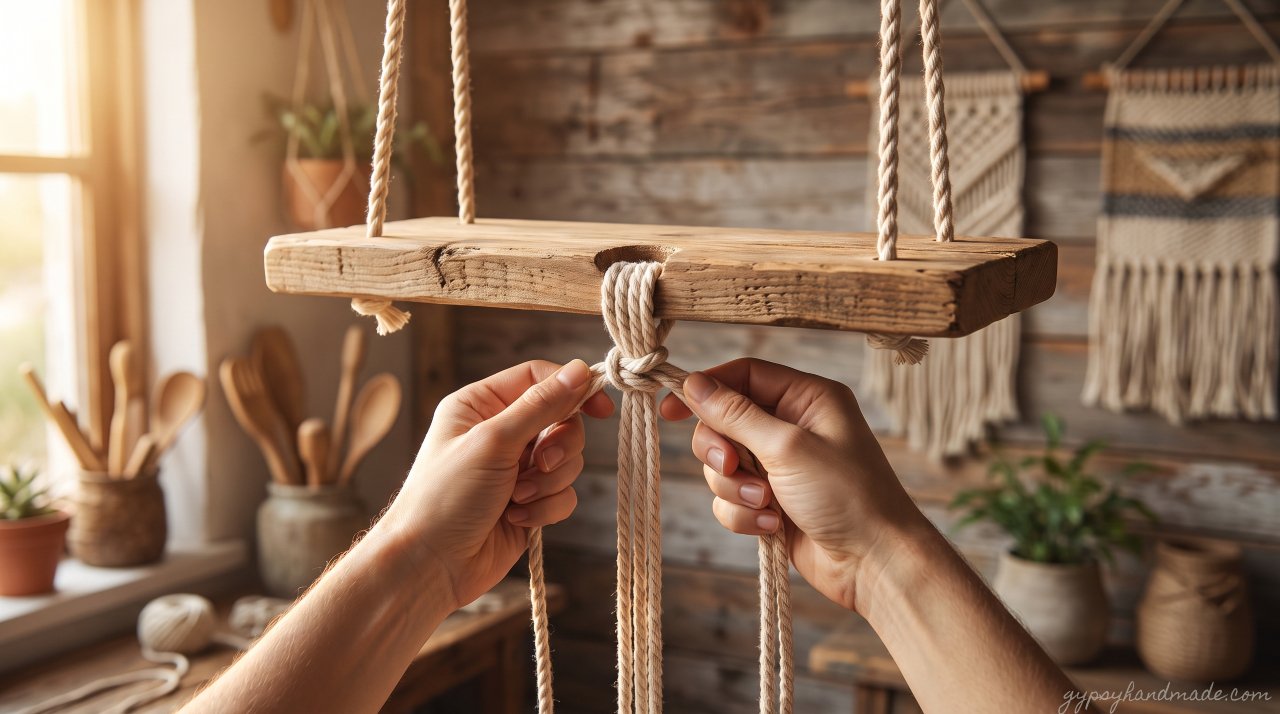
Why this step matters: These are the knots that hold the board at the correct height and stop it from sliding. Getting them at exactly the right position is what separates a shelf that stays level from one that tilts within a week.
With the board hanging on the cords and your project still on the clothes rail, use a spirit level held flat against the board surface. Adjust the board up or down on each cord pair until the bubble centers.
Once the board is level, tie a firm gathering knot (also called a wrapping knot) directly under each corner hole, using the excess cord length. Pull it tight against the underside of the board. The gathering knot should sit flush against the wood with no gap. Tie a second overhand knot below each gathering knot as a backup stopper.
Most common mistake here: Tying the knots while the project is lying flat on a table. The cords behave differently under gravity. Always tie the locking knots with the piece hanging vertically.
6: Finish the Fringe
Why this step matters: The fringe length affects the visual weight of the shelf. Too long and it overwhelms the board; too short and it looks unfinished. Aim for 15-20cm of fringe below the lowest knot.
Trim all eight cord ends to an even length using sharp scissors or a rotary cutter against a straight edge. For a clean finish, cut straight across. For a boho look, cut at a slight angle or trim into a soft V-shape. Unravel the last 5cm of each cord end by separating the plies and combing through them with a stiff-bristle brush or a pet slicker brush. This creates the fluffy fringe that photographs well and is the finishing signature of a polished macramé piece.
7: Hang and Load-Test Before Decorating
Why this step matters: A macramé shelf that holds a candle is not the same as one that holds a 500g plant. Testing before you load it with decor tells you if your wall anchors are strong enough and if the knots are holding position.
Mount your two wall hooks at the correct distance apart (match the width of your hanging ring or dowel). Hang the shelf. Hold a spirit level against the board one final time and adjust wall hook height if needed. Leave the shelf empty for 24 hours. Check that no knots have slipped and the board is still level before placing anything on it.
Once confirmed level, the shelf holds plants, small ceramics, candles, and trailing pothos cuttings without issue. A 60cm pine board at 1.8cm thickness holds up to 3-4kg distributed weight when the wall anchors are correctly rated.
Common Mistakes (and How to Fix Them)
The board tilts to one side. This means the locking knots under two of the four corners are at different heights. Remove the lower-side gathering knots, slide the board up on those cords, re-level with a spirit level, and re-tie.
The cords keep slipping through the holes. The board holes are too large for the cord weight. Tie an extra overhand knot on top of the gathering knot to create a thicker stopper, or add a large wooden bead onto the cord below the board as a physical stop.
The decorative knotting looks uneven between left and right. This is almost always a tension issue, not a knot structure issue. After every three rows of alternating square knots, hold the project out at arm’s length and compare the two sides. Correct tension by pulling each knot slightly tighter or looser before moving on.
The fringe looks stringy rather than fluffy. The cord wasn’t unraveled far enough. Undo the last 8cm of each cord ply fully and comb through the fibers again. Single-strand cotton cord requires more combing than braided cord to achieve the full, soft fringe look.
Frequently Asked Questions
What size wooden board works best for a macramé floating shelf?
A board between 50cm and 70cm long and 12cm-18cm wide is the most practical range. Narrower than 12cm doesn’t hold much; wider than 18cm and the weight increases enough to require heavier cord (5mm instead of 4mm) and rated wall anchors rather than standard picture hooks.
What cord thickness should I use for a macramé floating shelf?
4mm single-strand cotton cord is the standard for a functional shelf. It’s thick enough to hold the board securely, fine enough to create tidy knots, and available at most craft stores. 3mm cord works for decorative-only shelves holding lightweight items like small candles. Avoid braided cord for this project as it slips through knots more easily than single-strand.
Do I need to drill holes in the wooden board?
Drilling holes is the most reliable method for keeping the board level and locked in place. The cradle method (where the board rests in a knotted net) works but is harder to level and tends to shift over time. If you don’t have a drill, a hardware store can drill the four corner holes for a small fee.
How much weight can a macramé floating shelf hold?
With correctly rated wall anchors (not standard picture hooks), a 60cm pine board on 4mm cotton cord holds 3-4kg distributed weight safely. Never place a single heavy item at the center; always distribute weight toward the corners where the cord support is.
Can I make a macramé shelf without a wooden ring?
Yes. A 30cm natural wooden dowel works just as well and gives a wider top anchor point, which some find easier to balance. Attach the cords using the same lark’s head knot method, spacing the four cord pairs evenly along the lower half of the dowel.
Ready to Hang It?
The leveling step is what most tutorials rush past, and it’s the one that makes every other effort worth it. Take your time on Steps 5 and 7, use a spirit level both times, and this shelf will stay exactly where you put it.
Once your shelf is up, a trailing pothos or a small macramé plant hanger hung from the same wall section creates a cohesive, layered look that photographs well for Pinterest. The macramé plant hanger guide walks through a beginner-friendly version that pairs well with this shelf. Save this tutorial to your macramé Pinterest board before you start so the cord measurements are easy to find when you’re at the craft store.
