
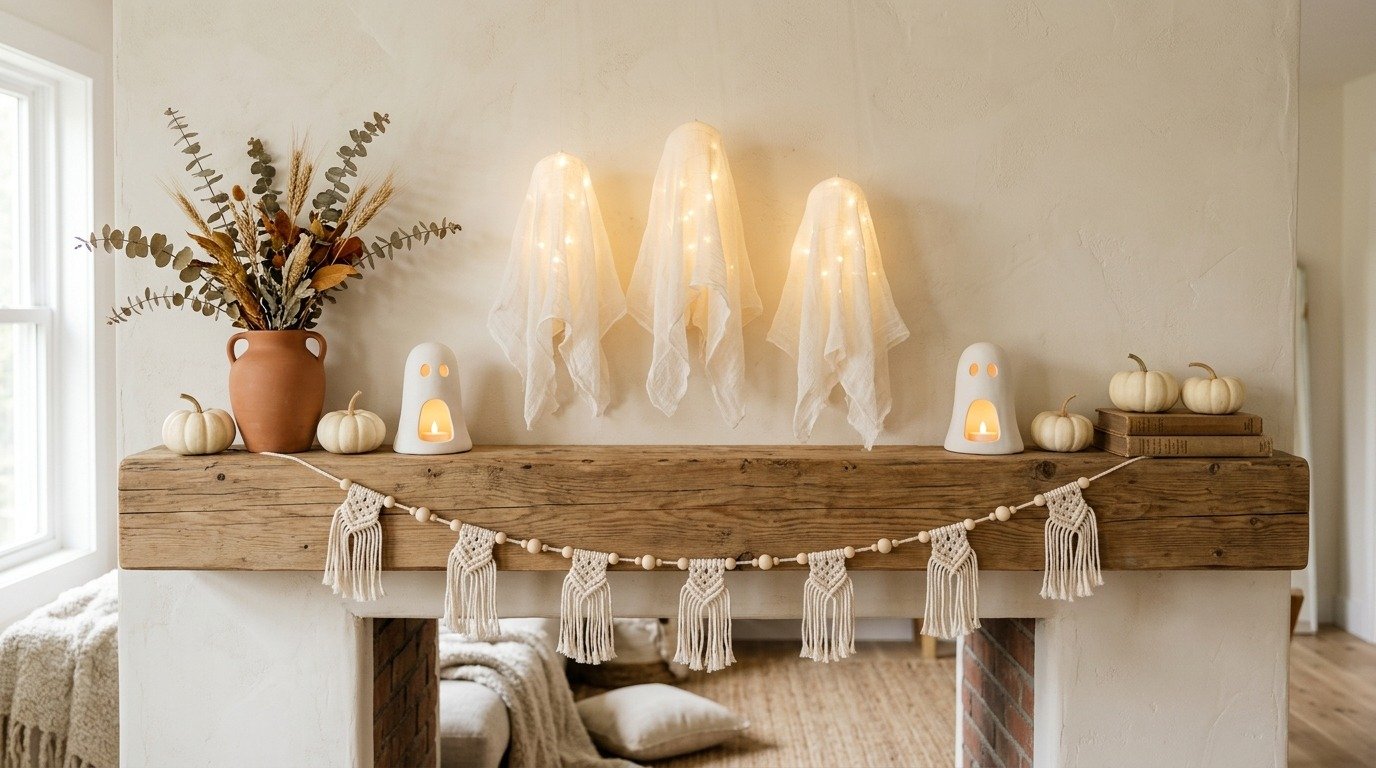
When autumn rolls around, our homes naturally transition toward layered textures, amber lighting, and nostalgic seasonal accents. Yet for years, holiday decor felt divided into two extremes: either brightly colored plastic novelties that clashed with earthy home decor, or hyper-realistic gore that felt far too intense for a peaceful living room. Fortunately, modern maker culture has sparked an aesthetic revolution. Handcrafted diy ghost decorations offer the perfect bridge between playful autumn folklore and refined, modern bohemian interior styling.
By relying on organic textures like raw cotton rope, natural linen, unbleached cheesecloth, air-dry terra-cotta clay, and birch wood beads, you can craft whimsical ghosts that feel completely at home alongside your everyday decor. Whether you want to drape ethereal floating spirits along your fireplace mantel, string a textured macrame ghost garland across a console table, or illuminate your coffee table with glowing ceramic luminaries, these projects prove that seasonal crafting can be both budget-friendly and visually stunning.
Quick Answer: How to Make Aesthetic DIY Ghost Decorations
To make aesthetic DIY ghost decorations on a budget, blend tactile natural fibers like unbleached cheesecloth, macrame cotton rope, and raw air-dry clay with warm LED illumination. The easiest beginner project is the floating cheesecloth ghost, created by draping cotton fabric soaked in fabric stiffener or cornstarch solution over a round form. Pair these floating spirits with wooden bead tassel ghost garlands and sculpted clay tea light holders to build an organic, modern bohemian autumn aesthetic that feels cozy, warm, and sophisticated rather than cheap or overly spooky.
Why Handmade Aesthetic Ghost Decor Outshines Store-Bought Plastic
Store-bought seasonal decorations often carry steep markups, fragile synthetic materials, and a cookie-cutter appearance that feels disposable. When you craft your own ghost decor at home, you unlock several major creative advantages:
- Harmonious Color Palette: Instead of stark fluorescent whites, you can work with soft oatmeal, warm ivory, unbleached cotton, and muted terracotta tones that seamlessly blend into your existing autumn textiles.
- Budget-Friendly Materials: Most of these DIY projects utilize basic household staples like cornstarch, scrap fabric, embroidery floss, and dollar store craft basics, costing just a fraction of boutique retail prices.
- Custom Scale and Sizing: Whether you need a towering statement piece for your front entryway or tiny two-inch ghost charms for your tiered tray, crafting allows you to scale every project to fit your exact living space.
- Mindful, Tactile Crafting: Working with natural fibers, knotting soft cord, and sculpting malleable clay provides a deeply relaxing seasonal ritual that brings true warmth and personality into your living space.
Before diving into our fifteen featured ideas, it helps to keep general safety in mind when styling decorative paper and textiles. Because these projects feature lightweight cotton, linen, and paper mache, the National Fire Protection Association candle safety guidelines recommend using flameless battery-operated LED tea lights rather than open flames to prevent accidental heat ignition around delicate seasonal fabrics.
15 Curated DIY Ghost Decor Concepts for a Cozy Autumn
1. Classic Floating Cheesecloth Ghosts (The Stiffened Fabric Method)
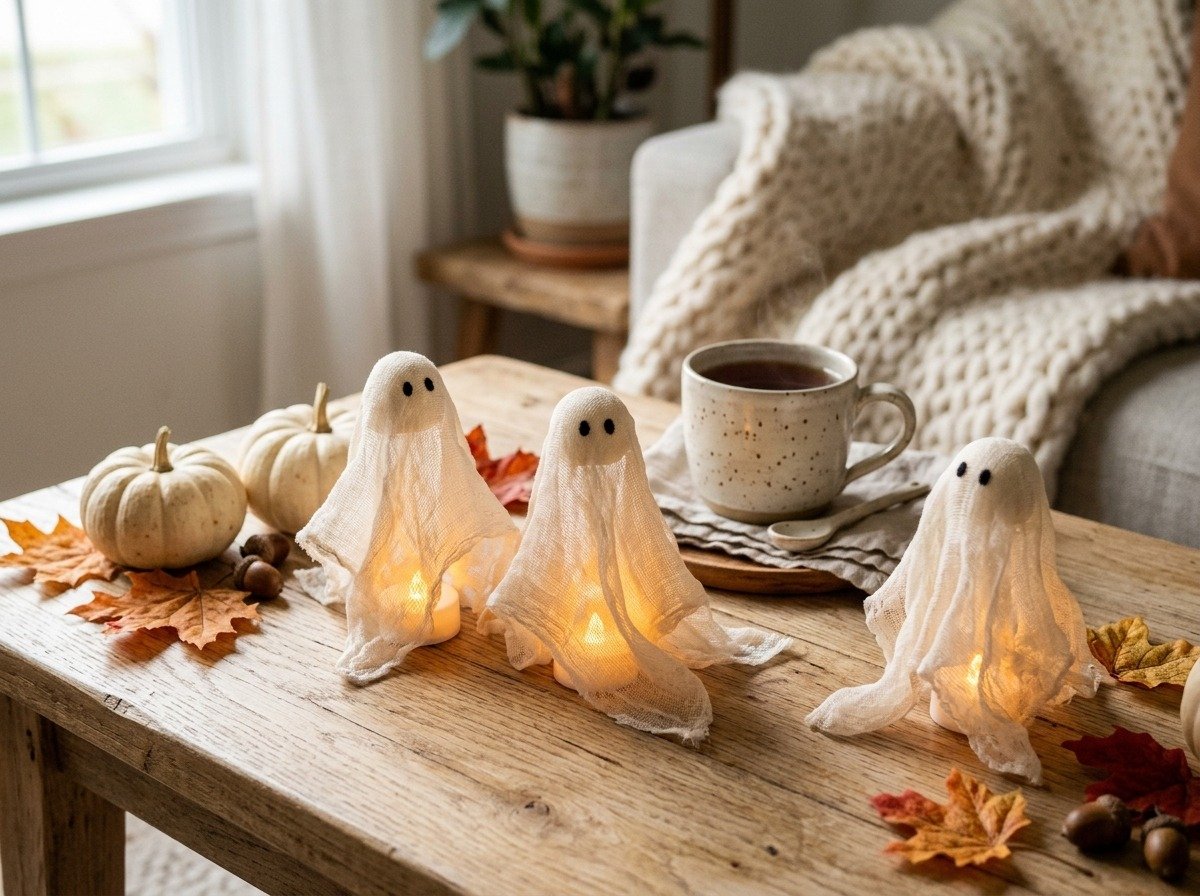
The floating cheesecloth ghost is a timeless seasonal centerpiece that looks remarkably high-end when crafted with attention to draped silhouettes. By saturating open-weave cotton cheesecloth in a liquid stiffening bath, you freeze flowing fabric in mid-air, creating a freestanding spirit that appears to glide across tabletops.
Supplies Needed:
-
Grade 50 or 60 unbleached cotton cheesecloth (3 to 4 yards)
-
Fabric stiffener (Mod Podge Stiffy or an equal mixture of liquid craft glue and warm water)
-
Molding forms: Small plastic water bottles, balloons, or foam craft balls mounted on wooden dowels
-
Small sheet of parchment paper or wax paper
-
Battery-operated LED tea lights or warm micro fairy lights
-
Black wool felt or black acrylic paint for subtle eyes
Step-by-Step Instructions:
- Build the Armature: Set a small bottle on your work table and secure a foam ball or inflated water balloon to the top opening with painter tape. Extend two pipe cleaners outward from the neck if you want your ghost to have expressive, outstretched arms.
- Cut the Fabric Layers: Cut your cheesecloth into two or three square sheets per ghost, roughly 14 inches square. Staggering multiple lightweight layers creates greater depth and opacity than a single thick piece.
- Soak and Drape: Submerge the fabric squares completely in your stiffener mixture until thoroughly soaked. Squeeze out excess liquid gently so it does not drip excessively. Drape the first layer over the form, smoothing it down over the rounded head and coaxing the hemline into soft, cascading ripples at the base. Layer the second square diagonally across the first.
- Allow to Cure Completely: Let the ghost dry undisturbed for 18 to 24 hours. Once rigid to the touch, gently wiggle the bottle and balloon loose from the hollow interior.
- Illumination: Place a warm battery-powered flicker candle beneath the hollow base. The translucent open weave catches the golden glow beautifully, casting delicate shadows across your surface.
2. Natural Starch and Cornstarch Eco-Friendly Ghosts
If you prefer an all-natural, biodegradable stiffening method that avoids synthetic polymers, a traditional boiled cornstarch solution works exceptionally well. As detailed in educational resources on natural adhesives from Penn State University Agricultural Extension, natural starch pastes form resilient crystalline bonds upon dehydration, providing strong structural rigidity to cellulose fibers like cotton and linen.
To make the starch bath, whisk two tablespoons of cornstarch into a quarter cup of cold water until smooth. Pour this slurry into one cup of boiling water, stirring constantly over medium-low heat until the mixture turns clear and thickens to the consistency of warm gravy. Let it cool to lukewarm before soaking your cheesecloth. This non-toxic technique produces a soft, chalky matte texture that complements rustic country and farmhouse autumn styling.
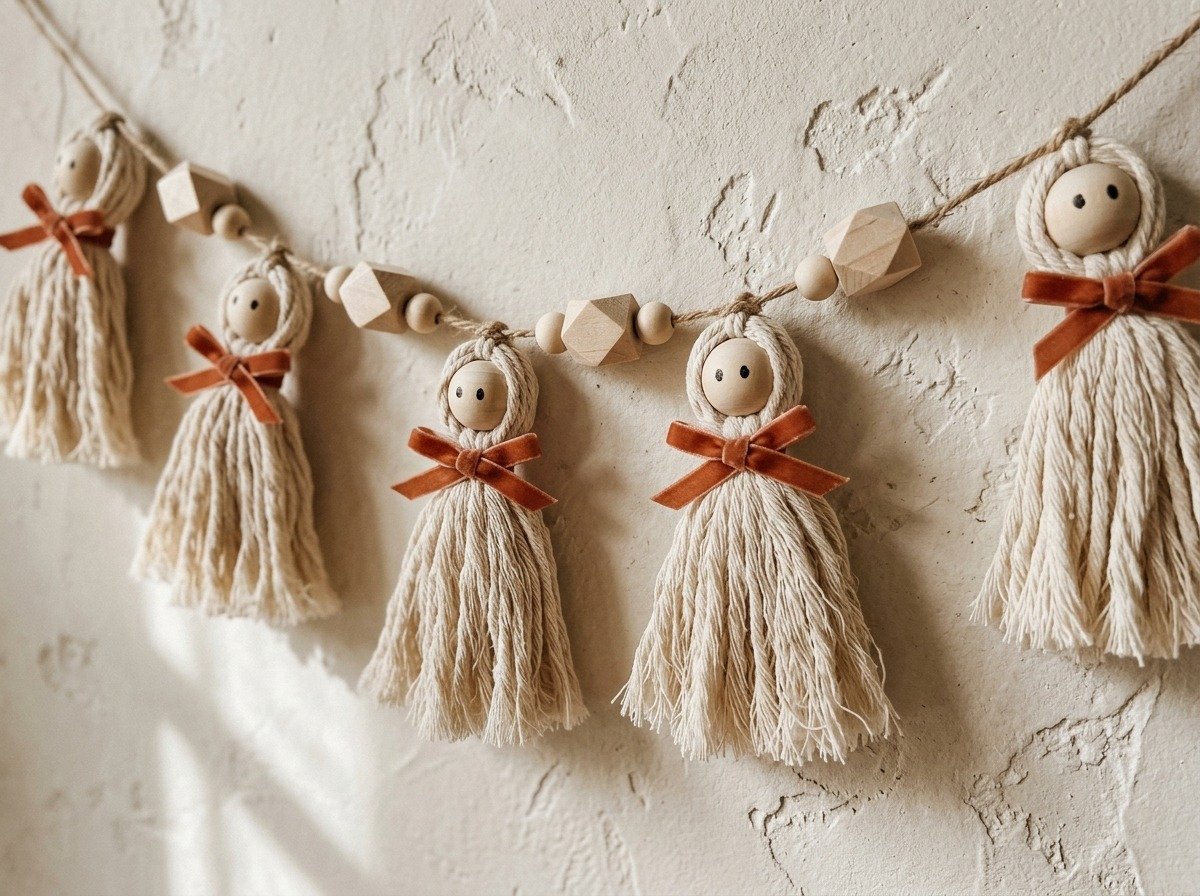
3. Macrame and Yarn Tassel Ghost Garland
Garlands are among the most versatile decorative elements you can create because they bring rhythm and vertical interest to bare walls, staircases, and mantels. Pairing this project with our popular guide on aesthetic DIY fall garland ideas lets you coordinate textures across your entire living area.
Supplies Needed:
-
4mm single-twist unbleached cotton macrame cord or chunky cream wool yarn
-
1.5-inch unfinished round wooden beads (with large center holes)
-
Fine-tip black archival marker or black fabric paint
-
Jute twine or cotton baker twine for the garland stringer
-
Assorted geometric wood spacer beads (12mm to 20mm)
-
Sharp fabric shears and a wire fringe comb
Assembly Method:
- Form the Body Tassel: Wrap macrame cord around a 7-inch piece of cardboard roughly 25 to 30 times. Cut the loops at one end to yield equal strands.
- Attach to the Bead Head: Thread a folded 12-inch hanging loop through the center of your wooden bead. Slip the bundle of cut cords through the loop, pull tightly to anchor against the bead base, and cinch with a neat gathering knot around the neck.
- Fringe and Fluff: Gently brush out the cotton cord ends with a comb to produce a wispy, cloud-like skirt. Trim the bottom hem straight or in a soft downward arch.
- Add Sweet Facial Details: Using your black marker, draw two clean oval dots for eyes. Keep the expression minimal and sweet.
- String the Garland: Thread your finished ghosts onto a 6-foot length of jute twine, spacing them evenly between raw wooden geometric beads and mini dried cinnamon sticks.
4. Air-Dry Clay Ghost Tea Light Luminaries
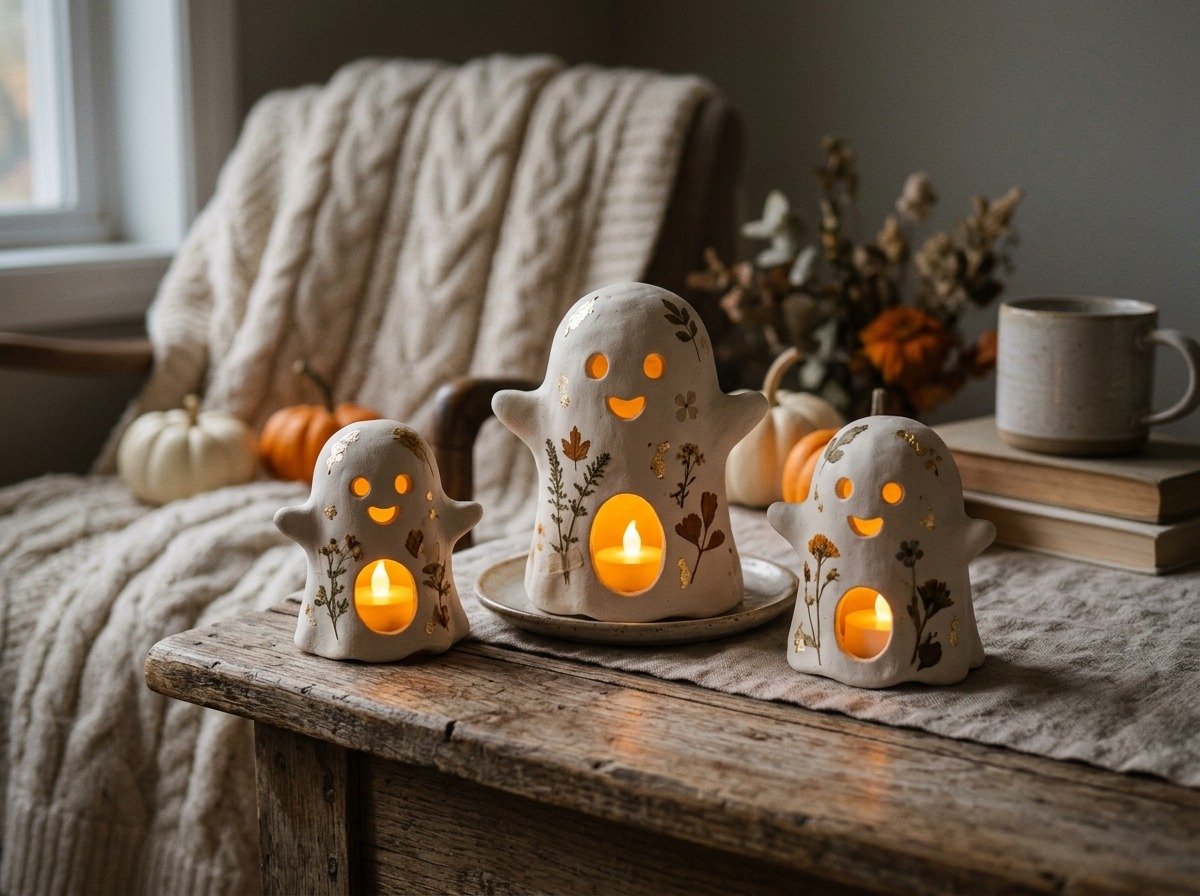
Sculptural clay accents bring tactile weight and artisanal charm to shelves, nightstands, and coffee tables. Sculpting small ghost luminaries out of white air-dry clay requires zero pottery experience, making it one of the most satisfying beginner projects of the season.
Supplies and Technique:
Knead a palm-sized portion of premium white air-dry clay until soft and pliable. Roll it out between two sheets of parchment paper to an even quarter-inch thickness using a rolling pin. Drape the flattened clay circle over an inverted small juice glass or silicone dome form, gently pinching the edges into organic folds that billow outward like fabric.
Use a craft scalpel or drinking straw to punch out circular eyes, an open mouth, or even delicate star perforations along the body. Once the clay has dried solid (typically 48 to 72 hours), sand any rough edges with a fine 220-grit sanding sponge. You can elevate the piece further by using a touch of craft decoupage to adhere pressed dried autumn botanicals like mini ferns or gold leaf flakes across the ghost cloak. Insert a battery-powered tea light inside to cast playful glowing silhouettes across the room.
5. Terracotta Flower Pot Painted Ghosts
Inverted clay planters provide instant structural support for charming tabletop spirits. Select tiny 3-inch or 4-inch standard terracotta pots from your local garden center. Apply two smooth coats of warm ivory or chalky linen craft paint across the exterior, allowing the earthy terracotta texture to peek through slightly around the rim for an aged, vintage feel.
Turn the painted pot upside down so the drainage hole sits on top. Insert a sprig of dried bunny tails, preserved eucalyptus, or a mini dried pumpkin stem into the hole. Paint two simple black eyes on the side using matte acrylic paint. These sturdy little ghosts look wonderful lined along outdoor porch steps, pairing naturally with the styling tips in our cozy DIY fall porch decor guide.
6. Linen and Frayed-Edge Stuffed Ghost Pillows
If you love cozy textile accents on sofas, reading nooks, or entryway benches, sewing a set of minimalist stuffed ghost pillows is a rewarding afternoon project. Rather than sewing and turning edges inward for a formal seam, embrace raw, relaxed bohemian craftsmanship by stitching the right sides together and leaving a half-inch exposed border.
Trace a gentle, flowing ghost silhouette onto two layers of natural unbleached flax linen. Pin the layers together and sew along the outline, leaving a 3-inch opening near the bottom hem. Stuff the interior firmly with natural cotton batting or polyfill, stitch the opening closed, and use your fingertips to fray the exposed raw outer edge into a soft fringe. Add embroidered sleepy eyes with black cotton floss for an elevated modern Scandinavian look.
7. Cloche and Bell Jar Floating Spirit Diorama
Glass display cloches bring instant curio-cabinet elegance to seasonal styling. To create a captivating diorama, suspend a tiny 3-inch stiffened cheesecloth ghost inside an antique glass bell jar. Tie a loop of clear monofilament illusion cord to the ghost crown and secure it to the interior top of the glass dome using a tiny dot of clear museum gel or hot glue.
Line the wooden base of the cloche with preserved reindeer moss, mini river stones, and tiny faux white pumpkins. Weave micro copper battery fairy lights around the moss bed. When evening arrives, the miniature spirit appears suspended in mid-air above a magical woodland floor.
8. Boho Macrame Cord Floating Wall Hanging
For dedicated fiber art lovers who enjoy detailed knotting, you can incorporate ghost motifs directly into a small wall hanging. If you are eager to master foundational knots before starting, our in-depth tutorial on making a DIY macrame pumpkin pattern provides thorough practice with lark head knots, square knots, and diagonal clove hitches.
Mount eight 6-foot strands of 4mm single-strand cotton rope to a 10-inch driftwood branch using lark head knots. Work a sequence of alternating square knots to form a solid inverted triangle head, then transition into open diamond mesh. Gather the trailing cords at the bottom into a dense, brushed-out fringe skirt. Add two small black wooden craft beads to the knot pattern to serve as subtle, textured eyes.
9. Upcycled Sheet Outdoor Porch Luminaries
Decorating your exterior entryway requires elements that can handle outdoor breezes while maintaining cheerful curb appeal. You can transform standard tomato cages or wire garden plant stands into illuminated entryway ghosts using thrifted white cotton flat sheets.
Invert a wire tomato cage so the circular base rests on your porch floor. Secure the pointed top prongs together with zip ties and cap them with an 8-inch styrofoam craft sphere or a lightweight playground ball. Wrap warm white outdoor LED string lights spiral-fashion up the cage frame. Drape a clean vintage cotton bedsheet over the entire structure, letting the excess fabric pool naturally around the ground. Pin the folds in place so they hold their shape against autumn breezes. At dusk, your front porch glows with friendly, welcoming autumn light.
10. Dried Pampas Grass and Botanical Ghost Silhouette
Botanical crafting has surged in popularity, celebrated by design institutions such as the Smithsonian Magazine cultural design studies for reinterpreting historical folk craft traditions through modern organic media. You can craft a botanical ghost silhouette by assembling bleached dried florals onto a lightweight wire armature.
Form a ghost outline using 16-gauge floral wire. Using floral tape, bind short sprigs of fluffy bleached pampas grass, white bunny tails, and dried baby breath sequentially along the wire frame, layering downward like feathers. The feathery texture of the dried grasses creates an ethereal, smoky appearance that feels deeply artistic and upscale.
11. Minimalist Wire and Twine Ghost Sculptures
If your design aesthetic leans toward sleek, sculptural minimalism, wire art offers clean lines with virtually zero visual clutter. Take a 3-foot length of pliable black craft wire or natural brass wire and bend it into a single continuous contour of a floating ghost, complete with rounded head, sweeping arms, and wavy hemline.
Mount the bottom wire ends into a small drill hole in a block of salvaged cedar or white oak. Displayed on an open bookshelf or desk, these contour wire ghosts cast striking graphic shadows against light-colored walls when struck by the low rays of autumn sunlight.
12. Wooden Spindle and Linen Ghost Dolls
Vintage architectural salvage items like wooden balusters, stair spindles, and furniture legs make incredible structural bases for whimsical seasonal figurines. Thrifted wooden spindles often boast beautiful turned wood details that mimic the natural curves of vintage figurines.
Paint the top section of the spindle in warm ivory chalk paint and sand it lightly for distressed rustic texture. Cut a circle of unbleached cotton muslin with pinking shears, cut a small slit in the center, and slip it over the spindle neck like a flowing collar or cape. Tie a length of frayed silk ribbon or jute twine into a bow around the neck. These primitive, handmade folk dolls add rich tactile interest when styled near our aesthetic DIY fall centerpieces on a dining table or sideboard.
13. Paper Mache Ghost Lanterns with Warm Fairy Lights
Paper mache is one of the most accessible crafting mediums in existence, making it an ideal weekend project to share with friends or family. Blow up small latex balloons and coat them with overlapping strips of newspaper dipped in a smooth flour-and-water paste. Build up three sturdy layers, allowing each to dry partially between applications.
Once dry, cut the bottom third of the paper sphere open to remove the balloon. Coat the exterior with two coats of warm linen chalk paint. Use a hole punch or craft knife to cut out cute expressive faces. When nested over battery-operated flicker lights on a dark autumn evening, the warm translucent paper emits an inviting, storybook glow.
14. Embroidered Linen Hoop Ghost Art
Hoop art offers a compact, mess-free project that doubles as charming wall decor or seasonal gifts. Mount a piece of oatmeal-colored linen tightly inside a 5-inch bamboo embroidery hoop. Using a water-soluble fabric pen, sketch a simple, friendly ghost holding a mini autumn pumpkin or autumn leaf.
Use a crisp backstitch with three strands of black embroidery floss to outline the ghost. Fill in the mini pumpkin with satin stitch using burnt orange or mustard gold thread. Leave the linen background natural and trim the backing fabric cleanly. Hang a grouping of three small hoops on your gallery wall to add an artisanal handmade touch.
15. Rattan and Cane Webbing Ghost Door Sign
Bring classic bohemian wicker textures to your front entryway with a ghost-shaped door plaque crafted from natural cane webbing. This project pairs beautifully with the warm textures found in our boho DIY fall wreath tutorial.
Cut a ghost silhouette out of 1/8-inch birch craft plywood or sturdy heavy-duty chipboard using a scroll saw or craft knife, leaving an open inner frame. Soak a sheet of open-weave hexagonal cane webbing in warm water for 20 minutes until pliable, then stretch it across the back of the frame, securing it firmly with heavy-duty craft staples. Once dry, the cane contracts to a drum-tight finish. Hot-glue two circular black felt eyes onto the front and hang the sign on your front door using a wide velvet ribbon.
Comparative Guide: Crafting Your Aesthetic Ghost Decor
To help you choose the best project for your available time, skill level, and budget, refer to this handy comparison overview:
|
Project Style |
Skill Level |
Primary Material |
Drying / Build Time |
Estimated Cost |
|---|---|---|---|---|
|
Floating Cheesecloth Ghost |
Beginner |
Cotton Cheesecloth & Stiffener |
18 to 24 Hours |
$5 to $10 |
|
Macrame Tassel Garland |
Beginner |
4mm Cotton Cord & Wood Beads |
1 to 2 Hours |
$12 to $18 |
|
Air-Dry Clay Luminary |
Intermediate |
White Air-Dry Clay |
48 to 72 Hours |
$8 to $14 |
|
Terracotta Pot Ghost |
Beginner |
Mini Clay Pots & Chalk Paint |
1 Hour |
$4 to $8 |
|
Frayed Linen Stuffed Pillow |
Intermediate |
Flax Linen & Polyfill |
2 Hours |
$10 to $16 |
|
Glass Cloche Diorama |
Beginner |
Mini Ghost, Glass Dome & Moss |
1 Hour |
$15 to $22 |
|
Tomato Cage Porch Luminary |
Beginner |
Tomato Cage, Vintage Sheet & LEDs |
45 Minutes |
$10 to $20 |
Helpful Troubleshooting and Pro Crafting Tips
Even simple DIY crafts have subtle nuances that make the difference between a floppy experiment and a boutique-quality showpiece. Keep these practical tips in mind while building your ghosts:
Preventing Floppy or Sagging Cheesecloth
If your cheesecloth ghosts feel soft or collapse once removed from their forms, the issue is almost always humidity or insufficient stiffening solution. When working in humid environments, double the amount of craft glue in your bath or switch to a commercial fabric stiffener like Mod Podge Stiffy. Avoid placing drying forms near open windows on damp rainy days; running an oscillating fan nearby will accelerate crisp curing.
Combating Clay Cracking
Air-dry clay shrinks slightly as water evaporates. If draped over an inflexible, hard armature like glass without a release barrier, the clay can crack across the crown as it contracts. To prevent this, wrap your mold in plastic cling wrap before draping the clay, and smooth a damp finger over surface wrinkles to seal micro-fissures before they widen.
Achieving the Perfect Bohemian Tassel Fringe
When brushing out macrame cord for ghost garlands, always use a fine metal pet slicker brush or wire fringe comb rather than a standard plastic hairbrush. Comb gently in short strokes starting from the bottom tips and working your way up to the gathering knot. Once brushed out smooth, spray the fringe lightly with standard hairspray to help it maintain its fluffy shape without clumping.
Creative Styling Ideas for an Autumn Home
Once your creations are assembled, thoughtful styling brings them to life within your existing living space:
- The Cozy Fireplace Mantel: Drape your macrame ghost garland along the mantel face. Above it, style your floating cheesecloth ghosts in varying heights, nestled between heirloom white baby boo pumpkins, brass candleholders with beeswax tapers, and a terracotta vase filled with dried eucalyptus.
- The Inviting Entryway Table: Arrange a trio of sculpted air-dry clay luminaries atop a stack of vintage linen-bound books. Tuck warm copper fairy lights through a woven seagrass tray to greet guests as they enter your home.
- A Whimsical Dining Centerpiece: Place a glass cloche diorama at the center of your table runner. Scatter miniature painted terracotta ghosts and real dried fall oak leaves around the base for an intimate, atmospheric dinner party setting.
Crafting handmade autumn decor is a wonderful celebration of creativity, slow living, and cozy home making. With just a few basic natural supplies, you can bring a delightful touch of lighthearted seasonal charm into every corner of your home.
Frequently Asked Questions
How do you make cheesecloth ghosts stay standing up?
Cheesecloth ghosts stay rigid and freestanding through liquid fabric stiffeners like Mod Podge Stiffy or a boiled cornstarch slurry. Saturate open-weave cotton cheesecloth in the stiffening liquid, drape it over a bottle with a ball or balloon on top, and allow it to pool at the base. Once it dries undisturbed for 24 hours in a dry room, the crystalline starch bonds lock the fabric into a self-supporting silhouette.
Can you keep handmade ghost decorations outside on a porch?
Cheesecloth stiffened with starch or glue will soften and collapse if exposed to direct rain or high morning humidity. If styling ghosts on a covered porch, place them inside deep entryways shielded from wind and moisture, or use weather-resistant outdoor alternatives like painted terracotta pots, exterior fleece over tomato cages, or sealed air-dry clay coated in outdoor spar urethane.
What is the safest way to light fabric and clay ghost crafts?
Always use cool-touch battery-operated LED flicker tea lights or copper wire micro fairy lights. Because cheesecloth, macrame cord, and paper are flammable, open-flame wax candles should never be placed underneath or near fabric craft displays.
How do you store handmade cheesecloth ghosts for next year?
Because stiffened cheesecloth can crush easily, store finished ghosts upright inside sturdy plastic storage totes cushioned with acid-free tissue paper. Do not pack heavy items on top. If a ghost ever loses its shape after storage, lightly mist it with water, set it over a bottle form, and let it dry to reshape.
