
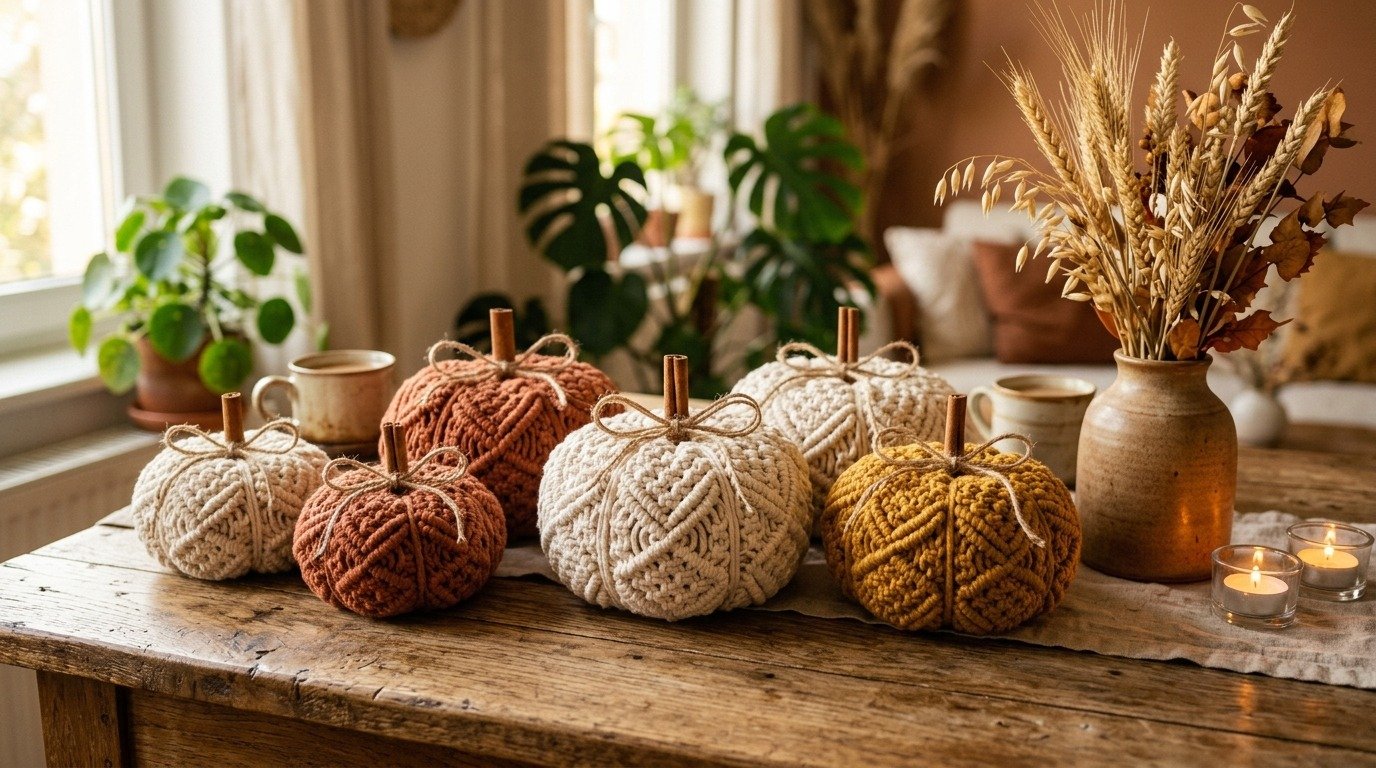
Autumn decorating brings a special warmth into our living spaces, and nothing captures cozy seasonal charm quite like handmade fiber art. Documented across American Craft Council contemporary fiber art archives, handcrafted decorative textiles bring authentic warmth and personal expression into autumn homes. Making your own diy macrame pumpkin is one of the most satisfying fall craft projects you can undertake. While plastic foam pumpkins from big-box retail craft aisles often look artificial and generic, a hand-knotted cotton pumpkin introduces tactile organic texture, earthy warmth, and artisanal sophistication to your fireplace mantel, coffee table, or harvest dinner tablescape.
If you are relatively new to macrame, the three-dimensional spherical shape might appear complex or intimidating. In truth, this project requires zero sewing, zero wire armatures, and relies almost entirely on foundational knots: the Lark’s Head knot and the square knot. By building curved vertical knot columns around a sturdy natural wooden ring, you naturally create authentic pumpkin ribs that cinch closed at the top around a fragrant cinnamon stick stem. This complete guide provides exact cord measurement formulas, step-by-step photo instructions, shaping secrets, and styling advice to help you craft an entire heirloom patch this season.
Quick Answer: How to Make a DIY Macrame Pumpkin
To make a standard 6-inch DIY macrame pumpkin, mount 16 working cords (measuring 7 feet each of 4mm natural cotton cord) onto a 2.5-inch smooth wooden craft ring using Lark’s Head knots, giving you 32 active strands. Divide the strands into 8 groups of 4 cords each. Tie a continuous vertical column of 12 to 14 square knots down each 4-cord group to establish the curved pumpkin ribs. Invert the ribbed dome, lightly fill the center hollow with scrap cord or polyfill, gather all hanging strands tightly at the top opening, and cinch firmly with a wrapped gathering knot. Insert a 3-inch natural cinnamon stick into the center hole as the stem, and embellish with a rustic jute twine bow.
Supplies and Materials Checklist
Before you begin cutting cord, gathering quality materials ensures your finished macrame pumpkin holds its rounded shape, displays crisp knot definition, and lasts through many autumn seasons without sagging or fraying.
Selecting the Best Macrame Cord
For small to medium decorative pumpkins, 4mm single-twist cotton cord or 3-ply twisted cotton rope is the premier choice. Single-twist cord provides an ultra-soft, plush finish that hugs stuffing smoothly and allows the top tassel ends to brush out into a soft cloud if you decide to add decorative fringe around the stem. 3-ply twisted cotton offers slightly firmer stitch structure, giving individual pumpkin ribs enhanced structural definition.
While traditional unbleached natural cream remains a perennial farmhouse favorite, experimenting with rich autumn palettes creates dramatic visual interest. Warm terracotta, burnt cinnamon rust, mustard ochre, and muted sage green complement natural wood tones beautifully. Avoid synthetic shiny ropes like nylon or polyester, which slip out of tension easily and lack the warm matte appearance essential for bohemian harvest decor.
Essential Tools and Hardware
- Natural Wooden Craft Rings: A 2-inch to 2.5-inch unfinished beechwood or bamboo ring acts as the flat bottom base of your pumpkin, allowing it to sit upright securely on flat surfaces without rolling away.
- 4mm Cotton Cord: Approximately 110 to 120 feet (35 meters) for a medium pumpkin. You can easily estimate yardage for multi-pumpkin projects using our free macrame cord calculator.
- Natural Cinnamon Sticks: 3-inch to 4-inch whole dried cinnamon bark quills provide an organic, fragrant stem that smells wonderful throughout your home.
- Polyester Fiberfill or Fabric Scraps: A small handful of polyester stuffing, unspun wool roving, or leftover cotton cord scraps to fill the hollow interior cavity and maintain plump spherical volume.
- Sharp Fabric Scissors: Heavy dressmaker shears for making clean blunt cuts across thick rope bundles.
- Measuring Tape: Flexible tailor tape for measuring working cord strands accurately.
- Natural Jute Twine: A 24-inch length of rustic thin jute string for tying decorative bows around the cinnamon quill stem.
- Hot Glue Gun (Optional): A quick dab of low-temp craft glue helps anchor the cinnamon stick firmly inside the gathered knot well.
Macrame Pumpkin Sizing and Cord Measurement Chart
To create an appealing, organic autumn vignette, styling pumpkins in staggered sizes creates balanced dimension. Because each vertical square knot uses significant rope length during knotting, use this handy reference matrix to plan your cuts accurately before unspooling cord:
| Pumpkin Size Profile | Wooden Ring Base | Cord Count & Strand Size | Cut Length per Cord | Total Cord Needed |
|---|---|---|---|---|
| Mini Accent (4-inch Diameter) | 1.5 to 2.0 inches | 12 cords (24 working ends) | 5.5 feet (1.7 m) | 66 feet (20 m) |
| Medium Tabletop (6-inch Diameter) | 2.5 inches | 16 cords (32 working ends) | 7.0 feet (2.1 m) | 112 feet (34 m) |
| Large Heirloom (8-inch Diameter) | 3.0 inches | 20 cords (40 working ends) | 9.0 feet (2.7 m) | 180 feet (55 m) |
Mastering the Core Knots
Only three fundamental macrame knots are required to build a 3D pumpkin. If you need a comprehensive visual refresher on hand placement and cord management, review our essential guide on macrame knots for beginners before diving in.
1. Lark’s Head Knot
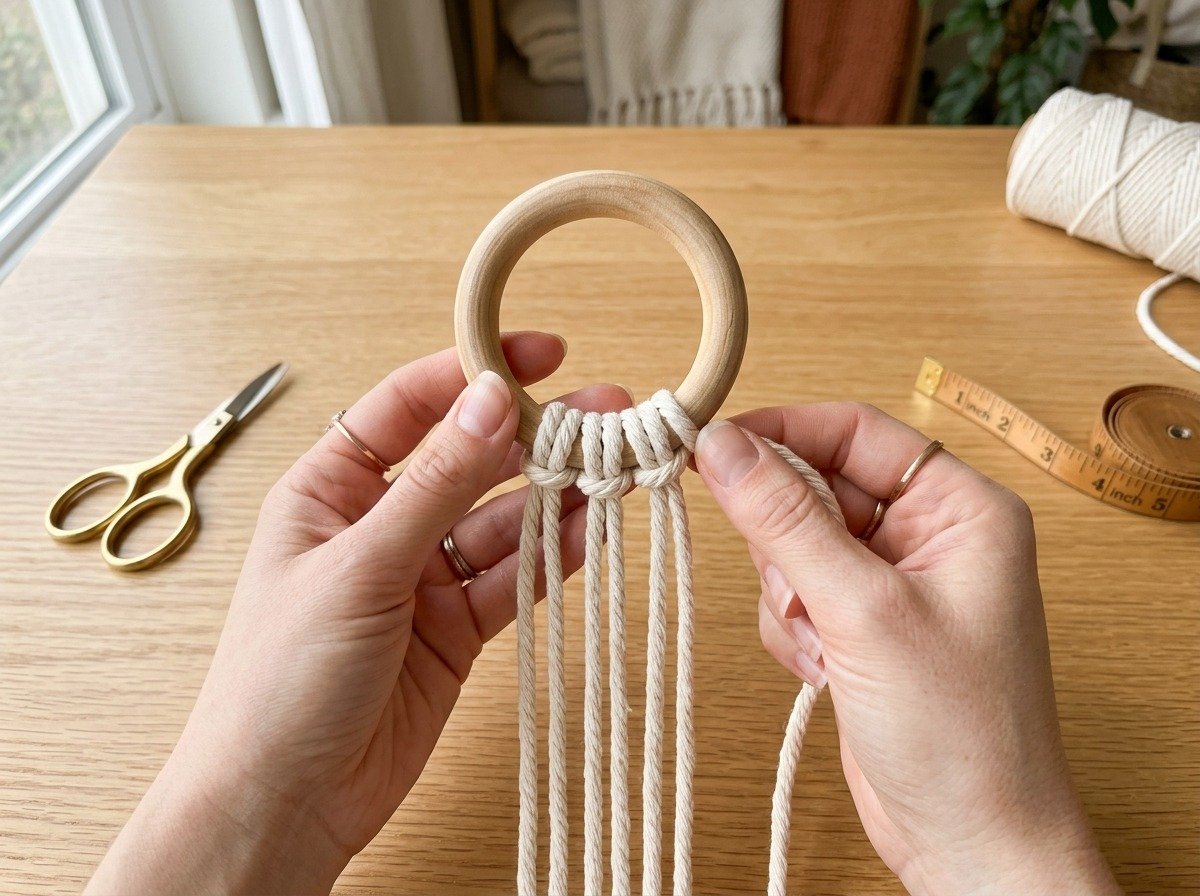
The Lark’s Head knot attaches your working strands securely to the wooden ring base. Fold your measured cord in half so the cut ends align at the bottom, creating a loop at the top fold. Place the loop through the center of the wooden ring from back to front, fold it over the ring rim, pull both tails through the loop, and pull tight. This anchors two equal working ends to your ring.
2. The Square Knot
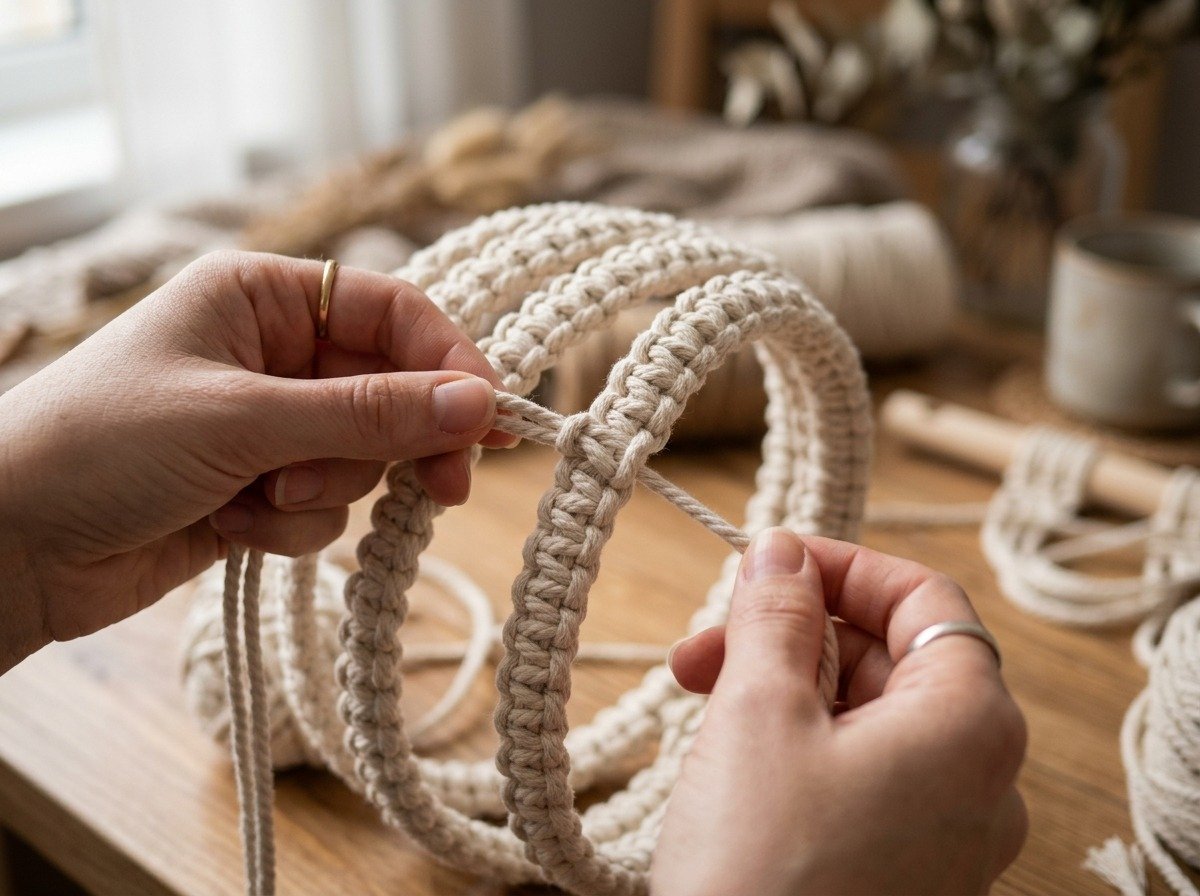
Square knots form the curved vertical ribs of your pumpkin. Working with four adjacent cords, the two middle strands serve as passive filler cores while the two outer strands do the active knotting. Bring the left outer cord over the middle cores and under the right cord, forming a loop. Take the right cord behind the center cores and pull it up through the left loop. Pull both outer strands firmly to settle the half knot. Complete the square knot by mirroring the steps: pass the right cord over the center, feed the left cord behind, and pull tight. Stacking square knots continuously produces a sturdy vertical rib column.
3. Gathering Knot (Wrapping Knot)
The gathering knot bundles all loose strands together at the top of your pumpkin to seal the interior cavity. Take a separate 24-inch piece of cord and form a downward-pointing U-shaped bight against your gathered strand bundle. Wrap the long tail firmly around both the bundle and the bight 5 to 6 times, working from top to bottom. Feed the wrapping tail through the bottom loop of your bight, then pull the top tail upward until the knot loop is hidden halfway inside the wraps. Snip both tail ends flush for an ultra-clean closure.
Step-by-Step DIY Macrame Pumpkin Tutorial
This tutorial walks through creating a medium 6-inch diameter pumpkin using 4mm natural cotton cord and a 2.5-inch wooden ring base. Work comfortably on a flat table or lap tray where you can freely rotate the ring as you progress.
Step 1: Measuring and Cutting Cords
Unroll your cotton cord across a clean craft table. Measure and cut 16 cords at exactly 7 feet (2.1 meters) each. Cut one additional cord measuring 24 inches for your final gathering knot. Group your cut cords neatly so ends do not tangle while mounting.
Step 2: Mounting Cords to the Wooden Base Ring
Take your 2.5-inch wooden craft ring. Fold each 7-foot cord in half to find the center midpoint. Mount all 16 cords onto the ring using tidy Lark’s Head knots. Push the knot loops close together so they distribute evenly around the perimeter of the ring. You will now have 32 active cord ends hanging downward in an open fringe skirt.
Step 3: Knotting the Vertical Rib Columns
Divide your 32 cords into 8 equal sections of 4 cords each. Each 4-cord grouping represents one individual vertical pumpkin rib. Starting with your first 4-cord group, tie a continuous vertical column of 13 square knots directly below the Lark’s Head mount.
Maintain moderate, uniform tension throughout. Do not pull knots excessively tight; keeping them slightly relaxed allows the column to curve organically when shaped into a sphere later. Repeat this process around the entire ring until all 8 groups have 13 square knots. You will have eight flexible ribbed columns radiating outward like flower petals.
Step 4: Shaping the 3D Hollow and Adding Stuffing
Place the wooden ring flat on your table with the flat base facing down. Bring the loose tail ends of all 8 ribbed columns upward toward the center, curving each column outward like an umbrella dome. Gently adjust each rib so they bow out symmetrically.
Before cinching the top opening completely shut, insert a small handful of polyester fiberfill, wool roving, or soft rope cut-offs through the top opening into the interior cavity. Stuffing prevents the pumpkin ribs from caving inward over time and gives the piece a plump, rounded harvest profile. Be careful not to overstuff, which can force the vertical square knots apart and expose the filling between ribs.
Step 5: Cinching the Top with a Gathering Knot
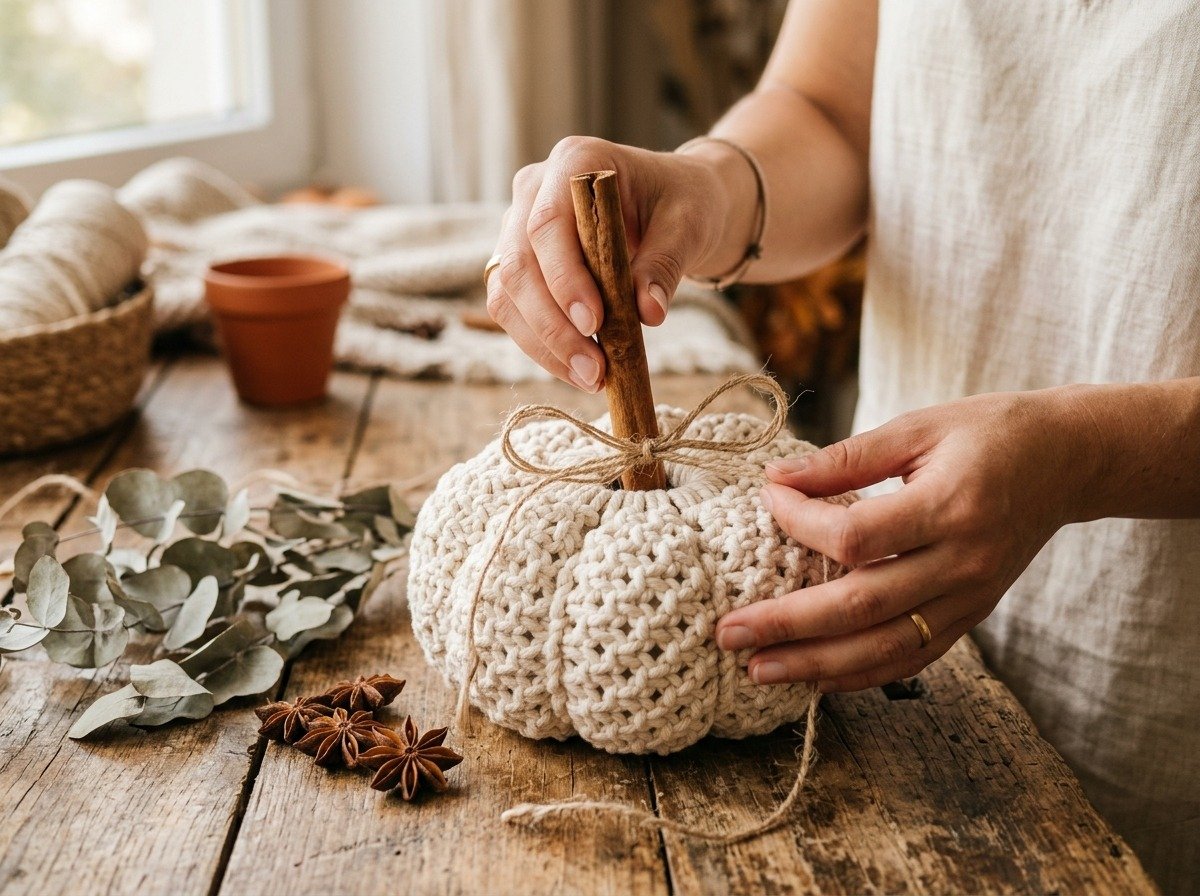
Gather all 32 hanging tail cords together tightly right above the top curve of your ribs. Pull firmly so the tops of the ribs meet snugly in the center. Use your extra 24-inch cord piece to execute a neat gathering knot around the entire bundle, wrapping 5 times. Pull both tails to bury the securing loop halfway under the wraps, and trim the excess wrapping ends flush.
Using sharp shears, snip the central bundle of 32 hanging cords down to roughly 1 inch in height. Push these trimmed ends gently downward into the top cavity well; they will naturally form a snug collar that grips your stem.
Step 6: Inserting the Cinnamon Stick Stem and Jute Bow
Select an aromatic 3-inch cinnamon stick quill (documented in Encyclopaedia Britannica botanical spice classifications). Press the bottom of the cinnamon stick directly down into the center of the gathered knot opening until it reaches the inner stuffing core. For extra durability, you can apply a tiny dab of hot craft glue around the base of the cinnamon stick before inserting. Tie a charming bow around the base of the stem using rustic jute twine, fraying the twine tails slightly with your fingertips for effortless farmhouse flair.
Step 7: Final Steam Shaping
The final step that gives your macrame pumpkin an upscale boutique appearance is steam blocking. Hold a handheld clothes steamer about two inches away from the cotton ribs, applying gentle steam all around while gently cupping and shaping the pumpkin with your hands. Steam relaxes the cotton fibers, eliminates minor creases, and helps the vertical square knot ribs settle into perfectly plump, uniform curves.
Creative Autumn Styling and Display Ideas
Handcrafted macrame pumpkins blend effortlessly across modern farmhouse, bohemian, Scandinavian, and minimalist interior decor. Here are inspiring ways to feature your handmade pumpkin patch throughout your home:
Thanksgiving Dining Table Vignette
Create a stunning seasonal dining centerpiece by layering a trio of macrame pumpkins in varying heights along the center of our handcrafted diy macrame table runner. Flank the pumpkins with amber glass votives, dried eucalyptus branches, and rustic stoneware dinner plates. You can also craft matching drink place settings with our tutorial on how to make macrame coasters for a cohesive holiday tablescape.
Fireplace Mantel & Entryway Shelf Styling
On a living room fireplace mantel, cluster miniature cream and terracotta macrame pumpkins atop stacks of vintage hardcover books or wooden dough bowls. Pair with warm brass candlesticks and dried lagurus bunny tails. For an inviting welcome from the moment guests step inside, coordinate your indoor shelf styling with our matching front door tutorial for a diy fall wreath.
Festive Place Card Accents
Miniature 4-inch macrame pumpkins make unforgettable, reusable place card holders for autumn dinner parties. Simply tuck a handwritten kraft paper name card into the twine bow at the stem, allowing each guest to take home their handmade pumpkin as a charming seasonal favor. For more creative ideas, browse our curated roundup of fall crafts for adults.
Care, Cleaning, and Off-Season Storage
With proper care, your handmade fiber art pumpkins will look just as fresh next autumn as they do today. Because natural cotton attracts household dust, follow these simple preservation guidelines:
Dust Removal
During the season, use a soft makeup brush, gentle lint roller, or a hairdryer set on the cool, low-airflow setting to quickly blow dust particles out of the square knot crevices. Never submerge a stuffed macrame pumpkin in water, as soaking can saturate the interior polyfill and damage the wooden base ring.
Spot Cleaning Stains
If accidental coffee, sauce, or wine drops land on your pumpkin, treat the spot immediately. Dab with a clean white microfiber cloth dampened with lukewarm water and a drop of clear liquid Castile soap. Blot gently without vigorous rubbing to preserve the cotton cord twist. Allow to air dry thoroughly in a warm, ventilated room.
Seasonal Storage
When autumn transitions into winter, wrap each macrame pumpkin loosely in acid-free tissue paper or a breathable cotton drawstring storage pouch. Store them in a sturdy hard-sided plastic tote in a climate-controlled closet rather than a damp basement or hot attic. Adding a cedar block or sachet of dried lavender protects the natural cotton rope and keeps cinnamon stems smelling sweet year after year.
Troubleshooting Common Macrame Pumpkin Mistakes
If your first pumpkin does not look quite as symmetrical as you envisioned, minor adjustments can easily correct the shape:
The Pumpkin Ribs Look Lopsided or Uneven
Uneven ribs occur when knot tension varies between columns, or when one column contains more square knots than its neighbors. Always count your square knots precisely down each 4-cord group before shaping. If one side bulges more than another, gently massage the knot columns with your fingers to redistribute tension evenly around the wooden ring perimeter.
Stuffing Peeks Through Between the Ribs
If white fiberfill is visible between the vertical knot columns, you either slightly overstuffed the interior cavity or spaced the Lark’s Head mounts too far apart. To fix this without re-tying, remove a small pinch of stuffing, or insert a piece of color-matched scrap fabric or felt between the polyfill and the outer macrame shell to conceal the filling completely.
The Cinnamon Stem Wiggles or Feels Loose
If the top opening is slightly too wide for your cinnamon quill, wrap a short strip of scrap cotton cord or floral tape around the base of the cinnamon stick to increase its diameter before pressing it in. Alternatively, apply a generous dab of hot glue inside the trimmed cord cavity and hold the stem upright for 30 seconds while the adhesive sets.
Frequently Asked Questions
How much cord do I need for a DIY macrame pumpkin?
For a standard medium 6-inch macrame pumpkin, you need approximately 112 feet (34 meters) of 4mm cotton cord. This accounts for 16 working cords cut to 7 feet each, plus an extra 24-inch piece for the top gathering knot.
Can I make a macrame pumpkin without a wooden craft ring?
Yes, you can substitute a wooden ring with a tied ring loop of thick cord, a metal curtain ring, or a small silicone craft ring. However, wooden rings provide weight and a perfectly flat base that keeps your finished pumpkin sitting level on shelves and tables.
What can I use instead of cinnamon sticks for the pumpkin stem?
Natural dried driftwood twigs, birch branch cuttings, whole dried wine corks, rolled cinnamon bark, or leather strap loops all make charming alternative stems that suit rustic and bohemian home styles.
How long does it take to make one macrame pumpkin?
Once cords are measured and mounted, tying the square knot ribs and assembling a medium pumpkin takes approximately 45 to 60 minutes. It is an ideal weekend afternoon craft project you can easily complete in one relaxing sitting.
Can I make this project with colored macrame cord?
Absolutely! Using colored 4mm single-twist or 3-ply cord in terracotta, burnt orange, mustard yellow, chocolate brown, or olive sage produces a gorgeous harvest display that rivals high-end boutique home decor.
Celebrating Autumn Handcrafts
Crafting your own macrame pumpkins connects you with the tactile, slow rhythm of the changing seasons. Each rhythmic square knot brings texture, fragrance, and handmade warmth into your home that mass-produced holiday decor simply cannot replicate. Save this step-by-step pattern guide to your Pinterest craft boards, grab your favorite autumn cord colors, and enjoy creating an heirloom pumpkin patch that will brighten your home year after year.

