
Quick Answer: How to Make Christmas Perler Bead Patterns
To make durable holiday ornaments using Christmas Perler bead patterns, arrange standard 5mm fuse beads on a clear square pegboard following a 15×15 to 29×29 peg grid. Cover the finished design with blue painter’s tape, burnish firmly, poke ventilation holes into each bead through the tape, and lift the pattern off the plastic board. Place parchment paper over the beads and fuse with a dry household iron set to medium heat using slow, circular motions for 15 to 20 seconds. Leave the top center bead empty during assembly to thread natural jute twine and raw beechwood beads for tree ornaments, or string finished charms into festive holiday garlands and gift tags.
Holiday crafting has a way of slowing down busy winter evenings. When the weather turns chilly and Christmas music starts playing softly in the kitchen, sitting down with a warm mug of spiced cider and a tray of colorful fuse beads is pure comfort. Whether you are crafting alongside your kids or creating bespoke handmade ornaments for your own tree, working with Christmas Perler bead patterns offers immediate creative satisfaction without requiring expensive studio gear.
Perler beads (also known as fuse beads or Hama beads) carry a wonderful retro nostalgia, but they can look surprisingly elevated when you style them with an intentional, earthy holiday color palette. By swapping neon shades for deep forest pine, cranberry red, gingerbread brown, and warm gold, these plastic cylinders transform into charming Scandinavian inspired keepsakes. After the incredible response to our cozy Halloween Perler bead patterns and our beginner friendly guide to mini Perler bead patterns, I wanted to curate a complete holiday collection designed specifically for home makers.
In this complete guide, you will discover 15 charming Christmas patterns organized into three festive themes. You will also learn the game-changing blue tape ironing technique that saves your plastic pegboards from melting, plus my simple trick for converting flat melted shapes into heirloom tree ornaments using natural jute twine and raw wooden spacer beads.
Essential Supplies for Holiday Fuse Bead Projects
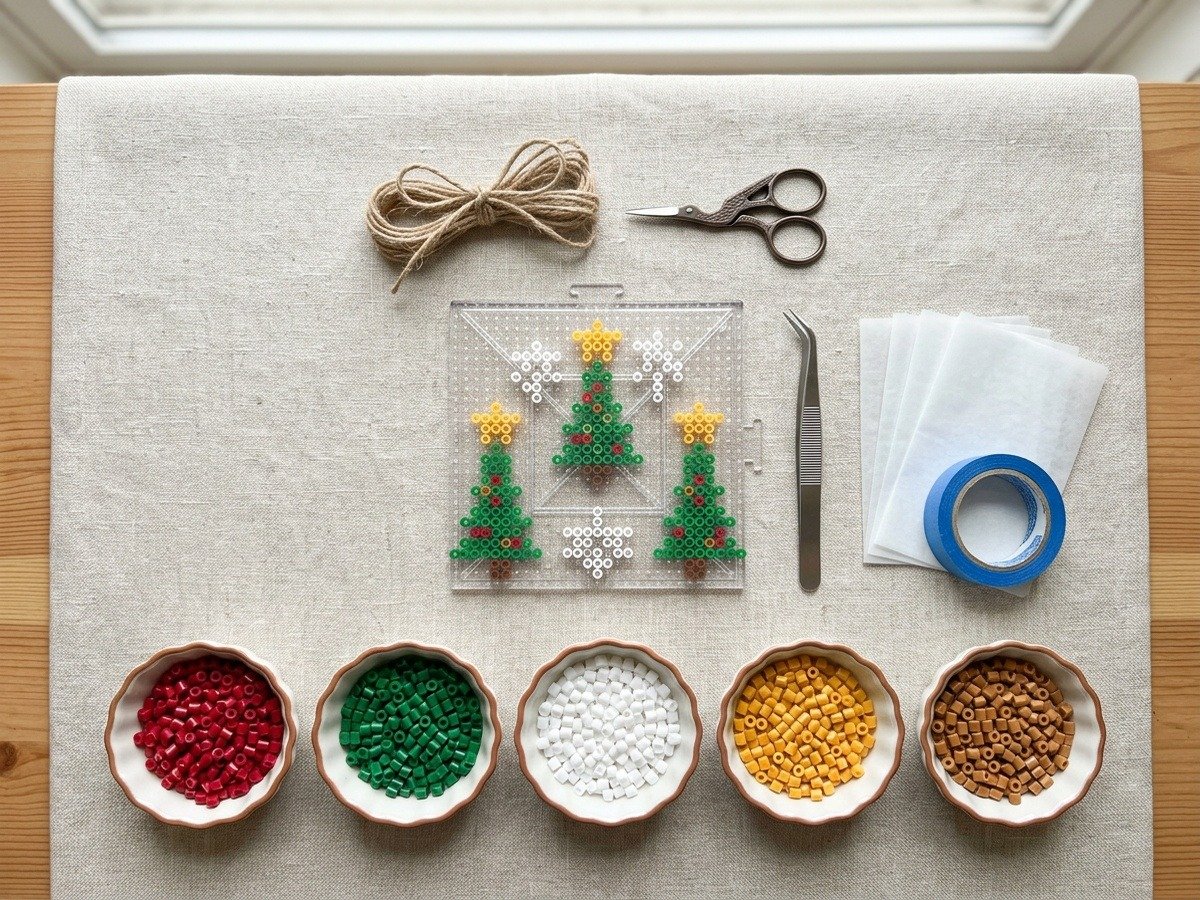
One of the best things about fuse bead crafting is how accessible the materials are. You do not need a dedicated craft room or high-end tools to produce boutique quality ornaments. Here is the curated checklist of supplies I keep on my work table whenever I tackle holiday bead projects:
- Standard 5mm Fuse Beads: Standard midi beads (5mm) are the gold standard for holiday ornaments. They provide crisp detail while remaining easy to handle with craft tweezers.
- Clear Interlocking Square Pegboards: Transparent 29×29 pegboards allow you to slide printable pattern grids directly beneath the plastic, making bead placement practically foolproof.
- Fine Craft Tweezers: Precision angled tweezers save your fingers from cramping and keep you from accidentally bumping neighboring rows out of place.
- Heat-Resistant Parchment Paper: Always use unbleached kitchen parchment paper or reusable ironing film. Never use wax paper, which will melt sticky paraffin directly onto your warm beads and iron plate.
- Original Blue Painter’s Tape: Medium-tack painter’s tape is the secret to the no-melt pegboard method. It holds beads rigidly in position while you iron them away from your plastic board.
- Household Dry Iron: A standard clothes iron with the steam function turned completely off. Even dry heat ensures flat, uniform melting without hot steam water droplets.
- Heavy Books or Marble Tile: A pair of heavy cookbooks or smooth stone tiles prevents warm fused plastic from curling upward as it cools.
- Finishing Accents: 1mm natural jute twine, unbleached baker’s twine, and 10mm to 12mm raw beechwood beads for stringing finished ornaments.
When selecting bead colors, building a cohesive palette makes your finished collection feel intentional. According to the official Perler projects and safety library, sticking to consistent color families across a batch creates a harmonious display on your tree. For an earthy, modern Scandinavian look, I recommend Evergreen (forest green), Cherry or Cranberry (deep red), Cheddar (warm star gold), Sand or Light Brown (gingerbread), and Bright White (snowflakes and frosted trims).
Christmas Perler Bead Patterns: Complete Project Directory
Here is a comprehensive breakdown of all 15 holiday patterns featured in this guide. Use this quick reference table to check dimensions, approximate bead counts, difficulty ratings, and recommended holiday display applications before setting up your pegboard.
| Pattern Name | Grid Size | Bead Count | Difficulty | Best Application |
|---|---|---|---|---|
| 1. Mini Geometric Pine Tree | 17 x 15 pegs | 112 beads | Beginner | Tree ornament, gift tag topper |
| 2. Scandinavian Crisp Snowflake | 19 x 19 pegs | 134 beads | Intermediate | Window suncatcher, tree ornament |
| 3. Cozy Gingerbread Man | 16 x 14 pegs | 128 beads | Beginner | Kitchen garland, tree ornament |
| 4. Striped Peppermint Candy Cane | 18 x 10 pegs | 86 beads | Easy | Stocking stuffer, gift tag charm |
| 5. Classic Fur-Trimmed Santa Hat | 15 x 16 pegs | 98 beads | Easy | Napkin ring charm, tree ornament |
| 6. Chubby Winter Snowman | 21 x 15 pegs | 164 beads | Intermediate | Mantel display, tree ornament |
| 7. Woodland Red-Nosed Reindeer | 20 x 14 pegs | 146 beads | Intermediate | Kids gift charm, tree ornament |
| 8. Festive Evergreen Wreath | 17 x 17 pegs | 120 beads | Beginner | Bottle collar charm, tree ornament |
| 9. Nordic Christmas Stocking | 18 x 12 pegs | 104 beads | Easy | Place card holder, tree ornament |
| 10. Golden Holiday Jingle Bell | 15 x 14 pegs | 92 beads | Easy | Wreath accent, tree ornament |
| 11. Nordic Eight-Point Star | 15 x 15 pegs | 88 beads | Intermediate | Mini tree topper, gift tag accent |
| 12. Cute Holiday Gnome (Tomte) | 19 x 11 pegs | 118 beads | Intermediate | Shelf sitter, tree ornament |
| 13. Red Poinsettia Blossom | 15 x 15 pegs | 96 beads | Beginner | Holiday centerpiece accent, gift charm |
| 14. Fresh Mistletoe Sprig | 16 x 13 pegs | 78 beads | Easy | Doorway hanging accent, gift tag |
| 15. Frosted Holiday Winter Mitten | 16 x 12 pegs | 94 beads | Beginner | Twin mitten garland, tree ornament |
Collection 1: Classic Holiday Tree Ornaments
This first cluster represents the core staples of traditional Christmas decor. These designs are instantly recognizable, balance beautiful symmetry, and look stunning when hung together on evergreen pine branches.
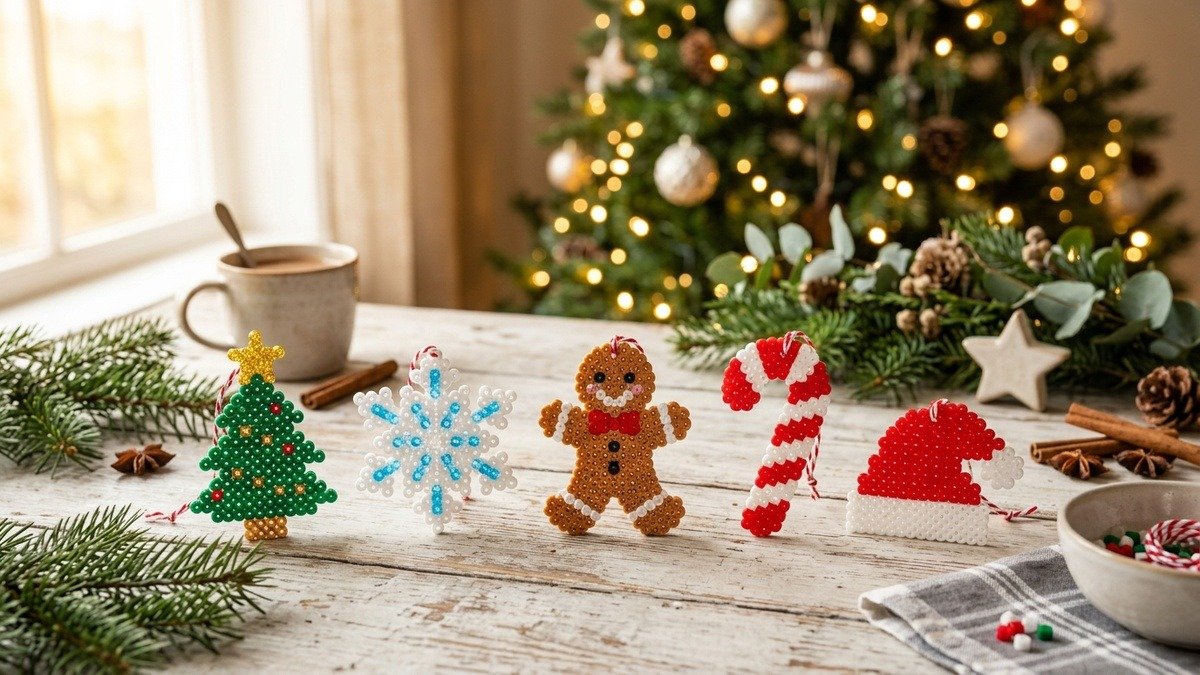
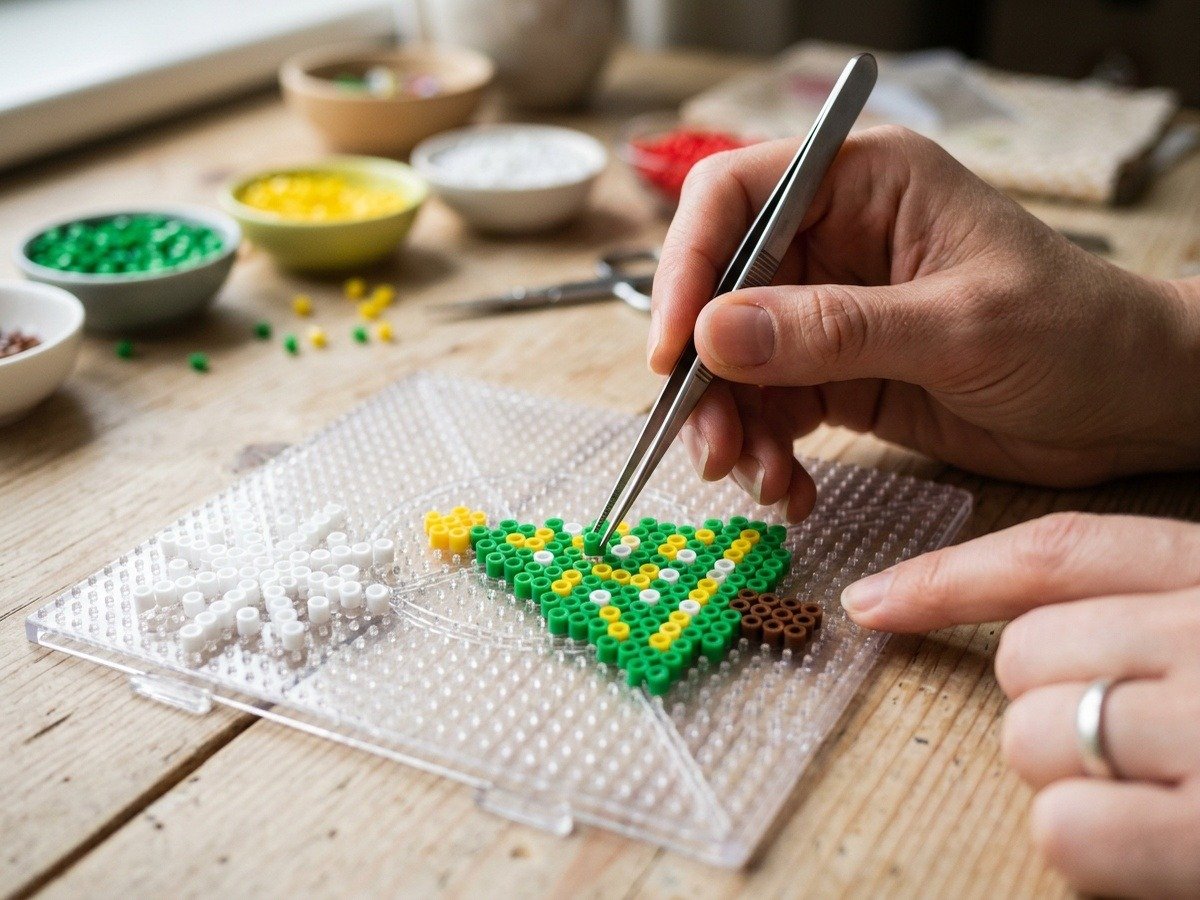
1. Mini Geometric Pine Tree (112 Beads)
The geometric Christmas tree is built using tiered horizontal rows of deep forest green beads, flanked by light mint green perimeter beads to create depth. Start at the top point with a 3×3 yellow star. Work down in three distinct triangular tiers, widening each section by two pegs. Finish the base with a solid 3×3 block of gingerbread brown for the trunk. To leave room for hanging, omit the top center bead of the yellow star so your jute twine can loop straight through.
2. Scandinavian Crisp Snowflake (134 Beads)
A symmetrical six-point snowflake pattern that feels delicate yet remains structurally strong after fusing. Place a single central white bead, then build six radiating spoke arms measuring five beads each. Add diagonal chevron branches onto the third bead of each spoke. For a frosted Nordic effect, use translucent glitter white beads for the outer tips and solid opaque white for the central core.
3. Cozy Gingerbread Man (128 Beads)
Crafted from warm light brown (teddy bear) beads, this sweet figure features white zig-zag icing cuffs on both wrists and ankles. Use two black beads for the eyes, a bright red bead for the smile, and two emerald green beads down the chest for festive candy buttons. The wide rounded head and sturdy limbs give this ornament excellent durability when handled by small hands.
4. Striped Peppermint Candy Cane (86 Beads)
This classic J-hook curve alternates three rows of bright cherry red with three rows of solid snow white at a crisp 45-degree angle. By doubling the width of the cane to three beads across, the shape stays rigid and resistant to snapping, even when packed away in holiday storage bins between seasons.
5. Classic Fur-Trimmed Santa Hat (98 Beads)
Featuring a triangular red cap that gently folds over to the right side, ending in a cute fluffy pompom of seven white beads. A double row of textured white beads along the bottom creates the plush brim. You can tuck this charming hat onto holiday gift packages or hook it over the neck of homemade wine bottles for festive gifting.
Collection 2: Cozy Winter Wonderland Characters
The second collection brings storybook warmth to your holiday craft table. These character designs are wonderful weekend projects for families and introduce playful personality to evergreen garlands and mantel displays.
6. Chubby Winter Snowman (164 Beads)
Constructed with two overlapping white spheres. The upper head sphere features coal-black eyes and a sweet three-bead orange carrot nose pointing sideways. Wrap a festive red and green striped scarf across his neck, allowing two scarf fringe tails to dangle downward. Top his head with a dapper black top hat accented by a single red holly band.
7. Woodland Red-Nosed Reindeer (146 Beads)
A friendly woodland deer head featuring branching dark brown antlers and warm tan facial shading. A single glowing crimson bead marks Rudolph’s famous nose. For extra charm, give him two soft pink cheek beads right below his eyes. The wide antler spans provide multiple anchoring points for ribbon loops.
8. Festive Evergreen Wreath (120 Beads)
A circular wreath design utilizing alternating light green and dark green beads to simulate layered spruce boughs. Scatter tiny red bead berries around the circle, and crown the bottom center with a dimensional red ribbon bow. Because this pattern has an open circular center, it hangs effortlessly over tree branches without any extra string.
9. Nordic Christmas Stocking (104 Beads)
A classic holiday stocking rendered in deep Scandinavian red with a fluffy white cuff, heel, and toe. The center shaft showcases a tiny white snowflake pixel motif. This pattern looks especially darling when strung onto a jute cord garland above a fireplace mantel alongside our popular DIY macrame Christmas tree tutorial.
10. Golden Holiday Jingle Bell (92 Beads)
Shimmering with yellow and cheddar beads, this rounded bell design features a rounded dome top, flared rim, and a bottom center clapper. Add a sprig of green Perler holly leaves with two red berries directly on the hanging loop for an authentic Victorian carol look.
Collection 3: Boho Gift Tags & Mini Charms
If you are short on time or want quick 15-minute makes that can double as charming package toppers, these compact mini patterns are ideal. They use fewer than 100 beads each and are fantastic for using up leftover bead colors from previous projects. Pair them with our curated guide to handmade gift ideas to create unforgettable holiday packages.
11. Nordic Eight-Point Star (88 Beads)
Inspired by traditional Norwegian knitwear patterns (Selburose), this geometric star combines crisp white and crimson beads in an intricate eight-point diamond layout. Its modern clean lines look striking against brown kraft wrapping paper and raw linen twine.
12. Cute Holiday Gnome / Tomte (118 Beads)
Scandinavian Tomte gnomes are beloved holiday symbols. This pattern features an oversized pointed red hat pulled down past his eyes, leaving only a cute round peach wooden-style nose peeking out over a long, flowing white beard. It is fast, whimsical, and immensely popular at holiday artisan markets if you craft for local craft fairs or explore profitable crafts to make and sell.
13. Red Poinsettia Blossom (96 Beads)
Radiating red petals surround a tiny cluster of yellow and gold center beads. Two emerald leaf tips branch out from the base to ground the floral shape. Flat-fused poinsettias can be glued directly onto wooden holiday signs or tied onto gift ribbon as floral package accents.
14. Fresh Mistletoe Sprig (78 Beads)
A delicate hanging bunch of two pale green leaves tied with a red ribbon knot, accented by three white pearl mistletoe berries. It is lightweight, takes only ten minutes to peg, and makes a charming doorway charm.
15. Frosted Holiday Winter Mitten (94 Beads)
A cozy mitten with an extended thumb and a fluffy white ribbed wrist cuff. Make a mirrored pair (left hand and right hand) and connect them with a four-inch strand of baker’s twine for an adorable tree branch hanger.
The Blue Painter’s Tape Ironing Method (No Melted Pegboards)
If you have ever ironed fuse beads directly on a plastic pegboard, you know the heartbreak: the board’s plastic pegs warp, bend, and shrink under the iron’s heat, ruining the pegboard permanently. The blue tape method eliminates this issue completely by transferring your beads off the board before heat is ever applied.
Follow this step-by-step procedure for flawless, stress-free fusing every single time:
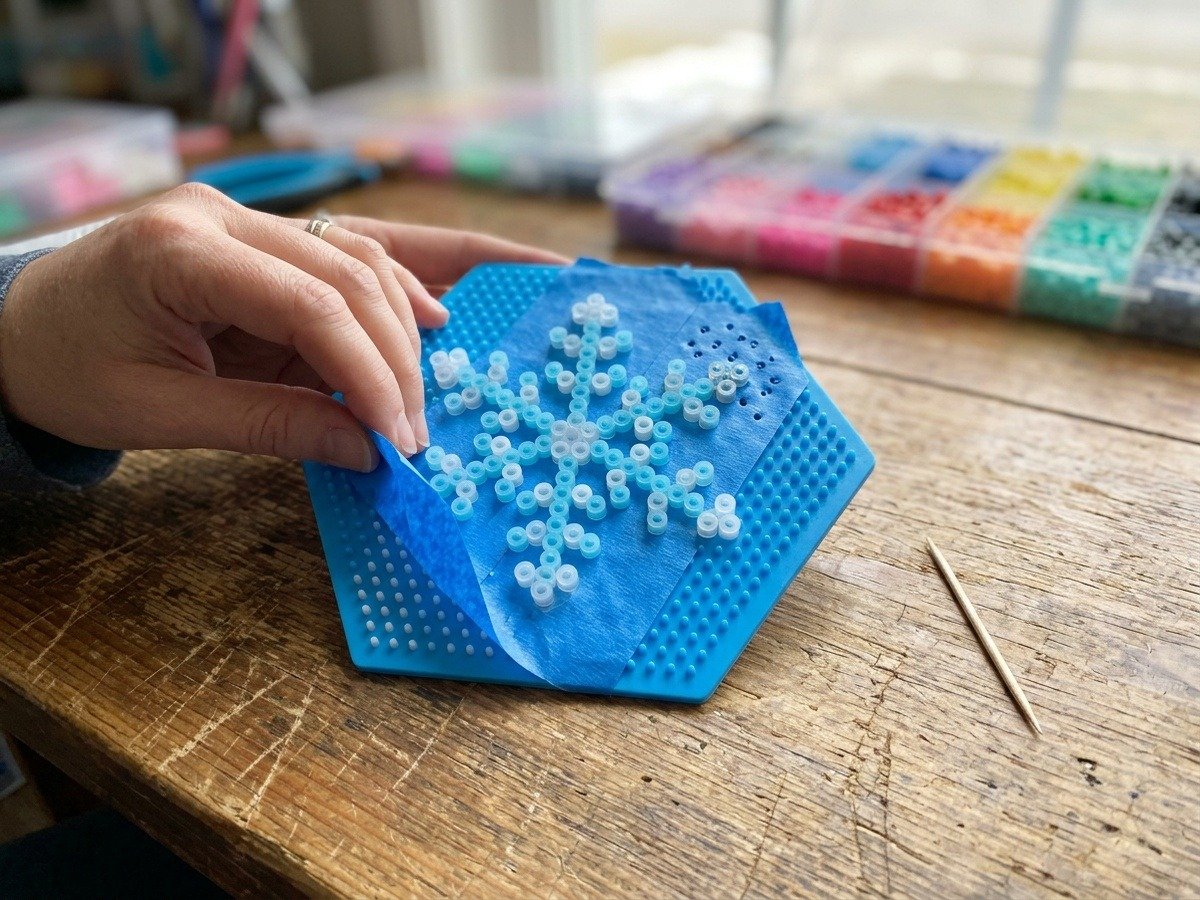
- Tape the Design: Once your bead pattern is finished on the pegboard, tear strips of standard blue painter’s tape slightly wider than your design. Lay the strips across the beads, overlapping each strip by about 1/4 inch until the entire pattern is covered.
- Burnish Firmly: Use your fingertips, a bone folder, or the back of a smooth metal spoon to rub the tape down with firm pressure. Every bead must adhere securely to the adhesive layer.
- Poke Ventilation Pinholes: Take a wooden toothpick, skewer, or spare pegboard and poke a hole through the tape into every single bead opening. This step is critical: according to craft safety data shared by Purdue University Extension home arts programs, trapped air pockets under hot plastic can pop or cause blowout bubbles when heated. Poking pinholes allows expanding hot air to vent harmlessly.
- Peel Off the Pegboard: Slide your fingers beneath the tape edge and slowly peel the taped bead design straight off the pegboard. Your pegboard remains 100% cool, unwarped, and ready for the next project.
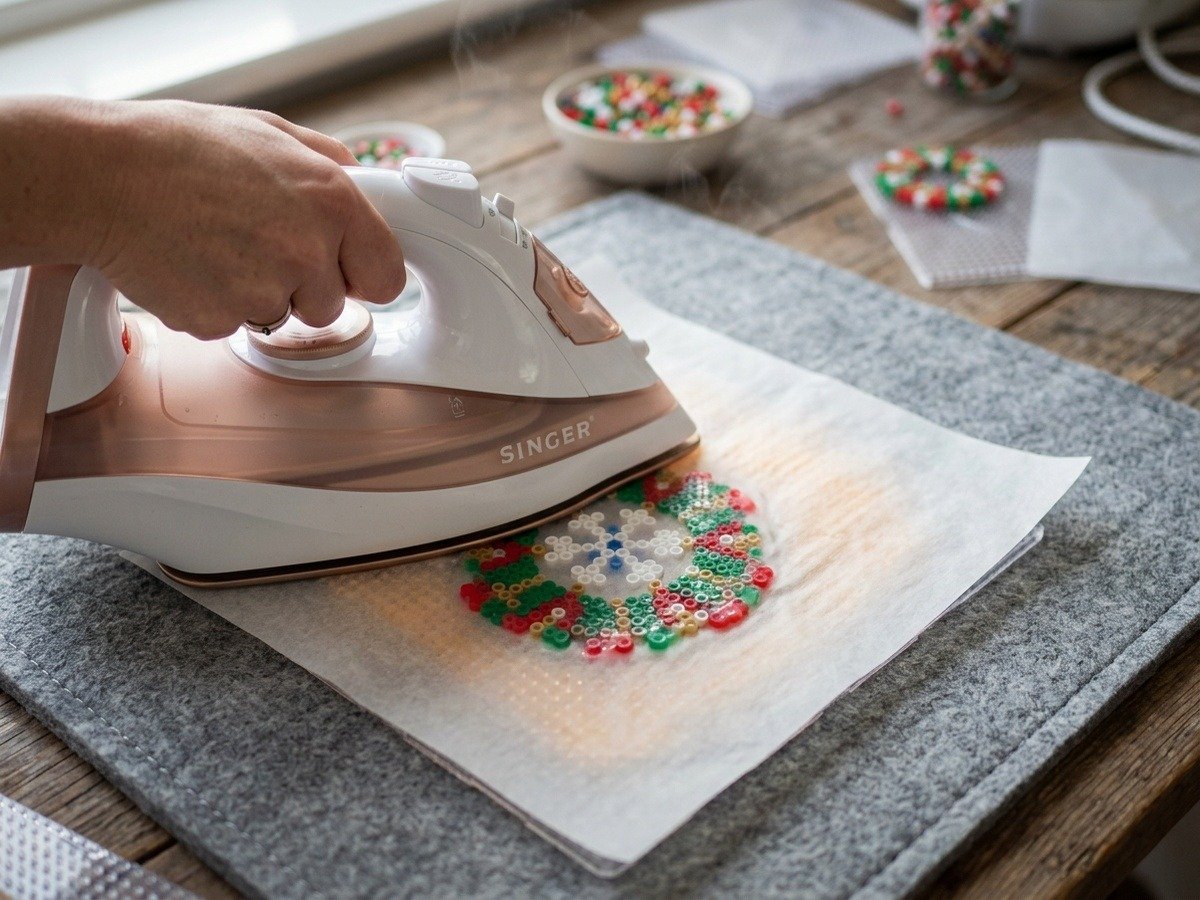
- Iron Through Parchment Paper: Place the taped design on a heat-resistant wool pressing mat or wooden cutting board with the exposed bead side facing up. Lay a sheet of parchment paper over the beads. Set your iron to medium (wool setting) with dry heat. Press gently and move in slow, smooth circular motions for 15 to 20 seconds until you see the bead holes close into an even flat melt.
- Cool Under Weight: Immediately flip the hot piece over, carefully peel away the warm blue tape, place parchment paper over the reverse side, and give it a quick 8-second fuse. Transfer the hot ornament beneath a heavy cookbook or marble tile for three minutes. Weighting it down guarantees a glass-flat finish that will never curl.
How to Convert Flat Beads into Heirloom Tree Ornaments
A melted Perler shape is charming on its own, but adding thoughtful artisanal details turns it into a genuine heirloom tree ornament. Here is the exact stringing method I use to elevate fuse beads into boutique holiday decorations:
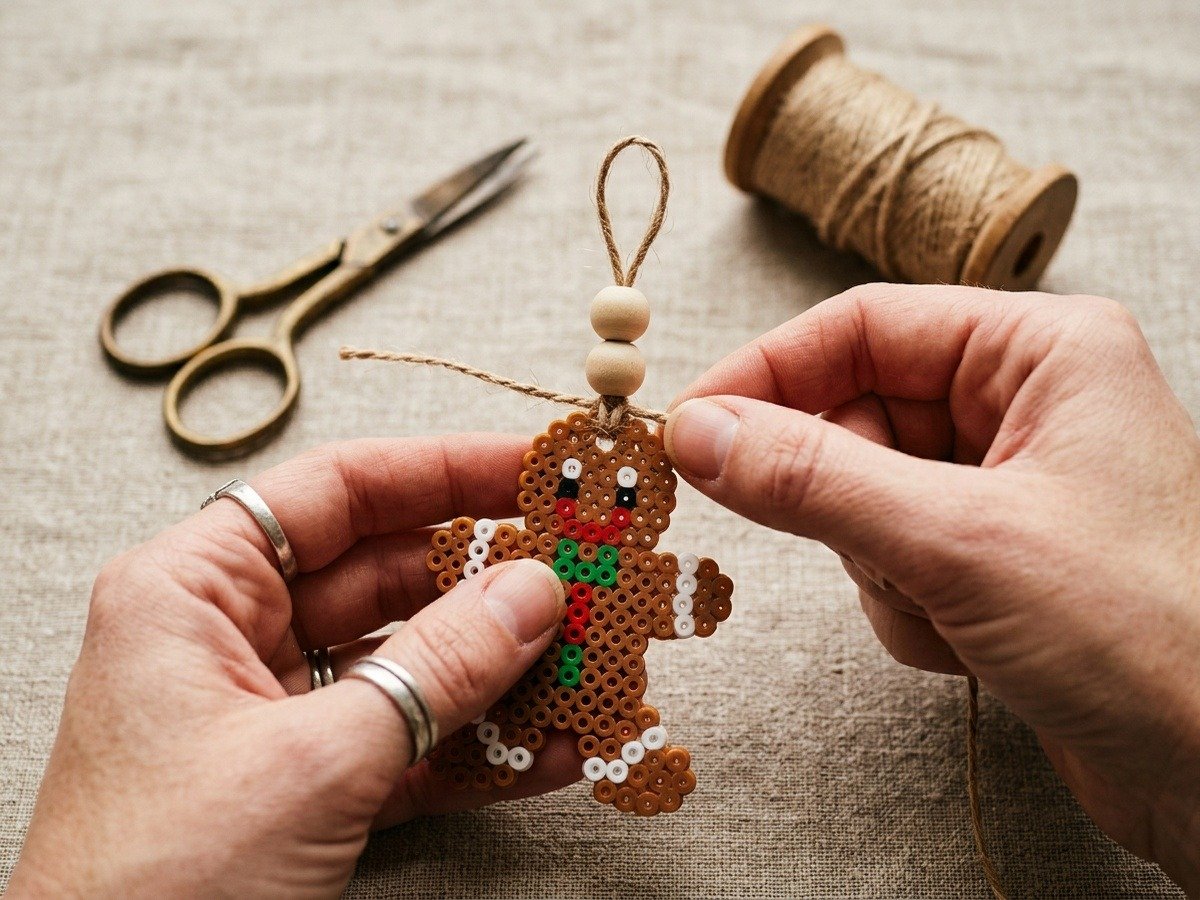
1. The Apex Gap Secret: When placing beads on your pegboard, deliberately omit the very top center bead. When you fuse the design, this creates an open eyelet hole with perfectly melted border walls that will never tear out.
2. Stringing Jute Twine: Cut a 10-inch length of 1mm natural polished jute twine or metallic gold baker’s twine. Fold the strand in half to form a loop. Thread the folded loop through the open eyelet from back to front, then pass the two loose ends through the loop to create a snug lark’s head hitch.
3. Adding Raw Beechwood Spacer Beads: Slide one or two 10mm raw natural beechwood beads over both strands of twine, sliding them down until they rest directly against the top of the Perler ornament. The earthy blonde wood provides stunning tactile contrast against the glossy colorful beads, giving your project an authentic Scandinavian aesthetic.
4. Tying the Hanger Knot: Tie an overhand knot four inches above the wooden beads to complete the hanging loop, and trim the excess cord ends neatly with sharp craft shears.
Creative Ways to Style and Display Holiday Fuse Beads
Do not limit your finished Christmas Perler beads to tree branches alone. These lightweight, durable pieces can be integrated across your entire holiday home decor scheme:
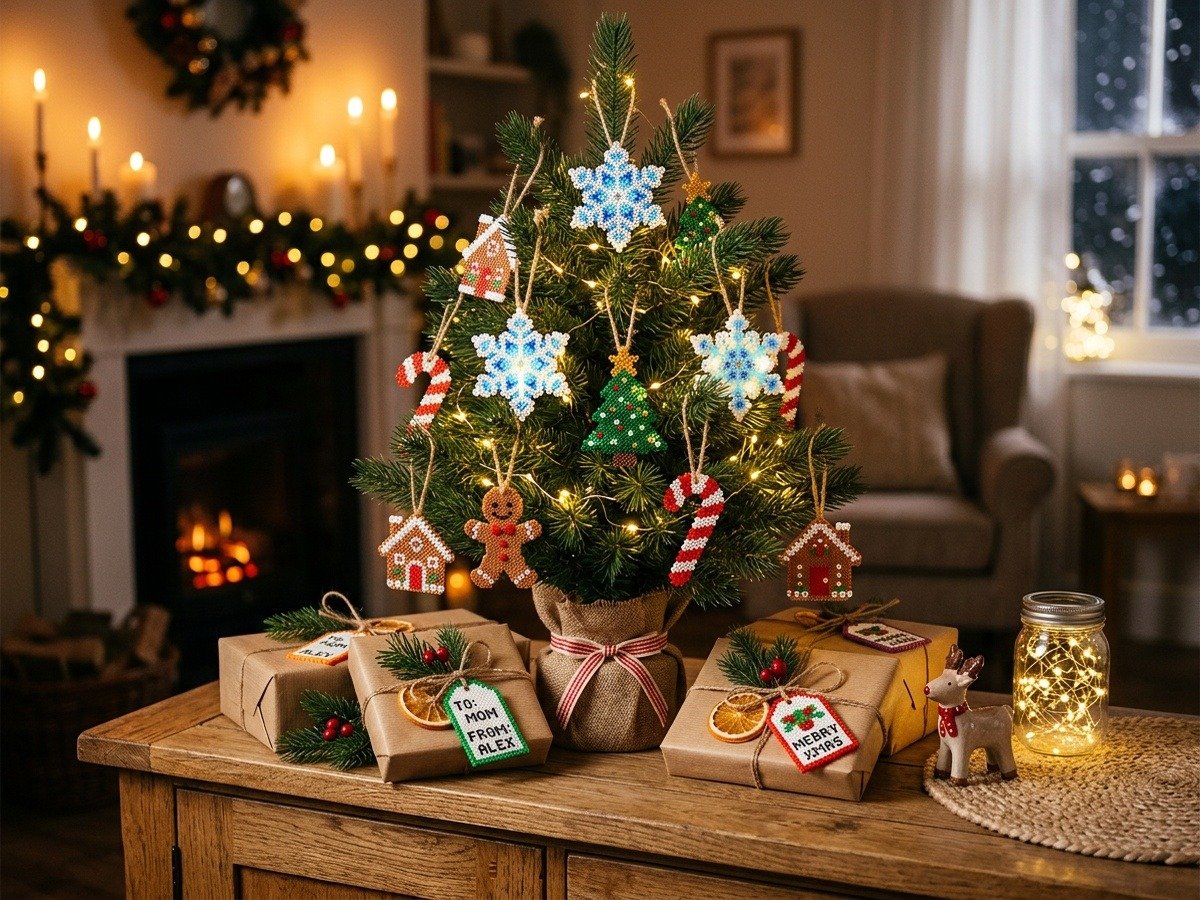
- Festive Holiday Garlands: String 8 to 12 finished ornaments onto a six-foot length of twisted cotton rope or thick jute twine, spacing them four inches apart with wooden spacer beads. Drape the garland across a fireplace mantel, open kitchen shelving, or a staircase railing.
- Artisan Gift Tag Toppers: Tie finished snowflakes, candy canes, or mini trees onto kraft paper wrapped holiday gifts. Write the recipient’s name on a small card tucked beneath the bead charm. The recipient gets a gift tag that doubles as a keepsake ornament for their own tree.
- Holiday Place Card Accents: Lay a miniature Santa hat or wreath ornament flat across dinner napkins on your holiday dining table. Thread a small handwritten name tag through the top loop for a memorable dinner party place setting.
- Reusable Advent Calendar Ornaments: Number 24 small muslin bags and tuck one fused holiday charm inside each bag. Children can discover a new ornament each morning in December and hang it directly onto a tabletop miniature tree.
Because food-grade plastic fuse beads are sturdy and moisture-resistant, they can be enjoyed year after year without yellowing or degrading. As noted by the EPA recycling and materials guidance, durable handmade items that replace single-use disposable holiday decor help reduce seasonal consumer waste while cultivating meaningful family traditions.
Frequently Asked Questions About Christmas Perler Beads
What temperature iron setting works best for Perler beads?
Set your iron to medium heat (usually marked as wool or silk on household irons). High heat melts the beads too quickly, causing uneven pooling, bubbling, and burnt edges. Always turn off the steam setting completely, as hot moisture droplets trapped beneath parchment paper can cause steam pockets and cloud the plastic surface.
Can I substitute wax paper for parchment paper?
No, never use wax paper. Wax paper is coated in paraffin wax that will melt directly onto your beads and the soleplate of your iron at fusing temperatures. Always use silicone-coated kitchen parchment paper, unbleached baking paper, or reusable Teflon ironing film designed specifically for fuse bead crafts.
How do I prevent fused ornaments from curling as they cool?
As plastic cools, the side that received the most heat tends to contract faster, pulling the shape into a curve. To keep your ornaments dead flat, immediately transfer the hot fused piece beneath a heavy book, marble pastry board, or cutting board for two to three minutes until the plastic has completely dropped to room temperature.
What is the best way to attach hanging loops to Perler ornaments?
The cleanest method is leaving an empty bead space at the top point of your pattern before fusing. Once cooled, thread a 10-inch piece of natural jute twine or metallic embroidery floss through the opening using a lark’s head knot, add one or two natural wooden spacer beads, and tie a knot at the top to form a durable hanger.
Are Perler bead ornaments safe for kids to make?
Yes, placing beads onto pegboards is fantastic for developing fine motor skills, hand-eye coordination, and pattern recognition in children ages six and up. However, the ironing step involves high temperatures and should always be performed strictly by an adult on a stable, heat-resistant surface.
There is something deeply rewarding about unpacking a storage box next December and discovering handmade ornaments you created with your own hands. These 15 Christmas Perler bead patterns are quick to complete, budget-friendly, and infinitely customizable to match your home’s unique holiday aesthetic.
Gather your pegboards, plug in your iron, and give these charming holiday patterns a try this weekend. If you create a set of ornaments or string up a festive garland, I would love to hear which designs became your family favorites. Happy holiday crafting!

