
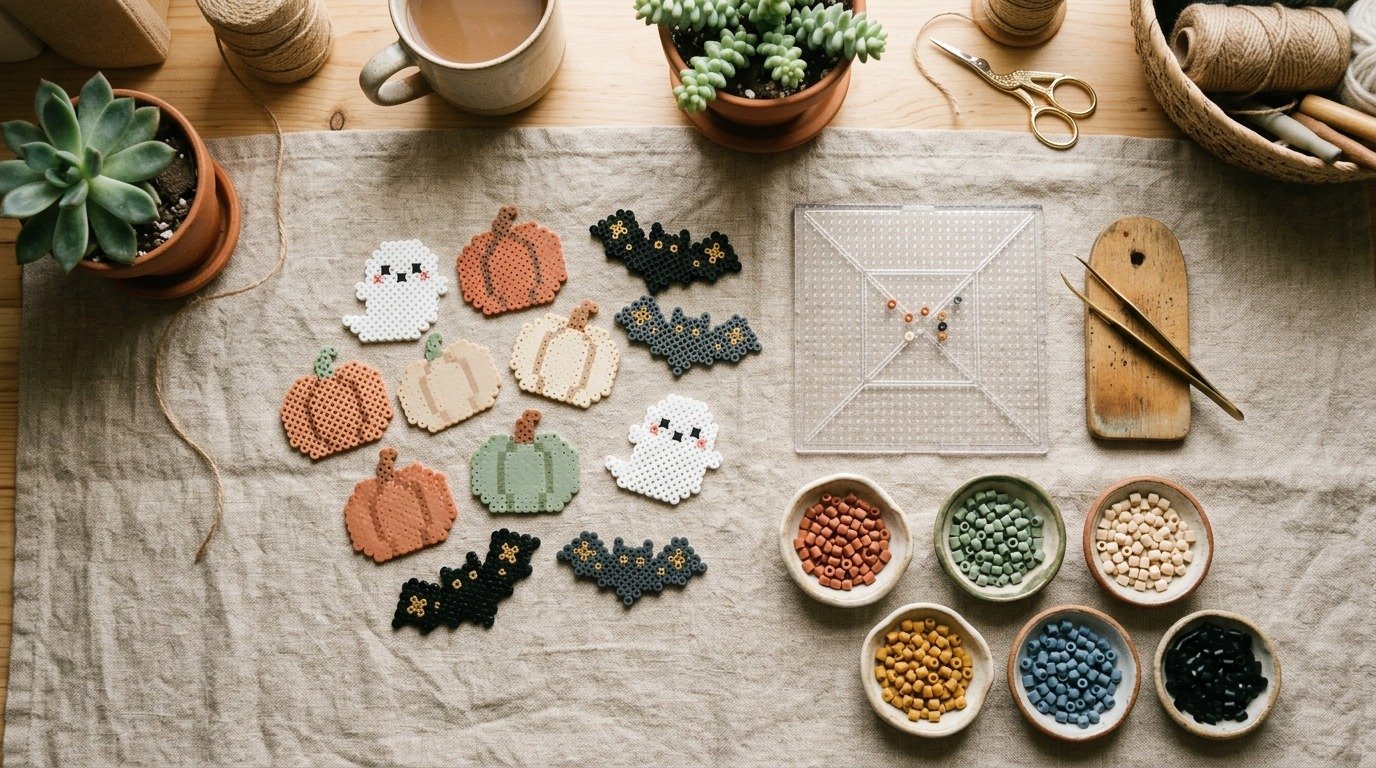
Halloween crafting does not have to mean messy orange glitter on your dining table or expensive plastic knick-knacks from big-box store aisles. If you want a relaxing, zero-mess maker project that yields charming holiday decor in under an hour, exploring creative Halloween Perler bead patterns is one of the most rewarding crafts you can tackle this autumn.
Fuse beads, often called Perler or melty beads, provide the ideal medium for building graphic pixel art that looks elevated, crisp, and surprisingly modern. Whether you want to craft blushing ghost keychains, subtle terracotta jack-o’-lanterns, or gothic celestial bats for a fireplace garland, this step-by-step guide walks you through fifteen beginner-friendly designs, essential maker tips, and the game-changing painter’s tape technique that saves your plastic pegboards from heat warping forever.
Quick Answer: How to Make Halloween Perler Bead Projects
To make durable Halloween Perler bead patterns, arrange standard 5mm fuse beads onto a square pegboard using fine-tip craft tweezers. To prevent your pegboard from melting or warping under heat, use the painter’s tape method: press blue painter’s tape firmly over the beads, rub smoothly to secure adhesion, lift the design off the board, and poke ventilation holes through every bead using a spare pegboard or needle. Set a dry household iron (no steam) to medium heat. Place unbleached parchment paper over the beads and press lightly in slow circular motions for 15 to 25 seconds until the bead rims fuse evenly without crushing the center holes. Flip, iron the reverse side for 10 seconds, and immediately place the warm piece under a heavy hardback book for 10 minutes to cool completely flat.
1. Essential Supplies and Choosing Your Autumn Palette
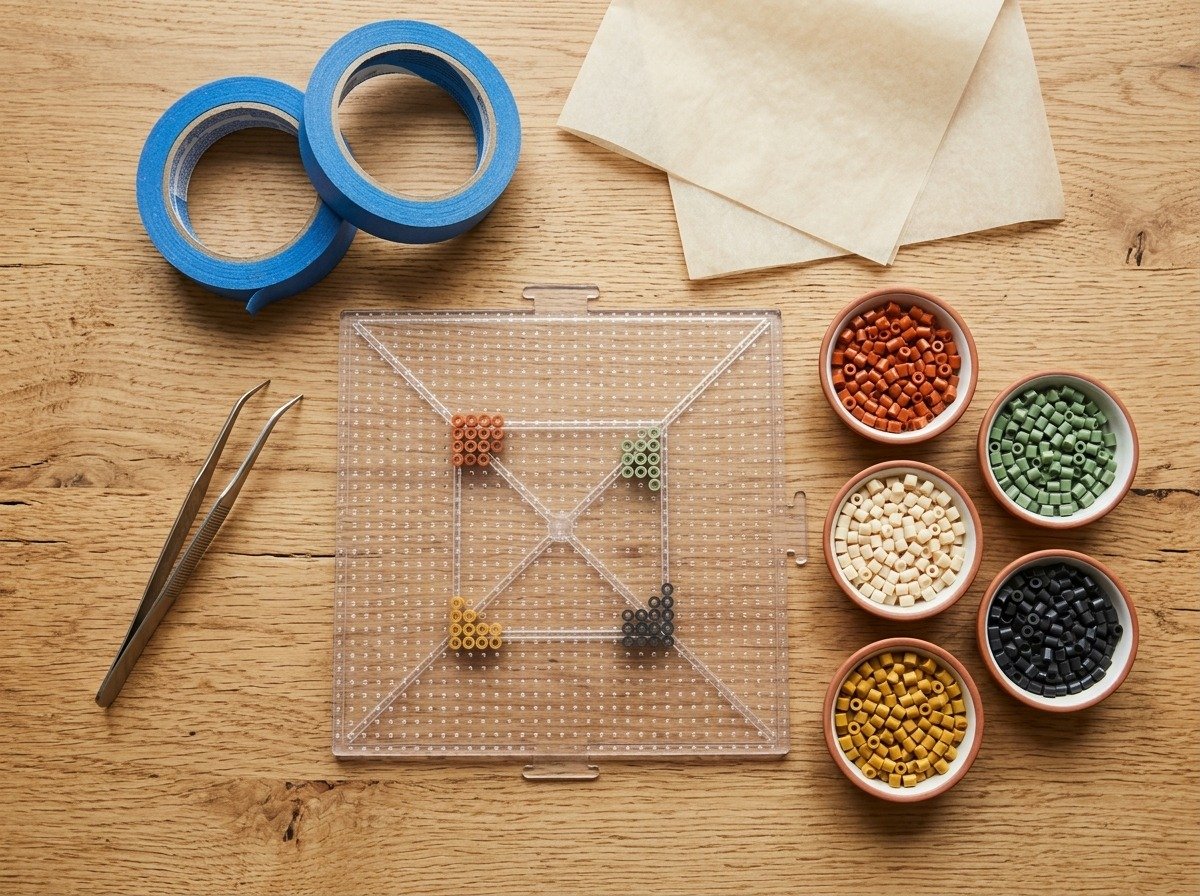
Starting with fuse beads is delightfully affordable because the foundational materials last through dozens of seasonal projects. You do not need industrial heat presses or specialized equipment. Standard 5mm midi fuse beads, a reliable household flat iron, and a flat craft workspace are plenty to produce gallery-worthy Halloween pixel art.
To create a cohesive bohemian aesthetic rather than a chaotic neon school project, thoughtfully curate your bead color palette before knotting or placing a single bead. We love combining rich terracotta, butterscotch yellow, toasted cream, warm charcoal, olive sage, and soft blush pink. Swapping out stark industrial orange for warm terracotta immediately elevates any Halloween craft into cozy, rustic home decor.
- Standard 5mm Fuse Beads: High quality polyethylene beads certified non-toxic under safety standards like ASTM D-4236 Standard Practice for Labeling Art Materials ensure safe melting and uniform wall thickness.
- Clear Square Pegboard (29×29 Pegs): Interlocking clear boards let you place printed or sketched grid templates directly underneath the pegs for effortless counting.
- Fine-Tip Craft Tweezers: Bent-nose or fine jewelry tweezers offer precise fingertip control, preventing accidental bumps that knock placed beads out of line.
- Unbleached Parchment Paper: Always use real silicone-coated kitchen parchment paper rather than wax paper. Wax paper melts into the plastic and permanently ruins your creations.
- Blue Painter’s Tape: Medium-tack painter’s tape allows you to safely lift your assembled patterns off the pegboard before applying heat, protecting your boards from heat degradation.
If you are brand new to fuse bead projects, reviewing our foundational mini perler bead patterns guide will give you helpful insight on bead anatomy and beginner pegboard handling before diving into larger seasonal pieces.
2. Friendly Ghosts and Floating Mini Specters
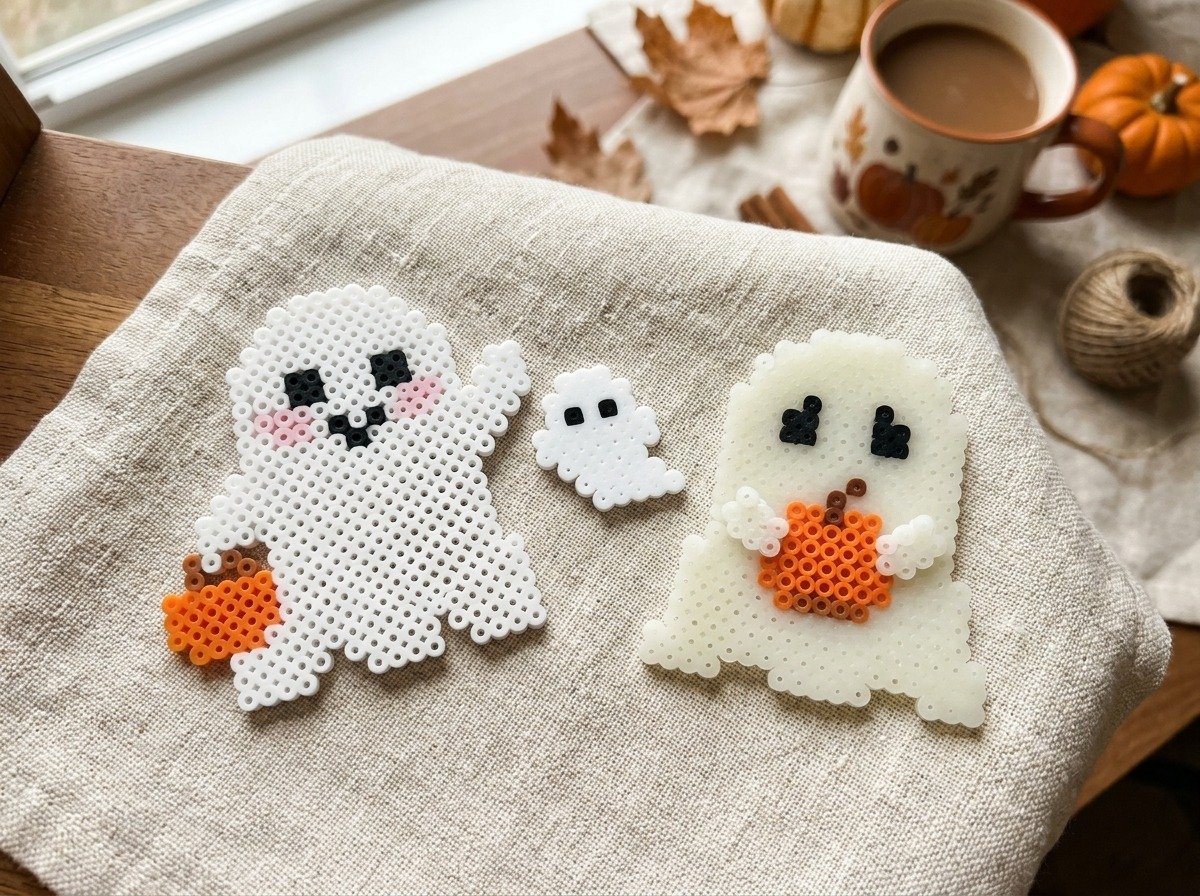
Ghosts are universally adored Halloween icons because their organic flowing silhouettes translate effortlessly onto square pegboards. Instead of aggressive hollow eyes or sharp jagged borders, aesthetic perler bead ghosts use rounded contours, friendly eye placement, and charming blush accents.
Here are four delightful ghost variations you can assemble in under twenty minutes each:
- The Waving Little Ghost: A 14×18 peg silhouette with a flared rounded tail, two black seed eyes, and two soft pink blush beads placed directly below each eye corner. An outstretched three-peg arm gives this design welcoming character.
- The Tiny Treat Pail Ghost: Build a 16×20 peg body and add a contrasting miniature orange trick-or-treat bucket at the base. Use five brown beads for the handle and eight orange beads for the miniature pumpkin pail.
- Glow-in-the-Dark Sheet Phantom: Substitute standard opaque white beads with phosphorescent glow beads for the main body. When charged under indoor lamps or daylight, the ghost emits a soft green nocturnal glow without batteries.
- The Peeking Ghost Bookmark: Create a slender, elongated ghost head that transitions into a flat 4-peg wide tail. Insert the finished piece into autumn reading books for instant seasonal charm.
For makers pairing paper crafting with fuse beads, these friendly specters match the lighthearted tone of our popular DIY Halloween paper crafts tutorial, making them wonderful companion projects for family craft afternoons.
3. Heirloom Pumpkins and Smiling Jack-o’-Lanterns
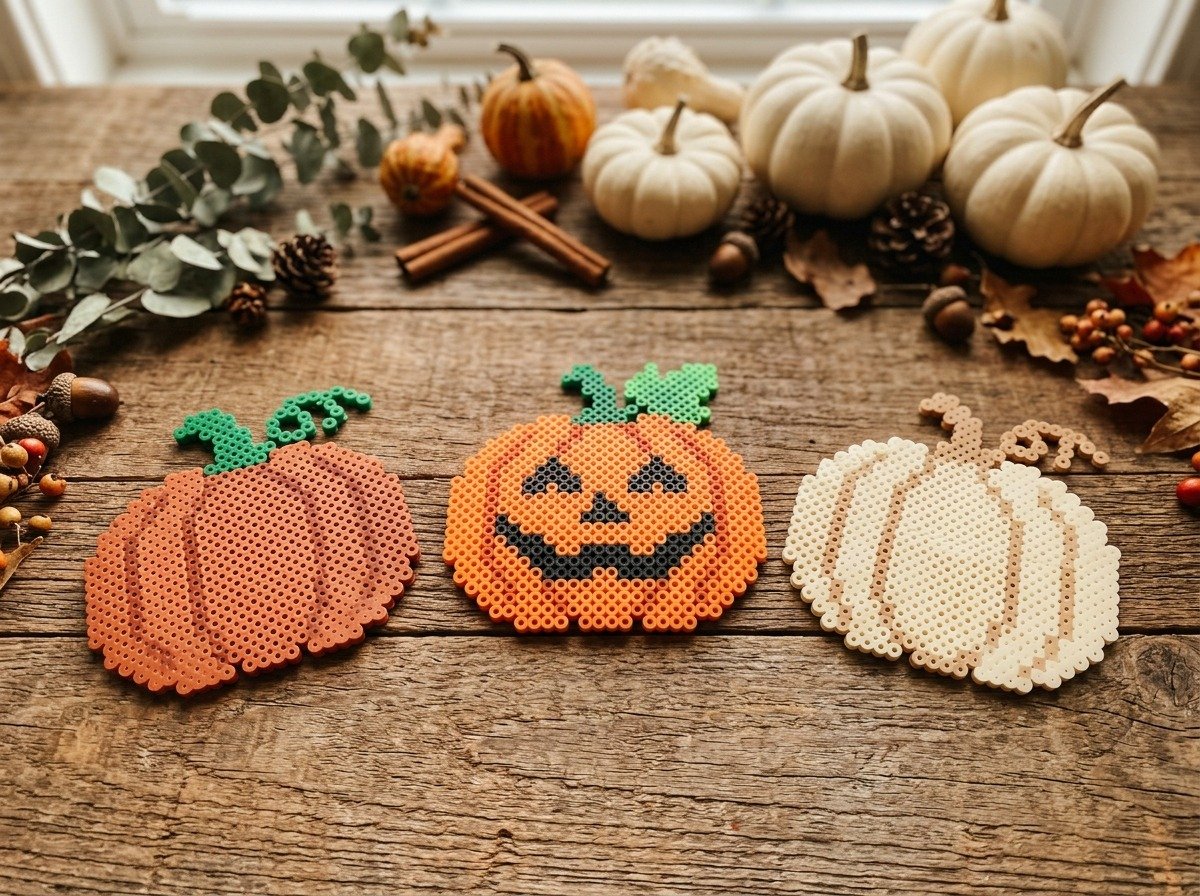
Pumpkins are the undisputed cornerstone of fall decorating because they transition smoothly from September through Thanksgiving. When planning pumpkin fuse bead patterns, experimenting with oblong, squat, and ribbed shapes adds authentic visual dimension to your display.
Try these four distinctive pumpkin patterns on a 29×29 pegboard:
- Terracotta Ribbed Heirloom: Instead of solid orange, construct three vertical lobes using darker rust beads along the groove lines and lighter apricot beads in the center. Top with an angled brown stem and two olive green curly tendrils.
- Classic Geometric Jack-o’-Lantern: A bright honey-orange 18×18 silhouette with crisp black triangle eyes, a tiny inverted triangle nose, and an alternating toothy smile. Perfect for refrigerator magnets.
- Ivory Cinderella Pumpkin: Use pearl white and cream beads with a soft tan ribbing line. Cinderella pumpkins evoke an elegant cottagecore mood that pairs seamlessly with neutral mantel decor.
- Mini Pumpkin Trio Cluster: Knot or fuse three miniature 8×8 pumpkins into an overlapping cluster with one shared vine. These compact motifs make darling additions to seasonal friendship bracelets and bag charms.
If you love combining different craft mediums across your living space, these bead pumpkins coordinate beautifully with the tactile textures found in our 12 aesthetic paper Halloween crafts collection.
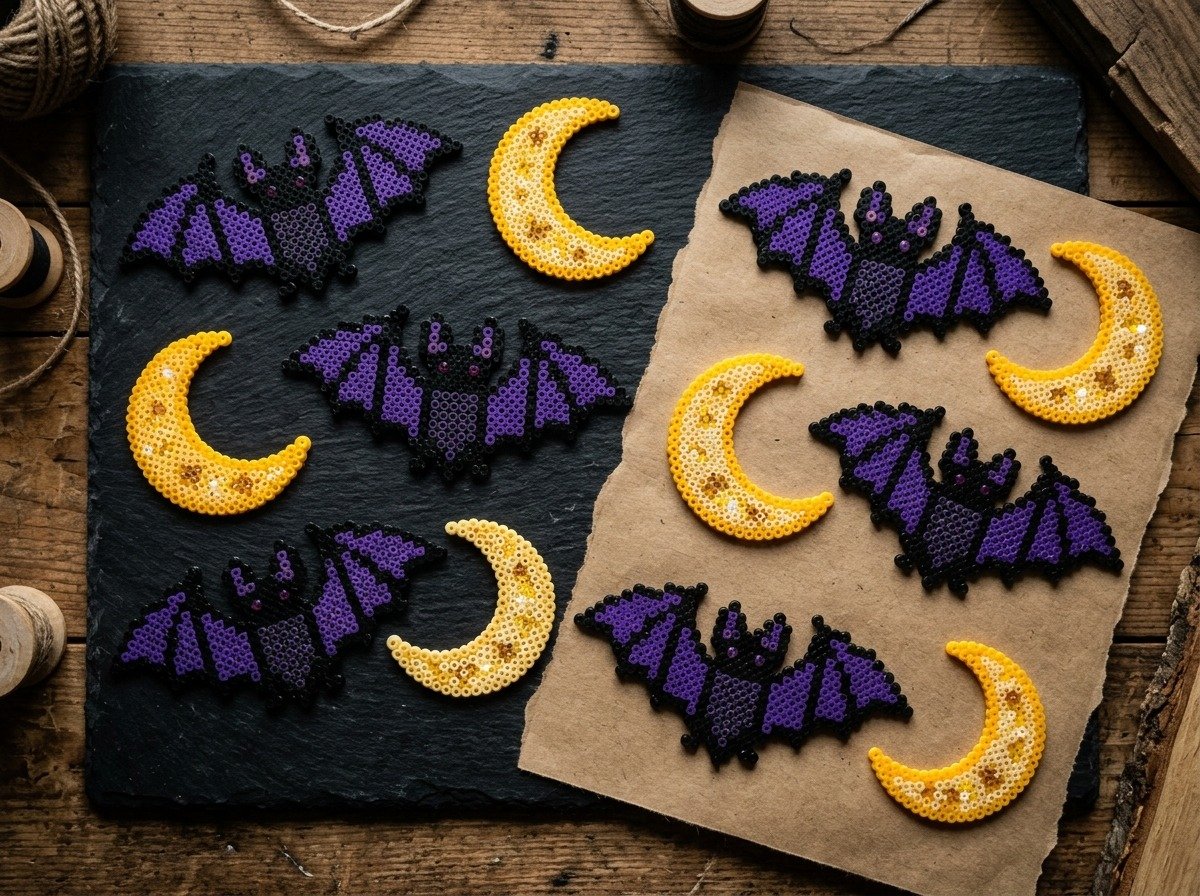
4. Gothic Celestial Bats, Moons, and Midnight Icons
For makers who appreciate moody, atmospheric autumn aesthetics, celestial midnight designs offer sophisticated alternatives to traditional cartoon motifs. Clean angular lines, deep charcoal tones, and golden butterscotch highlights bring a modern gothic sensibility to your holiday arrangements.
Explore these four captivating celestial motifs:
- Angled Flying Bat Swarm: A 22-peg wide bat silhouette featuring stepped wings, pointy ears, and twin purple or ruby eye beads. Crafting five or six of these in slightly varying wing angles lets you stage an organic climbing flight pattern on your wall.
- Golden Crescent Moon: A 15-peg curved crescent made with warm yellow and translucent glitter beads. Moons provide a stunning visual anchor when interspersed among hanging bats or strung onto holiday garlands.
- Twinkling Four-Point Star: A crisp 9×9 miniature diamond star. These fast 3-minute builds are fantastic for filling small empty spaces on your pegboard and serve as lovely spacer beads on garlands.
- Black Cat Head with Golden Eyes: A clean 14×14 silhouette with triangular upright ears, a miniature pink nose bead, and striking amber-gold eyes that stand out sharply against matte black fur.
These midnight icons harmonize naturally with darker holiday styling, such as the ambient candlelit displays shared in our spooky Halloween decorations tutorial.
| Pattern Name | Grid Dimensions | Approx. Bead Count | Primary Colors Needed | Best Finished Application |
|---|---|---|---|---|
| Waving Ghost | 14 x 18 Pegs | ~140 Beads | White, Black, Pastel Pink | Keychain / Fridge Magnet |
| Terracotta Pumpkin | 18 x 16 Pegs | ~195 Beads | Rust, Apricot, Brown, Olive | Mantel Garland / Coaster |
| Celestial Bat | 22 x 12 Pegs | ~135 Beads | Charcoal Black, Dark Purple | Wall Swarm Display |
| Crescent Moon | 15 x 15 Pegs | ~90 Beads | Butterscotch, Gold Glitter | Bag Charm / Mobile |
| Candy Corn Accent | 9 x 12 Pegs | ~55 Beads | White, Orange, Yellow | Hair Clip / Earring Pair |
| Black Cat Silhouette | 14 x 14 Pegs | ~120 Beads | Matte Black, Amber, Pink | Pin Badge / Plant Stake |
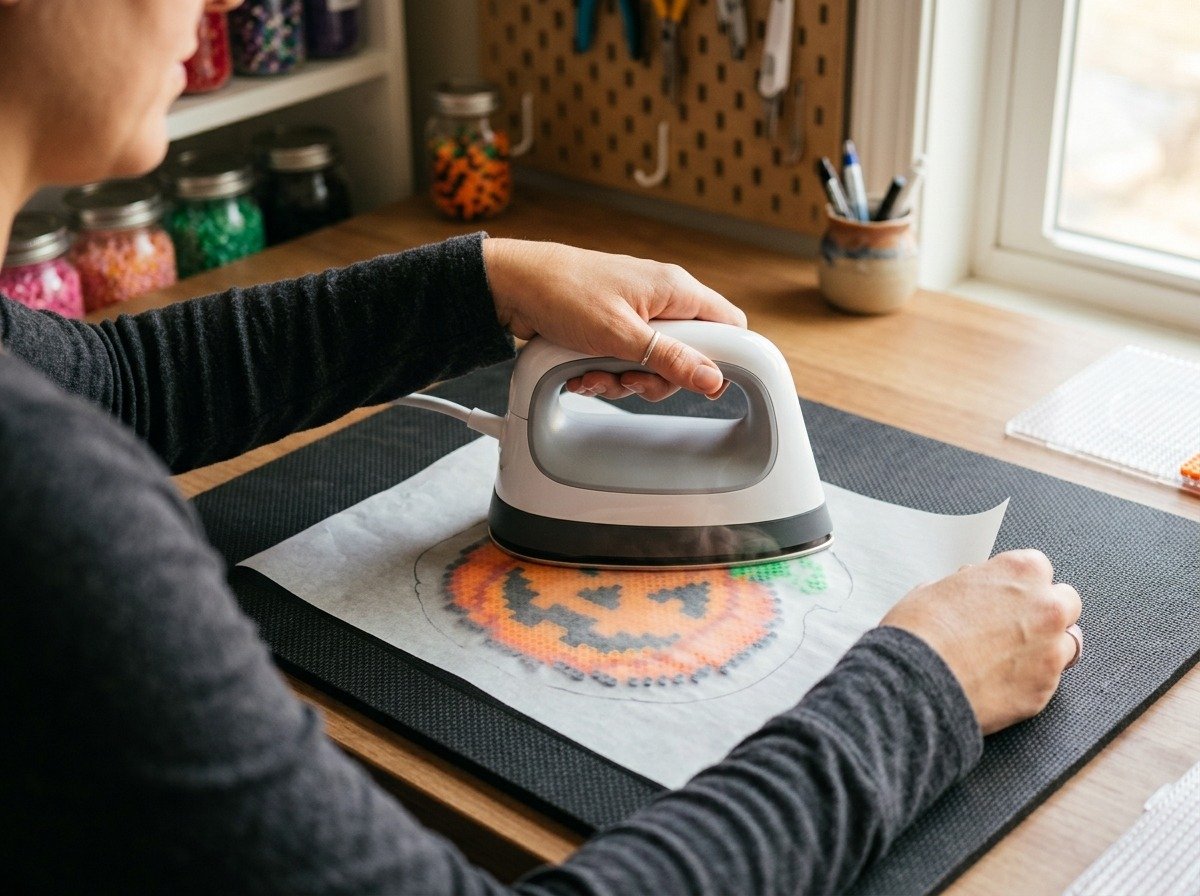
5. The Painter’s Tape Method and Ironing Without Warping
The single most common disappointment among fuse bead crafters is warped pegboards or unevenly melted designs. When you apply a hot iron directly to beads resting on plastic pegs, the pegs absorb residual heat, bend out of shape, and eventually make straight bead alignment impossible.
Professional pixel artists prevent this by using the tape method. It adds two minutes to your preparation time but guarantees crisp, repeatable results without damaging your boards. Maker safety guidelines supported by educational resources like Penn State Extension Youth Arts and Crafts Safety Guidelines consistently recommend proper ventilation, dry heat without steam, and dedicated flat cooling surfaces when working with thermo-setting polymers.
Step-by-Step Tape Protocol
- Tape the Bead Surface: Tear strips of blue painter’s tape slightly wider than your completed design. Carefully lay the tape across the top of the beads with slight overlap between tape rows. Rub firmly with the pad of your thumb or a craft bone folder to ensure every bead sticks securely to the adhesive.
- Lift and Flip: Gently peel the tape from the pegboard. Your beads will come off cleanly attached to the tape. Set your plastic pegboard safely aside in a cool area.
- Poke Vent Holes: Turn the taped piece over so the open bead ends face upward. Take another pegboard (or a blunt needle) and press into the back of every bead to puncture the tape. These tiny vent holes allow trapped hot air to escape freely during ironing, preventing unsightly air bubble blowouts.
- Iron in Circles: Place your taped design on a flat, heat-resistant surface with the exposed plastic side facing up. Lay parchment paper over the beads. Using medium dry heat (linen setting without steam), press gently and move in slow, continuous circular patterns for 15 to 25 seconds until the bead walls fuse into a uniform grid.
- Peel and Press Under Weight: Allow the piece to cool for 60 seconds, peel off the painter’s tape from the reverse side, and briefly iron the back for 10 seconds for extra strength. Immediately sandwich the warm piece between two sheets of clean paper under three heavy hardback books for 10 minutes until cool to room temperature.
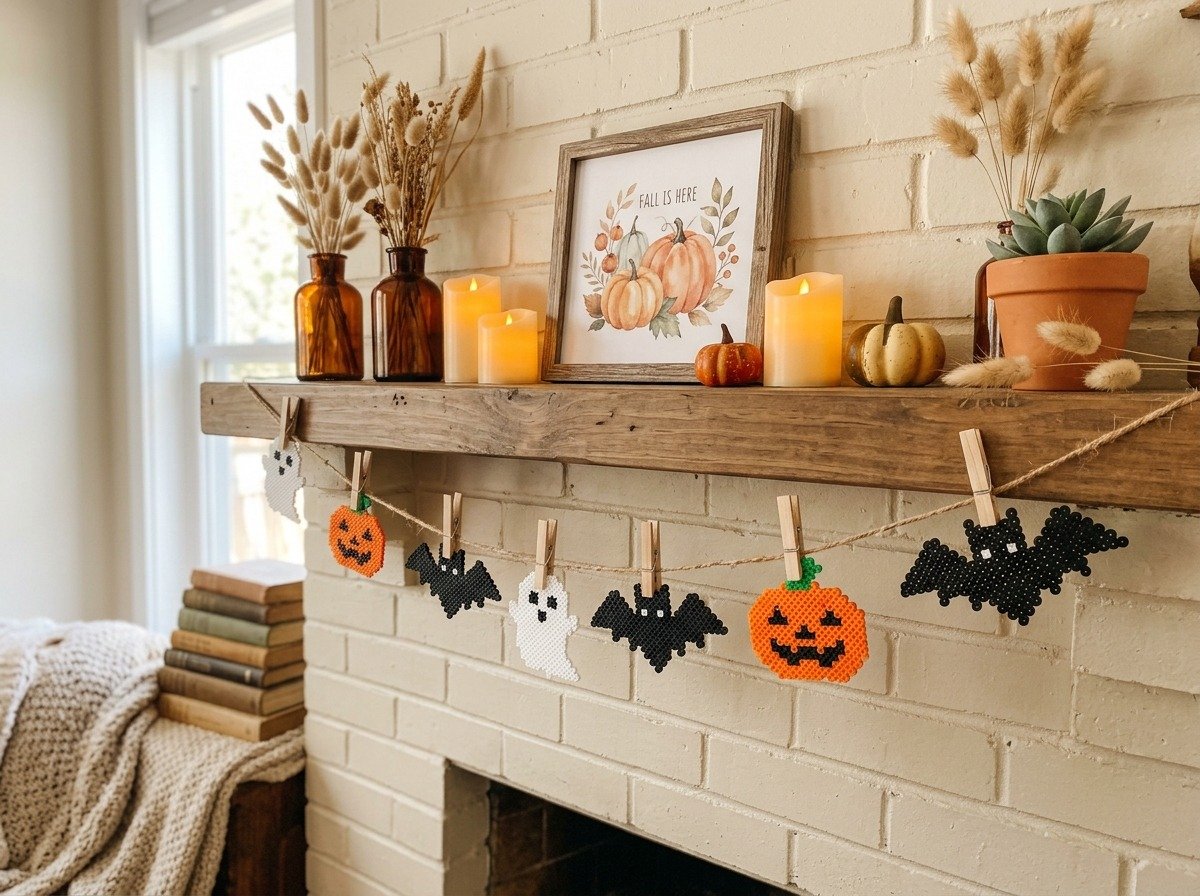
6. Creative Ways to Display and Style Your Finished Pieces
Once your Halloween perler bead pieces are fused flat and completely cooled, the creative fun continues with styling. Because fuse beads are lightweight, water-resistant, and structural, they can be incorporated into seasonal home decor in surprising ways:
- Rustic Twine Fireplace Bunting: Thread natural jute twine or baker’s twine through the top corner holes of your fused pumpkins, bats, and ghosts. Secure them with mini wooden craft clothespins and drape across an autumn mantel alongside dried bunny tails and glowing amber tea lights.
- Strong Ceramic Refrigerator Magnets: Use E6000 craft adhesive to attach a 15mm neodymium disc magnet to the smooth reverse side of your creations. They hold up recipe cards and holiday party invites with playful handmade personality.
- Enamel-Style Keychains and Bag Charms: Using jewelry pliers, insert a 6mm brass or gunmetal jump ring through a perimeter bead hole, then attach a sturdy lobster clasp. They make sweet trick-or-treat bag charms or thoughtful handmade gifts for friends. For jewelry makers, they pair delightfully with the bead techniques featured in our beginner beaded bracelet guide.
- Festive Plant Stakes: Hot glue a 6-inch wooden craft dowel or bamboo skewer to the backside of a pumpkin or friendly ghost. Tuck the stake into potted indoor succulents and trailing houseplants for a whimsical seasonal touch.
Traditional folk arts and handmade seasonal decorations have a rich heritage in regional community traditions, celebrated in cultural repositories like the Library of Congress American Folklife Center Craft Archives. Embracing small-batch homemade decor brings that warm sense of craftsmanship into everyday modern living.
Frequently Asked Questions
What temperature should my iron be set to for Perler beads?
Set your iron to medium heat (often marked as the wool or polyester/linen setting on household irons). Never use the steam setting because water droplets create uneven heat zones and cause moisture bubbles inside the melting beads. A steady, dry medium heat gives you full control over the melting rate.
Can I use wax paper instead of parchment paper?
No, never use wax paper. Wax paper has a paraffin wax coating that instantly melts under the iron, adhering directly to your beads and the iron’s soleplate. Always use silicone-coated kitchen parchment paper or reusable Teflon ironing sheets designed specifically for fuse bead crafts.
Why do my finished Perler bead creations curl as they cool?
Polyethylene plastic contracts as it cools down from its molten state. If one side cools faster than the other, the tension forces the edges to warp upward. To keep pieces completely flat, immediately transfer the hot fused design beneath a heavy flat object, like two large hardback books or a flat cutting board, and let it rest undisturbed for 10 minutes.
How do you attach jump rings to fuse bead keychains without snapping them?
When ironing the design, avoid fully closing the center hole of the corner bead where you intend to attach hardware. If the hole accidentally melts shut, gently re-open it while the plastic is still warm using a round sewing awl or heated headpin. Always use an open 6mm or 8mm jump ring threaded through the bead wall rather than gluing hardware directly to the surface.
How many beads do I need for a typical mini Halloween pattern?
Most miniature Halloween designs (such as simple candy corn, tiny bats, and mini ghosts) require between 50 and 150 beads and fit comfortably on a small 14×14 pegboard. Larger detailed jack-o’-lanterns or full-body phantoms typically use 180 to 250 beads on a standard 29×29 board.

