
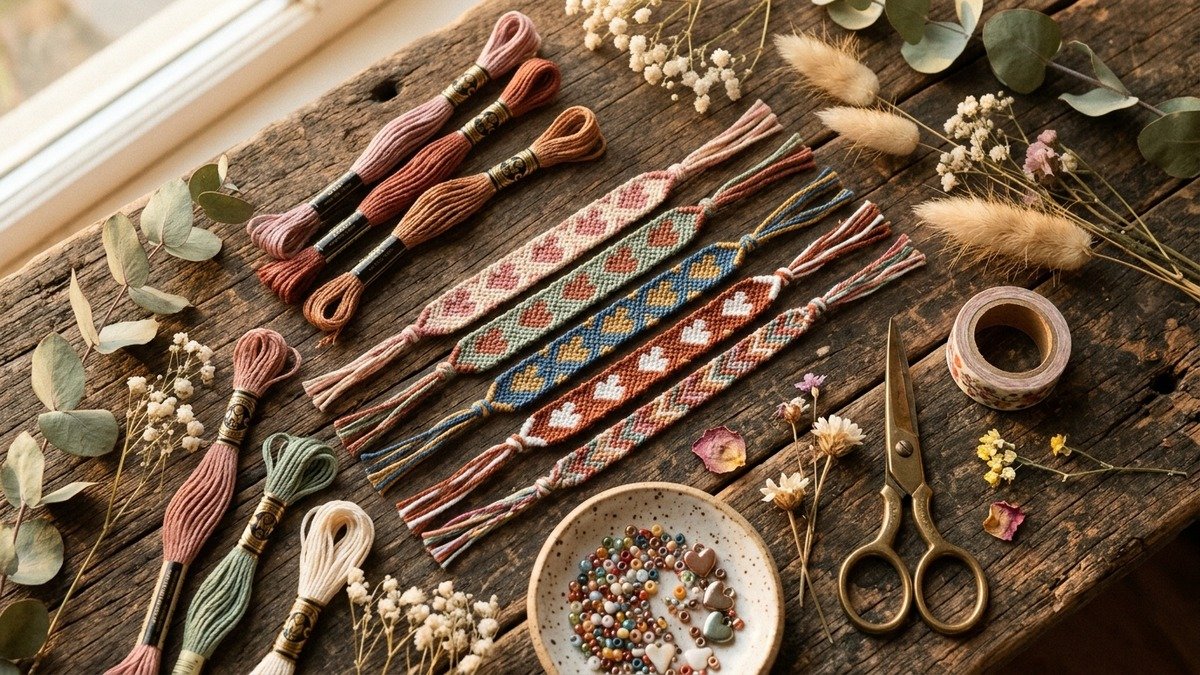
Quick Project Summary: Heart Friendship Bracelet
- Skill Level: Confident Beginner (familiarity with forward and backward knots helps)
- Required Strands: 8 strands total (4 background color, 4 heart color), each cut to 36 inches (91 cm)
- Core Knot Technique: Modified chevron foundation using forward knots, backward knots, and center joining knots
- Completion Time: Approximately 90 to 120 minutes per standard 6-inch bracelet
- Key Secret for Crisp Hearts: Keep outer border knots slightly firmer than inner filling knots to prevent the heart shapes from bowing outward
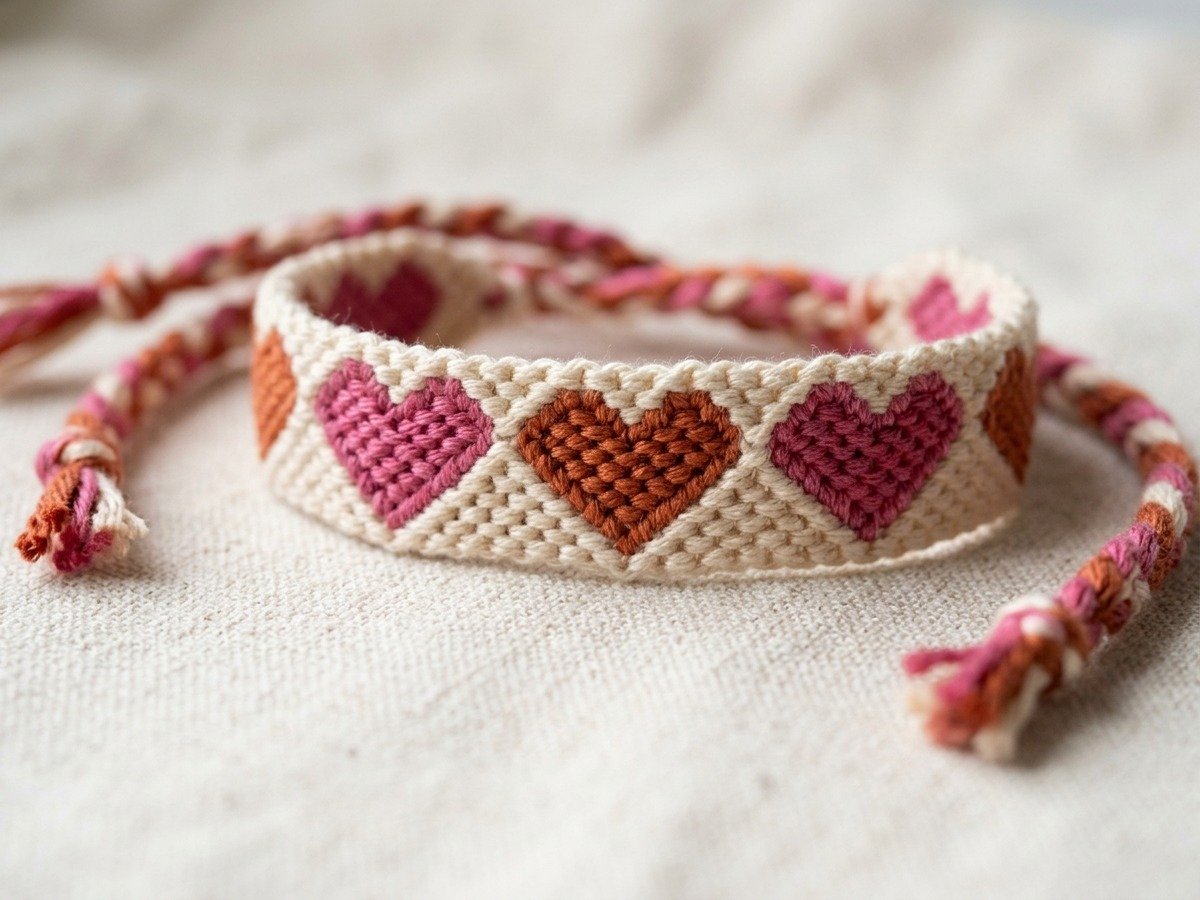
The friendship bracelet heart pattern remains one of the most rewarding textile projects you can make with simple embroidery floss. While classic chevron or candy stripe patterns create linear geometric bands, the heart pattern uses selective color placement and directional knotting to weave small, distinct heart silhouettes down the entire length of the band. When knotted with even tension and a thoughtful color palette, the finished piece looks polished, intentional, and timeless.
Many crafters encounter frustration when first attempting this design because traditional patterns often explain the steps through abstract knot diagrams without clarifying string travel. If you have ever ended up with lopsided lobes, warped edges, or hearts that blend into the background, the issue almost always comes down to strand ordering at setup or uneven thread tension. In this guide, you will learn the exact thread arrangement, the 8-row repeating knot sequence, and practical methods to keep your edges straight from the first knot to the final closure.
Essential Materials and Tool Selection
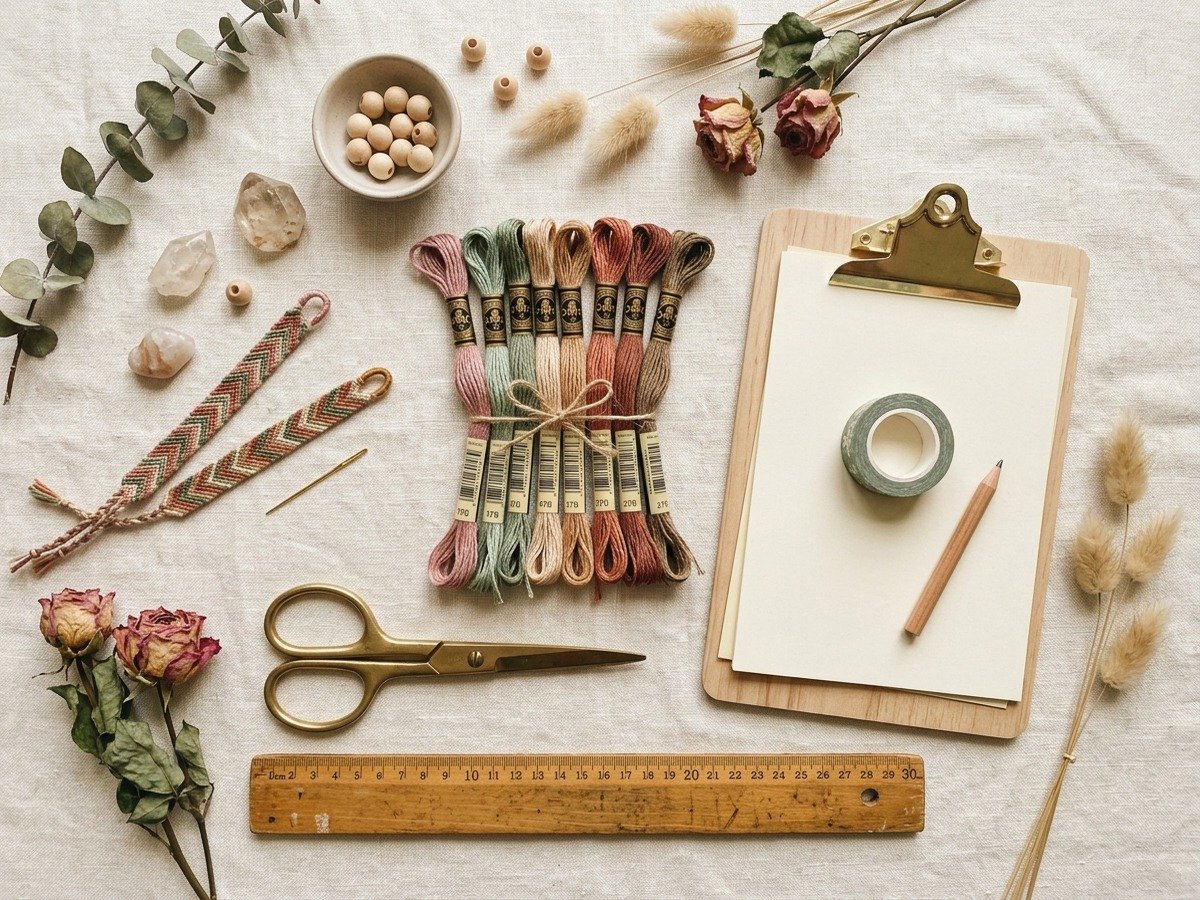
Before cutting any floss, selecting the right cord weight and fiber composition ensures clean knot definition. Standard craft store floss varies in fiber density, which directly impacts how crisp the heart shapes appear once tightened.
| Material / Tool | Recommended Specification | Practical Purpose |
|---|---|---|
| Embroidery Floss | standard six-strand cotton embroidery floss (Size 25) | Provides smooth matte finish, consistent strand thickness, and resists fuzzing during repetitive knotting |
| Work Surface Anchor | Heavy-duty clipboard or low-tack painter’s tape | Maintains steady downward tension while protecting your desk surface from adhesive residue |
| Measuring Tool | Clear craft ruler or sewing tape measure | Ensures equal strand lengths so you never run out of string mid-bracelet |
| Cutting Tool | Sharp micro-tip craft shears | Produces clean end cuts without fraying the multi-ply thread bundle |
| Finishing Needle (Optional) | Tapestry needle (size 22 or 24) | Helpful for undoing accidental wrong knots without shredding fibers |
For your initial bracelet, choose two high-contrast shades. A creamy neutral (such as ecru, linen, or soft sand) paired with a rich accent tone (such as terracotta, dusty rose, or deep mustard) provides the highest contrast. This visual contrast makes it simple to distinguish which strand acts as the working yarn and which strand serves as the static base cord while you learn.
If you enjoy exploring varied handmade accessories, you can combine this woven technique with our beaded friendship bracelets guide to create balanced mixed-texture bracelet stacks.
Step 1: Measuring, Cutting, and Strand Arrangement
Proper string preparation establishes the foundation for clean geometry. Follow these exact measurements to ensure sufficient working length for knotting and braided end ties.
- Cut Four Strands of Color A (Background): Cut four separate strands of your background color to 36 inches (91 cm) in length.
- Cut Four Strands of Color B (Hearts): Cut four separate strands of your heart color to 36 inches (91 cm) in length. You now have eight individual strands.
- Tie the Starting Knot: Align all eight strands at one end. Measure approximately 3 inches (7.5 cm) down from the tips and tie an overhand knot, or create a starter loop if you prefer a button closure.
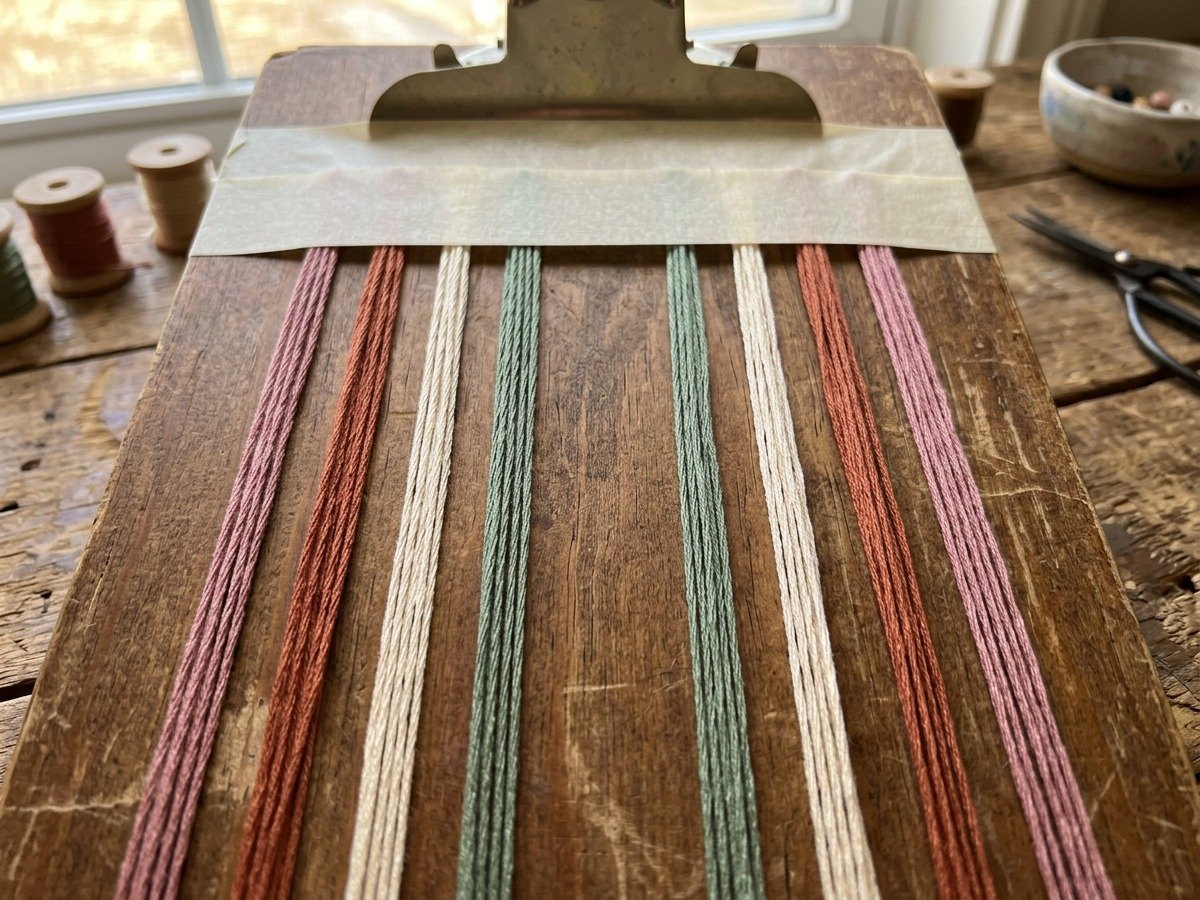
- Anchor to the Work Surface: Secure the knot firmly under the clamp of your clipboard or tape it flat to your work table using two strips of painter’s tape.
- Arrange in Mirrored Symmetry: Lay the strands flat across your board so they do not overlap. The order from left to right must follow this mirrored pattern:
- Left side: Color A (1), Color B (2), Color A (3), Color B (4)
- Right side: Color B (5), Color A (6), Color B (7), Color A (8)
This alternating, mirrored sequence (A-B-A-B-B-A-B-A) is the critical key that allows the hearts to form. If even one strand is misplaced in the initial order, the heart lobes will appear shifted or distorted.
Maker Tip: Keep a 2-inch wide gap between your left four strands and your right four strands on your board. Visualizing the bracelet as two mirrored wings working toward a central meeting point prevents accidental string confusion.
Step 2: Understanding the Double Hitch Knots
Like most traditional friendship bracelets rooted in historical textile knotting traditions, every single visible stitch in the heart pattern is composed of a double hitch knot. Tying only half of the knot creates a loose loop that twists out of alignment. Always tie two consecutive knots with the working strand around the base strand.
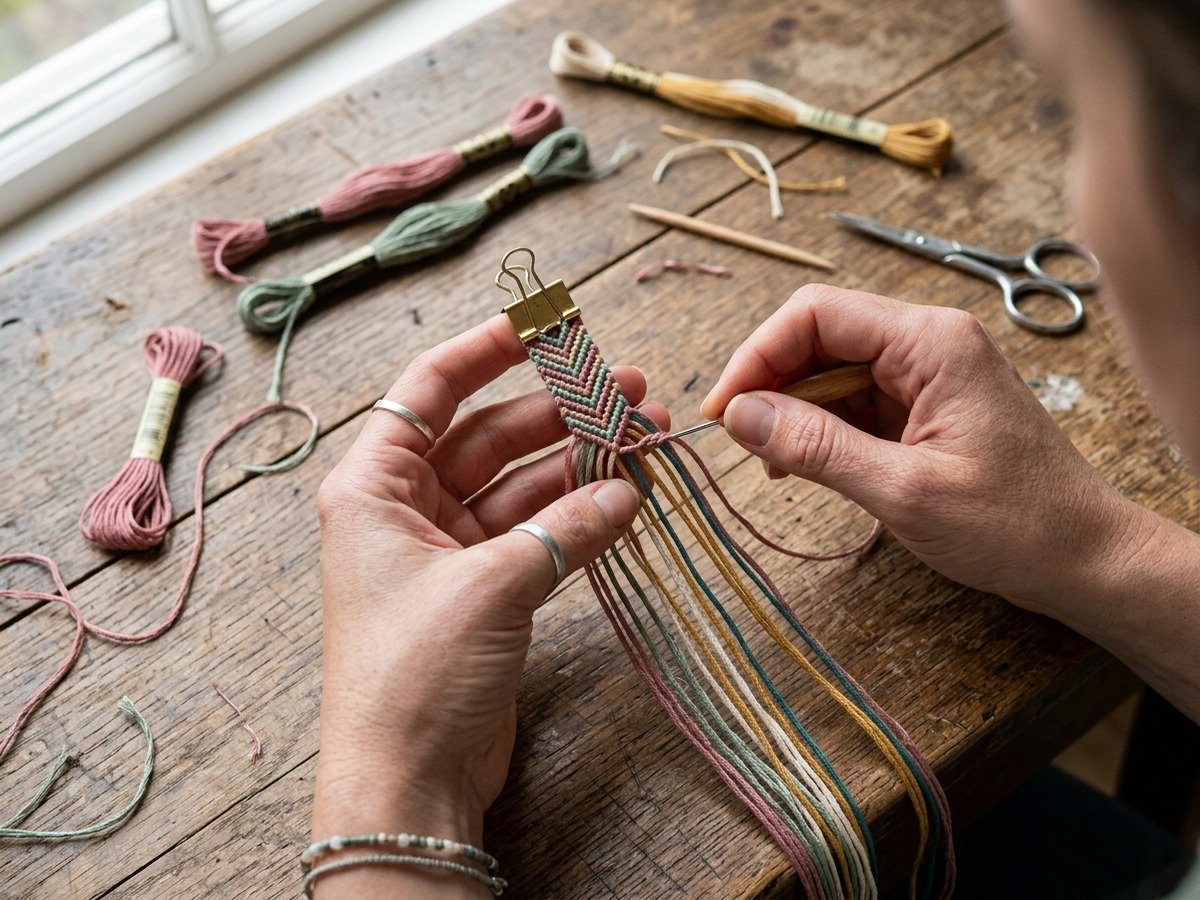
The Forward Knot (FK)
Used primarily on the left side of the bracelet to move colors inward toward the center:
- Take the left working strand and cross it over the adjacent right strand to form the shape of the number 4.
- Loop the working strand under the base strand and pull the tip up through the opening of the 4.
- Hold the base strand taut downward with your non-dominant hand while sliding the knot smoothly up to the top row.
- Repeat this exact motion a second time with the same working strand around the same base strand to complete one Forward Knot.
The Backward Knot (BK)
Used primarily on the right side of the bracelet to move colors inward toward the center:
- Take the right working strand and cross it over the adjacent left strand to form a backwards number 4 (the shape of the letter D or P).
- Loop the working strand under the base strand and bring the tip up through the loop.
- Keep the base strand pulled taut downward while sliding the knot up firmly against the previous row.
- Repeat the motion a second time with the same working strand around the same base strand to complete one Backward Knot.
The Center Joining Knot
Whenever the two outermost traveling strands reach the center (strands 4 and 5), they must be locked together to complete the chevron point. You can tie this central knot using either a Forward Knot or a Backward Knot. The essential rule is to pick one direction and stick with it consistently throughout the entire bracelet so your centerline remains smooth and uniform.
Step 3: The Complete 8-Row Heart Pattern Sequence
The friendship bracelet heart pattern operates on an 8-row repeating rhythm. Once you complete Row 8, your strands will return to their starting mirrored order, ready to begin the next heart. Follow along row by row:
Row 1: Establishing the Chevron Base
This row creates the outer background border and angles your strands inward.
- Left Wing: Take the leftmost strand (Color A, position 1). Tie a Forward Knot onto strand 2 (Color B), then onto strand 3 (Color A), and finally onto strand 4 (Color B). Strand 1 is now in the center.
- Right Wing: Take the rightmost strand (Color A, position 8). Tie a Backward Knot onto strand 7 (Color B), then onto strand 6 (Color A), and finally onto strand 5 (Color B). Strand 8 is now in the center.
- Center Join: Tie the two center Color A strands together using one Forward Knot.
Row 2: Second Chevron Row
Repeat the chevron motion with the new outermost strands to build width.
- Left Wing: Take the new leftmost strand (Color B). Tie Forward Knots onto strands 2, 3, and into the center.
- Right Wing: Take the new rightmost strand (Color B). Tie Backward Knots onto strands 7, 6, and into the center.
- Center Join: Tie the two center Color B strands together with one Forward Knot.
Row 3: Creating the Heart Lobes (Inward Knots)
Here the rhythm changes from a standard chevron to construct the top curved lobes of the heart.
- Left Side: Take strand 2 (Color A) and tie a Backward Knot onto strand 1 (Color A). This forms the left outer lobe edge. Next, take strand 3 (Color B) and tie a Forward Knot onto strand 4 (Color B).
- Right Side: Take strand 7 (Color A) and tie a Forward Knot onto strand 8 (Color A). This forms the right outer lobe edge. Next, take strand 6 (Color B) and tie a Backward Knot onto strand 5 (Color B).
- Center Note: Do not join the center strands on this row. Leaving the center open creates the cleft at the top of the heart.
Row 4: Outward Heart Fill
This row expands the heart color to fill the body of the motif.
- Left Wing: Take strand 2 (Color B) and tie a Backward Knot onto strand 1 (Color A). Then take the new strand 2 and tie Forward Knots across strands 3 and 4 toward the center.
- Right Wing: Take strand 7 (Color B) and tie a Forward Knot onto strand 8 (Color A). Then take the new strand 7 and tie Backward Knots across strands 6 and 5 toward the center.
- Center Join: Tie the two center Color B strands together with a Forward Knot.
Row 5: Solid Heart Center
Work your background color strands inward to frame the top of the heart.
- Left Wing: Take the leftmost strand (Color A). Tie Forward Knots across strands 2, 3, and into the center.
- Right Wing: Take the rightmost strand (Color A). Tie Backward Knots across strands 7, 6, and into the center.
- Center Join: Tie the two center Color A strands together with a Forward Knot.
Row 6: Heart Wall Formation
- Left Wing: Take the leftmost strand (Color B) and tie Forward Knots across strands 2, 3, and toward the center.
- Right Wing: Take the rightmost strand (Color B) and tie Backward Knots across strands 7, 6, and toward the center.
- Center Join: Tie the two center Color B strands together with a Forward Knot.
Rows 7 and 8: Heart Point Closure
Closing the heart point requires converging your background strands to lock the bottom tip into a sharp, recognizable V-shape.
- Work two standard chevron rows using Color A from both outer borders inward to the middle.
- Pull the center join on Row 8 firmly snug. This sharpens the tip of the heart and prepares the strings for the next heart cycle.
Troubleshooting Common Heart Pattern Mistakes
Every textile maker encounters knotting quirks. Understanding why a pattern distorts allows you to correct the issue immediately rather than unraveling inches of work.
Issue 1: The Bracelet Curls into a Spiral
When a woven bracelet curls tightly rather than lying flat, it is caused by pulling your knots upward too aggressively or tightening the second hitch significantly harder than the first. To correct this, focus on gliding each knot into place with steady, horizontal tension. The base thread must stay straight while the working thread forms the loop around it.
Issue 2: Blurry or Indistinct Heart Shapes
If the heart appears muddy or lacks clear definition, your chosen embroidery floss colors may share similar tonal values. Test your colors by taking a photo of the skeins with your phone and converting it to black and white. If both threads appear as the same shade of gray, they will blur together in the finished knot work. High tonal contrast is essential.
Issue 3: Edges Look Wavy or Uneven
Wavy edges happen when the outermost border knots are pulled with varying firmness from row to row. Dedicate consistent pressure to the first knot on the left and the first knot on the right of each row. Keeping these border stitches uniform acts as a structural frame for the interior motif.
Curated Aesthetic Color Palettes for Heart Bracelets
While primary neon shades have nostalgic appeal, styling heart friendship bracelets in modern, earth-inspired palettes transforms them into elevated daily jewelry. Here are four balanced combinations:
| Palette Theme | Background Color (Color A) | Heart Motif Color (Color B) | Styling Mood |
|---|---|---|---|
| Warm Terracotta Boho | Unbleached Ecru / Linen (DMC 712) | Muted Rust / Terracotta (DMC 3778) | Earthy, bohemian, pairs naturally with raw linen and leather |
| Eucalyptus & Cream | Soft Ivory (DMC 3865) | Sage Green (DMC 502) | Calm, botanical, subtle everyday neutral |
| Dusty Rose Vintage | Pale Sand (DMC 644) | Antique Dusty Mauve (DMC 3726) | Romantic vintage charm, complements gold-filled accents |
| Midnight Slate | Warm White (DMC 3865) | Deep Slate Navy (DMC 930) | High-contrast modern graphic style with crisp lines |
If you enjoy experimenting with varied bracelet textures, consider pairing your woven heart band alongside handmade pieces from our beaded flower bracelet tutorial or exploring versatile clay bead bracelet ideas to build a cohesive stack.
Finishing Techniques: Loops, Braids, and Ties
A well-crafted friendship bracelet deserves clean, secure closures that make putting it on and taking it off simple. Here are the three most durable ways to finish your heart bracelet:
- The Double Three-Strand Braid: Divide the remaining tails at each end into two equal groups of four strands. Braid each group for approximately 3 inches (7.5 cm) and finish with an overhand knot. This gives you two separate ties on each end, allowing you to tie a secure square knot on your wrist that will not slide undone.
- The Sliding Macrame Square Knot: Cross the braided tail ends in opposite directions. Using a spare 8-inch piece of floss in your background color, tie three square knots around both sets of tails. Trim the excess knotting floss and add a tiny dab of fabric glue to the knot tips. This creates an adjustable sliding closure that eliminates the need for tying and untying.
- The Teardrop Loop and Button: If you created a starter loop at the beginning of the project, braid your ending tails into a single firm 3-inch braid. Knot the end around a small brass or wood button, or tie an oversized knot that can slip through the starter loop to act as a toggle fastener.
For more foundational jewelry assembly tips and hardware techniques, our detailed guide on making beaded bracelets step-by-step covers secure closure methods that apply across diverse DIY jewelry projects.
Care and Longevity: Keeping Cotton Thread Crisp
Handmade embroidery floss bracelets withstand daily wear remarkably well when cared for properly. Keep these practical preservation habits in mind:
- Rinse After Saltwater or Swimming: Chlorine and ocean salt weaken cotton fibers over time and cause dyes to fade prematurely. If you wear your bracelet into water, rinse it under cool tap water afterward and allow it to dry flat on a towel.
- Restoring Flatness: If the bracelet becomes slightly twisted after prolonged wear, dampen it lightly with water, smooth it straight between your fingers, and press it flat beneath a heavy book overnight.
- Preventing Snags: Keep bracelet tails trimmed neatly to prevent them from catching on knitted sweaters or bag straps.
Frequently Asked Questions
How many strings do you need for a heart friendship bracelet?
You need 8 strands in total: 4 strands for your background color and 4 strands for your heart motif color. Each strand should measure approximately 36 inches (91 cm) in length to ensure plenty of working thread for knotting and end ties.
Can beginners make the heart pattern friendship bracelet?
Yes. If you know how to tie basic forward and backward knots (the same knots used in a simple chevron bracelet), you can easily make this pattern. The only difference is the 8-row sequence where the strands reverse direction to form the lobes and point of the heart.
Why do my heart shapes look crooked or lop-sided?
Crooked hearts are usually caused by uneven tension between the left and right wings of the pattern. Ensure that you tie both hitches of every knot with identical tension. Also confirm that your initial string arrangement follows the mirrored symmetry order: A-B-A-B on the left and B-A-B-A on the right.
What type of thread is best for making friendship bracelets?
Six-strand 100% mercerized cotton embroidery floss (such as DMC or Anchor) is the best choice. It provides vibrant color, high tensile strength, and a smooth sheen that allows knots to slide into position without catching or fraying.
How long does it take to make one heart friendship bracelet?
For most crafters, a standard 6-inch bracelet takes between 90 and 120 minutes of continuous knotting. Once you commit the 8-row sequence to memory, your rhythm will speed up significantly.

