
Quick Project Summary
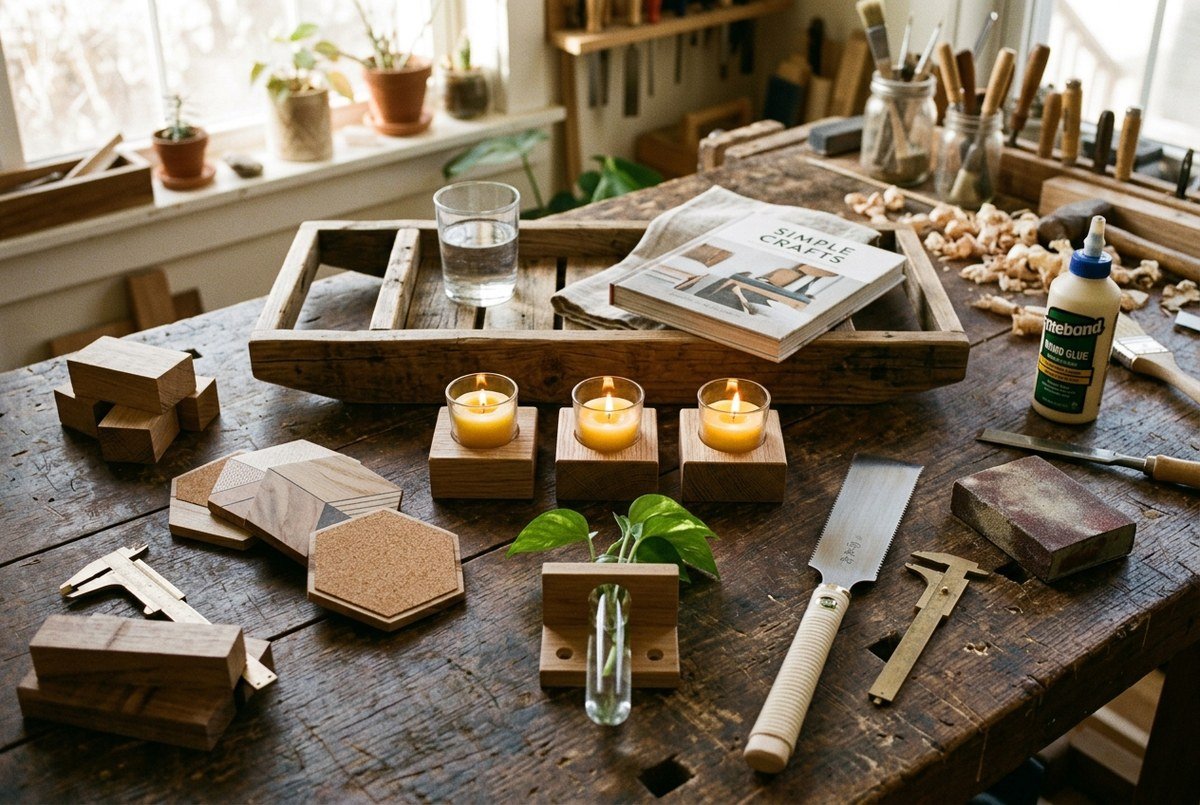
Wood crafts for beginners are accessible, functional DIY woodworking projects crafted from inexpensive scrap timber, 2×4 offcuts, and cedar slats using basic hand tools. Essential starter projects include rustic bath caddies, solid oak candle blocks, geometric coasters, plant propagation stations, and tablet cookbook stands. Requiring only a simple Japanese pull saw, sandpaper, PVA wood glue, and two bar clamps, these 15 beginner scrap wood projects teach foundational woodworking joinery, sanding progressions, and natural oil finishing without expensive power machinery.
In reality, some of the most charming, durable home decor pieces are made entirely with basic hand tools and leftover hardwood offcuts. Whether you want to build custom home decor, craft heirloom gifts for friends, or turn scrap lumber into functional homewares, this comprehensive master guide covers everything you need to know about wood crafts for beginners.
The Minimalist Beginner Woodworking Toolkit
You can build every single project in this guide on a kitchen table or sturdy workbench with these four fundamental tool categories:
| Essential Tool | Recommended Type | Approximate Cost | Craft Purpose |
|---|---|---|---|
| Japanese Pull Saw (Ryoba) | Double-edged flexible pull saw (crosscut & rip teeth) | $18.00–$25.00 | Cuts on the pull stroke for ultra-thin, razor-sharp kerfs with minimal physical effort |
| Quick-Grip Bar Clamps | Two 12-inch one-handed trigger bar clamps | $16.00 / pair | Holds workpieces rigid for safe cutting and exerts even pressure during glue-ups |
| Sandpaper & Sanding Block | Silicon carbide grit sheets: 80, 120, and 220 grit | $7.00 / pack | Levels rough cuts, breaks sharp edges, and buffs wood silky smooth |
| PVA Wood Glue | Titebond II or Gorilla Wood Glue (water-resistant) | $5.50 | Creates chemical bonds stronger than the timber fibers themselves |
For comprehensive technical wood species properties and drying characteristics, consult the USDA Forest Products Laboratory Wood Handbook. To explore combining wood and fiber arts, read our step-by-step tutorial on how to make a macramé floating shelf with a wooden board and our guide to handmade gift ideas for friends.
Core Hand Woodworking Skills (In 3 Simple Steps)
Step 1: Measuring, Marking & Precision Hand Sawing
The golden rule of beginner woodworking is simple: always measure twice, mark with a sharp carpenter pencil or knife line, and clamp your workpiece securely before sawing.
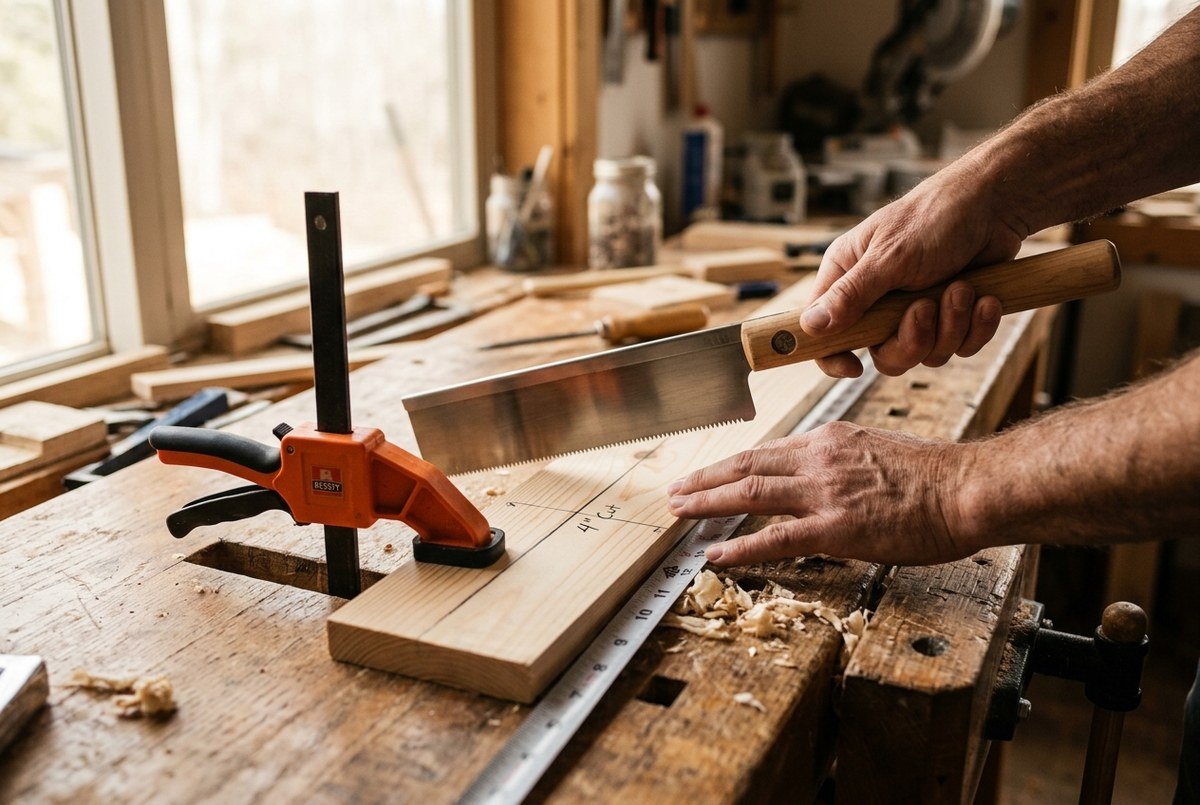
- Mark the Cut: Use a combination try square to draw a true 90-degree line across the face and down the sides of the board.
- Clamp Firmly: Secure the board to your workbench so the cut line extends approximately 2 inches beyond the bench edge.
- Start on the Pull: Japanese pull saws cut when pulled toward your body, not pushed. Rest your thumb against the blade as a guide, tilt the saw at 45 degrees, and take two gentle pull strokes to establish a kerf notch.
- Follow the Line: Keep your arm relaxed and let the weight of the saw do the cutting without applying downward muscle pressure.
Step 2: Clean Joinery, Gluing & Clamp Pressure
Modern PVA wood glue creates a chemical joint that is actually stronger than the cellular fibers of the surrounding wood—provided you clamp with adequate pressure.
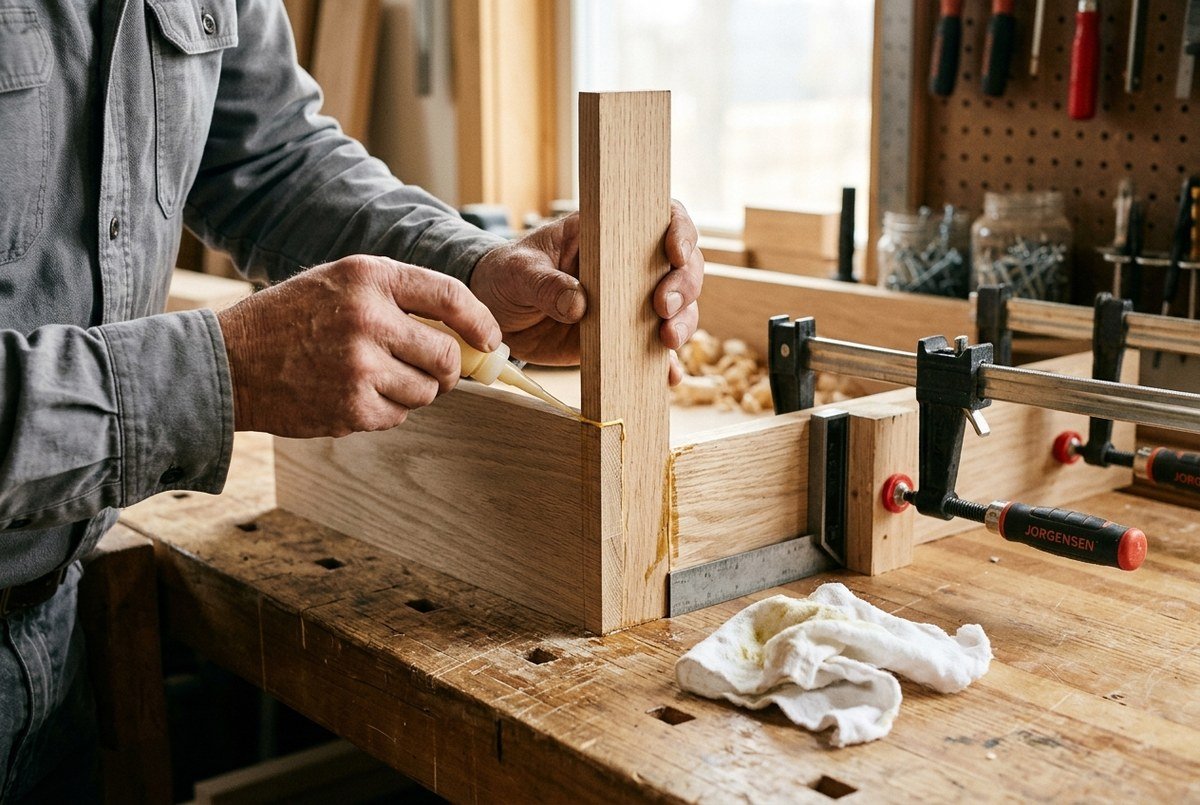
- Dry Fit First: Always assemble your pieces without glue first to verify that mating surfaces meet flush with zero gaps.
- Apply Even Glue: Spread a thin, continuous bead of wood glue across both joining surfaces using a silicone brush or your finger.
- Clamp Tight: Position bar clamps directly centered over the joints. Tighten until you see small, uniform beads of glue squeeze out along the seams.
- Clean Squeeze-Out: Wipe wet glue immediately with a damp rag, or allow it to skin over for 25 minutes and slice cleanly away with a sharp chisel. Leave clamped for at least 60 minutes.
Step 3: Sanding Progressions & Non-Toxic Oil Finishing
The difference between amateur crafts and heirloom quality comes down to sanding discipline and finishing oils.
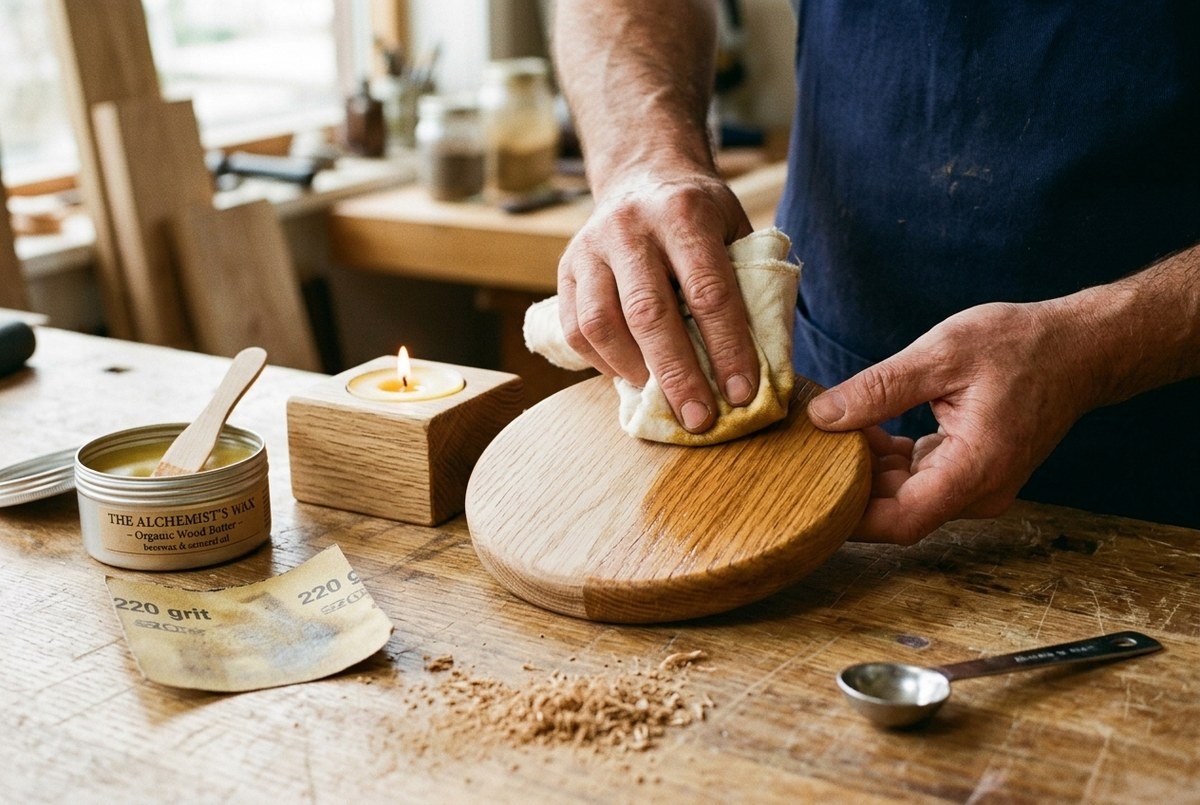
- Follow the Grit Sequence: Always sand in three progressive stages: start with 80-grit to remove saw marks, step up to 120-grit to erase scratch patterns, and finish with 220-grit for butter-soft smoothness. Always sand parallel with the wood grain, never across it.
- Ease the Edges: Run your 220-grit sanding block along sharp 90-degree board corners at a 45-degree angle to create a subtle, tactile chamfer.
- Apply Organic Wood Butter: Blend melted natural beeswax with food-grade mineral oil in a 1:4 ratio. Rub into the wood with a lint-free cotton rag, let soak for 20 minutes, and buff off excess with a dry cloth for an organic satin glow.
15 Easy Beginner Wood Crafts You Can Make Today
1. Rustic Bathtub Caddy Tray with Book Rest
Transform a single 1×10 cedar or pine board into a luxury spa bathtub tray. Measure your tub’s outer rim width (typically 30–32 inches), cut the board to length, and glue two 1×1-inch cleats to the underside 1/2 inch inside the tub walls to prevent slipping. Cut a shallow routed groove for an iPad or paperback book, and seal thoroughly with three coats of water-resistant polyurethane.
2. Minimalist Solid Oak Tea Light Candle Blocks
Cut 4×4 scrap timber or hardwood posts into staggered heights of 2, 3, and 4 inches. Mark the center point of each block top and drill a 1.5-inch diameter hole using a Forstner drill bit to a depth of 0.65 inches. Sand smooth, ease the corners, and insert glass-cupped tea light candles for warm tabletop hygge ambiance.
3. Geometric Scrap Wood Coasters with Cork Backing
Cut 4×4 inch squares or hexagonal shapes from mixed hardwood offcuts like walnut, cherry, and maple. Bevel the top edges with sandpaper, seal with water-resistant beeswax butter, and paste adhesive natural cork backing to the bottom to protect polished wood table surfaces. Pair them with our handmade DIY macramé coasters for a curated boho coffee table display.
4. Wall-Mounted Test Tube Plant Propagation Station
Rip a 1×3 inch pine strip to 12 inches long. Drill four evenly spaced 1-inch diameter holes through the top edge using a spade or Forstner bit to accommodate glass florist test tubes. Add keyhole hanging brackets to the back, slide the glass tubes in place, and fill with water to root pothos and monstera cuttings in natural window light.
5. Angled Wooden Cookbook and Tablet Stand
Craft an angled stand resembling an artisan cutting board. Cut a 10×14 inch backboard, cut a decorative handle hole at the top, and attach a 1.5-inch deep retaining ledge along the bottom with wood glue and brass finish screws. Attach an angled fold-out kickstand leg at the rear to prop recipes upright while cooking.
6. Wooden Entryway Key Rack with Brass Hooks
Sand a 4×14 inch piece of reclaimed walnut or weathered pallet wood. Mount 4 vintage brass cup hooks evenly spaced along the lower third, and rout a shallow 1/4-inch deep channel across the top edge to hold outgoing mail and envelopes.
7. Hexagon Floating Honeycomb Shelves
Cut six identical 6-inch lengths of 1×4 pine with opposing 30-degree miter cuts at each end. Glue the miters together with wood glue and secure with painter’s tape while drying. Once cured, hang as modular geometric honeycomb shelves to display mini succulents and crystals in a boho chic bedroom setting.
8. Wooden Magnetic Poster Hanging Frames
Cut four thin 1×12 inch wooden molding strips. Embed rare-earth neodymium disc magnets into opposing strips with epoxy glue. Sand smooth, drill holes in the top pair for a leather hanging thong, and clamp art prints gently between the magnetic bars without damaging the paper.
9. Scandinavian Wooden Bead Garland with Jute Tassels
String 48 natural unfinished round birch wood beads (in graduated 16mm, 20mm, and 25mm diameters) along sturdy jute twine. Tie handmade fringed jute cord tassels onto both ends and drape casually across books, ceramic bowls, or fireplace mantels.
10. Rustic Mountain Peak Silhouette Wall Art
Cut varying angles from thin cedar scrap slats to form geometric overlapping mountain ridges. Stain alternating peaks in walnut, weathered gray, and natural pine, then glue the silhouette layers onto a plywood backing inside a simple wooden box frame.
11. Desktop Wooden Phone & Pen Charging Dock
Take a dense 3×8 inch hardwood offcut. Cut a 15-degree angled 1/2-inch wide slot across the front to hold smartphones at a comfortable viewing angle, drill three 3/8-inch vertical holes in the rear for pens, and carve a shallow dish on the side for paperclips.
12. Wooden Stacking Plant Pedestal Stool
Cut an 8-inch circle or rounded square from 1-inch thick timber for the seat. Cut three 6-inch legs from 1-inch hardwood dowels, drill 1-inch holes at a 10-degree outward splay into the underside, glue legs in with wood glue, and display potted houseplants at elevated heights.
13. Kitchen Slatted Trivet Mat
Cut eight 3/4×8 inch strips of heat-resistant hardwood like oak or cherry. Space them 1/4 inch apart and join with two crossbars on the underside using waterproof glue and brass brad nails to protect dining tables from hot Dutch ovens.
14. Rustic Wooden Lantern with Glass Votive
Build an open four-post square frame from 1×1 inch pine strips, glue a solid 6×6 inch wooden base to the bottom, and fit a thick jute rope loop to the top. Place a clear glass cylinder and battery-operated pillar candle inside for patio illumination.
15. DIY Wooden Birdhouse with Copper Ridge
Assemble a classic pitched-roof birdhouse from naturally rot-resistant untreated western red cedar or cypress. Drill a 1.25-inch entry hole for chickadees, cap the roof peak with a bend of thin copper sheeting, and mount in a quiet garden spot.
Troubleshooting Common Beginner Woodworking Mistakes
| Mistake / Symptom | Root Cause | Workshop Fix |
|---|---|---|
| Splintered / Ragged Saw Cuts (Tearout) | Using wrong saw blade teeth or cutting without backing support | Apply blue painter’s tape over cut lines before sawing, and support the underside with a scrap wood sacrificial board. |
| Glue Joints Separating Under Light Stress | End-grain gluing without mechanical support, or insufficient clamp pressure | Ensure joining edges are face-grain or edge-grain; add internal wooden dowels or reinforcement screws for end-grain joints. |
| Blotchy, Uneven Stain Appearance | Applying stain directly onto soft porous woods like pine without preparation | Apply pre-stain wood conditioner first, or switch to penetrating natural oils (mineral oil or Danish oil) that absorb evenly. |
Frequently Asked Questions (FAQ)
Q: What is the easiest and cheapest wood for beginners to practice on?
A: Kiln-dried select pine or poplar boards from local lumber yards are the best starting woods. Pine is soft, inexpensive, and easy to cut with hand saws, while poplar has a tight grain that cuts crisply without tearing out.
Q: Do I really need clamps for simple wood crafts?
A: Yes! Clamps act as your second pair of hands. When applying PVA wood glue, clamping pressure forces the glue deep into the timber pores, creating a bond stronger than the wood itself. Two 12-inch quick-grip clamps are more than enough for small projects.
Q: Can I do woodworking projects inside an apartment without a garage?
A: Absolutely! By using manual hand tools like Japanese pull saws and hand sanding blocks instead of noisy circular saws and orbital sanders, you generate very little noise and easily contain sawdust with a canvas drop cloth and handheld vacuum.

