
Quick Craft Summary
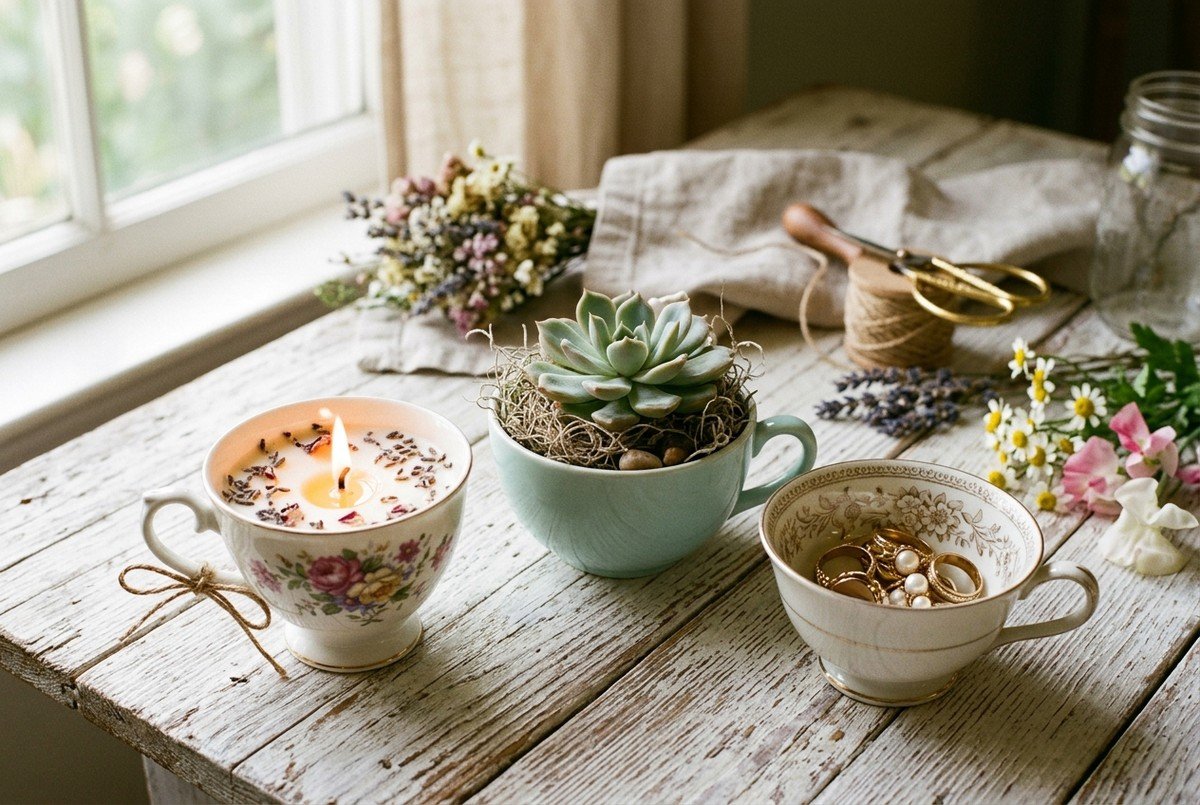
Dollar Tree teacup decor DIY projects are creative, budget-friendly crafts that transform $1.25 dollar store china and thrifted vintage teacups into boutique home decor. Projects range from hand-poured soy wax lavender candles and miniature succulent planters to gravity-defying floating floral centerpieces and hanging bird feeders. Taking 15 to 30 minutes each and costing under $3.00 per finished piece, these 15 easy tutorials turn inexpensive porcelain cups into charming cottagecore and bohemian accents.
With a few basic supplies like natural soy wax, faux florals, succulent potting soil, and heavy-duty adhesives, you can transform humble dollar store cups into high-end gift shop treasures. In this complete crafting guide, you will discover 15 charming Dollar Tree teacup decor DIY ideas with step-by-step instructions.
Essential Budget Supplies & Tool Checklist
Most supplies for these projects can be picked up at your local dollar store or craft retailer for just a few dollars. Review the core supply checklist below:
| Item / Material | Recommended Specification | Approximate Cost | Craft Purpose |
|---|---|---|---|
| Dollar Store Teacups | Ceramic or porcelain teacup and saucer sets | $1.25 / set | Base vessel for candles, planters, and displays |
| Natural Soy Wax Flakes | 100% natural Golden Soy 464 wax + cotton wicks | $4.50 (makes 4 candles) | Clean-burning scented teacup candle filling |
| E6000 Craft Adhesive | Industrial clear waterproof bond | $3.99 | Permanently bonds ceramic cups to saucers and metal stems |
| Faux Spring Florals & Moss | Dollar Tree faux cherry blossoms, greenery & Spanish moss | $1.25 / bush | Floral cascades and decorative planter toppers |
For safe candle pouring guidelines and wax melt temperatures, consult standards from the National Candle Association. For more budget craft inspiration, browse our 12 handmade gift ideas and 15 crafts with scrapbooking paper.
15 Creative Dollar Tree Teacup Decor Projects
1. Hand-Poured Soy Wax Scented Teacup Candles
Transform vintage floral porcelain cups into clean-burning soy candles infused with lavender, vanilla, or eucalyptus essential oils.
- Step 1: Clean and dry your $1.25 Dollar Tree teacup thoroughly.
- Step 2: Secure a pre-tabbed cotton candle wick to the center bottom of the cup using a wick sticker or hot glue.
- Step 3: Melt 1.5 cups of soy wax flakes in a heatproof pitcher using a double boiler until it reaches 185°F (85°C).
- Step 4: Stir in 15 drops of calming lavender or rose essential oil, let cool to 135°F, and slowly pour into the teacup.
- Step 5: Hold the wick centered with a clothespin and sprinkle a pinch of dried lavender buds on top before the wax solidifies.
2. Miniature Teacup Succulent & Moss Planters
Create charming windowsill succulent pots that add natural green vitality to your kitchen or home office desk.

- Step 1: Add a 0.75-inch layer of small river pebbles or pea gravel to the bottom of the teacup for essential drainage.
- Step 2: Fill with lightweight cactus and succulent potting soil.
- Step 3: Plant 1 or 2 small echeveria or sedum succulents into the soil.
- Step 4: Top with decorative Spanish moss and water lightly with a spray bottle once every two weeks. Coordinate with our small space room decor styling.
3. Gravity-Defying Floating Teacup Floral Centerpiece
A breathtaking optical illusion where an angled teacup appears suspended in mid-air above its saucer, pouring out a waterfall of spring flowers.

- Step 1: Take a metal thrift store fork and bend the tines flat at a 90-degree angle to create a base platform.
- Step 2: Bend the top handle of the fork backward at a 90-degree angle to hook securely inside the teacup rim.
- Step 3: Hot-glue the tines firmly to the center of the saucer and glue the handle inside the cup with E6000.
- Step 4: Hot-glue dozens of faux Dollar Tree cherry blossoms, roses, and greenery along the metal fork stem until the armature is completely hidden by a cascading floral waterfall.
4. Hanging Teacup Wild Bird Feeder
Glue a teacup onto its saucer with the cup tilted on its side, wrap natural jute twine through the handle, and hang from tree branches filled with wild birdseed.
5. Velvet & Ribbon Teacup Sewing Pin Cushion
Stuff a polyfill-packed velvet fabric sphere into a teacup and trim the rim with delicate cotton lace for a vintage sewer’s vanity accessory.
6. Tiered Teacup Jewelry & Dessert Stand
Stack 3 mismatched saucers and inverted cups using E6000 glue to create a three-tier high-tea organizer for earrings, rings, and macarons.
7. Solar Garden Teacup Stake Lights
Attach Dollar Tree solar pathway lights inside clear glass teacups mounted on wooden dowels for whimsical evening walkway illumination.
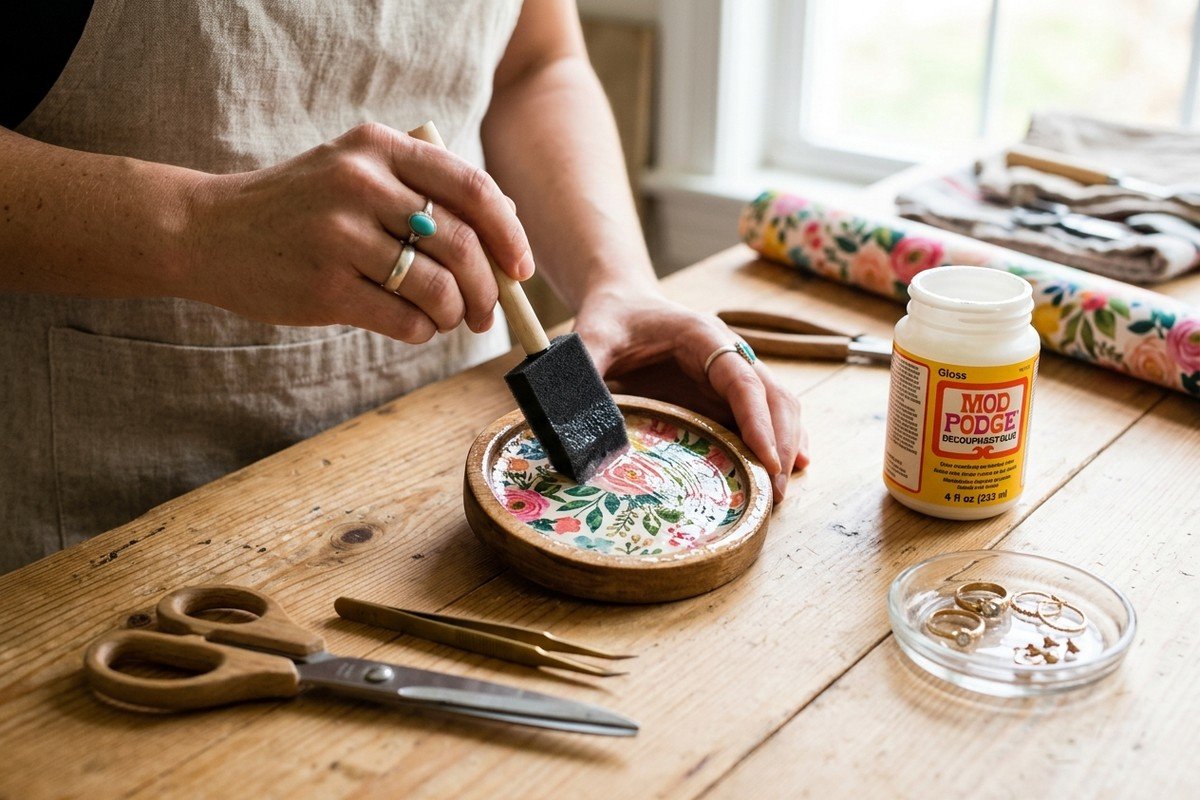
8. Decoupage Botanical Ring Catchall
Decoupage floral paper scraps into plain white ceramic cups with matte Mod Podge, sealed with gold leaf trim on the rim.
9. Miniature Teacup Fairy Garden
Build a whimsical fairy world inside a cup using preserved reindeer moss, miniature resin mushrooms, and micro fairy figurines.
10. Vintage Teacup Holiday Tree Ornaments
Loop velvet ribbon through espresso mini cups filled with artificial snow and miniature pinecones to hang on holiday trees.
11. Kitchen Window Herb Planters
Plant fresh basil, thyme, and rosemary in oversized teacups labeled with chalkboard paint stakes for fresh cooking herbs.
12. Teacup Floral Curtain Tiebacks
Drill a small hole in saucer bases and attach brass drapery hooks to hold sheer curtains open with cottagecore charm.
13. Wall-Mounted Sconce Votive Holders
Mount vintage teacups onto distressed wood plaques with pipe brackets to hold battery-operated LED flickering tea lights.
14. Shabby Chic Teacup Desk Clock
Insert a mini quartz clock movement through the center of a floral saucer for a charming bedside timepiece.
15. Crushed China Mosaic Stepping Stones
Recycle chipped teacups by pressing broken porcelain shards into concrete stepping stone molds for artistic garden pathways.
Care & Display Styling Tips
Display your DIY teacup creations on floating wall shelves, bedside nightstands, or as part of a high-tea brunch tablescape. To clean soy wax remnants after a candle burns down, simply place the cup in warm soapy water for 5 minutes and wipe clean with a paper towel—leaving the teacup ready for its next creative repurpose!
Detailed Instructions for Projects 4 through 15
4. Hanging Teacup Wild Bird Feeder
Lay the teacup on its side in the center of the saucer and secure with waterproof E6000 adhesive. Allow to cure for 24 hours. Thread a 3-foot loop of natural jute twine through the teacup handle, knot firmly, and hang from a porch hook or garden branch. Fill the saucer and cup basin with sunflower seeds to attract songbirds, chickadees, and finches.
5. Velvet & Ribbon Teacup Sewing Pin Cushion
Cut an 8-inch circle of dusty rose or sage green velvet fabric. Place a tennis-ball-sized clump of polyester stuffing in the center, gather the edges into a tight pouch, and hand-stitch closed with heavy thread. Apply hot glue around the interior rim of a vintage teacup and press the velvet sphere firmly inside. Trim the porcelain edge with self-adhesive cream lace ribbon for an heirloom vanity piece.
6. Tiered Teacup Jewelry & Dessert Display Stand
Gather 3 mismatched saucers in graduated sizes (large dinner saucer base, medium salad saucer center, small bread saucer top) and 2 inverted teacups. Apply E6000 adhesive to the rims of the upside-down teacups and stack them alternately between the saucers. Weight down with a heavy book for 12 hours while the bond cures into a rigid, multi-tiered display for rings, necklaces, or tea party pastries.
7. Solar Garden Teacup Stake Lights
Remove the black plastic ground spike from a $1.25 Dollar Tree solar pathway light. Invert a clear glass or pastel ceramic teacup, drill a 0.5-inch hole through the center using a ceramic diamond drill bit (or glue directly using clear silicone), and mount the solar housing into the cup. Insert a 36-inch copper garden stake to illuminate evening garden walkways with charming ambient light.
8. Decoupage Botanical Ring Catchall
Tear botanical floral motifs from decorative paper napkins or scrapbooking cardstock. Apply a layer of Mod Podge Matte to the interior of a plain porcelain teacup, smooth the paper into place with a soft foam brush, and seal with two protective topcoats. Paint the cup rim with metallic liquid gold leaf for a high-end French country aesthetic.
9. Miniature Teacup Fairy Garden
Fill a shallow teacup with floral foam, cover with vibrant green preserved reindeer moss, and insert miniature resin fairy mushrooms, tiny wooden stepping stones, and a miniature polymer clay snail. Perfect for bookshelves and children’s bedside tables.
10. Vintage Teacup Holiday Tree Ornaments
Glue a small faux bottle-brush evergreen tree inside a miniature porcelain espresso cup. Dust with faux iridescent snow, glue a micro red velvet bow to the handle, and attach an ivory satin hanging ribbon to suspend from Christmas tree branches.
11. Kitchen Window Sill Herb Planters
Plant fresh basil, oregano, and rosemary seedlings into oversized teacups. Write the herb names onto wooden mini chalkboard stakes and arrange along sunny kitchen window sills for fresh cooking garnishes.
12. Teacup Floral Curtain Tiebacks
Drill a small mounting hole through a teacup base, anchor a brass screw-in drapery hook through the porcelain into the window framing drywall, and drape your linen curtains through the cup handle for an unexpected vintage window treatment.
13. Wall-Mounted Sconce Votive Holders
Glue teacups onto weathered reclaimed pallet wood plaques using industrial epoxy. Mount the plaques onto your hallway or dining room wall and insert battery-operated LED flickering tea lights for cozy cottagecore wall sconces.
14. Shabby Chic Teacup Desk Clock
Drill a central 5/16″ hole through a vintage china saucer using a ceramic drill bit. Mount a standard battery-powered quartz clock movement from the back, press on vintage brass clock hands, and rest the saucer on a small decorative easel.
15. Crushed China Mosaic Stepping Stones
Place chipped teacups and broken saucers in a heavy canvas bag and gently tap with a hammer into 1-inch mosaic tiles. Press the decorative china pieces pattern-side-up into wet concrete poured inside a round cake pan mold to create everlasting botanical garden stepping stones.
Frequently Asked Questions (FAQ)
Q: How do you drill drainage holes in ceramic Dollar Tree teacups without cracking them?
A: Always use a diamond-tipped carbide tile/ceramic drill bit (1/4″ or 3/8″). Place a piece of masking tape over the bottom center of the cup to prevent the drill bit from slipping, submerge the cup under 1 inch of cool water in a shallow tray (or trickle water over the bit), and drill at low speed with light pressure. The water keeps the diamond bit cool and prevents thermal shock cracking.
Q: Which glue is best for bonding porcelain teacups to glass and metal?
A: E6000 industrial craft adhesive or a two-part clear epoxy is the best choice. Standard hot glue will hold temporarily for seasonal decor, but thermal fluctuations will cause hot glue to pop off slick glazed porcelain over time. E6000 provides a flexible, waterproof, permanent bond.
Q: Are DIY teacup candles safe to burn completely?
A: Yes, provided you use genuine ceramic or porcelain cups with zero existing structural cracks. Always trim the cotton wick to 1/4 inch before lighting, place the candle on its matching saucer to catch any drips, and extinguish the candle when 1/2 inch of wax remains to prevent the porcelain base from overheating.

